In this article, you'll learn how to set up your list of sources (the places customers come from, like your website, a referral or a yard sign), how to give each customer one, and how the ROAS report uses that list to show what each source brings in. If you pay for ads, this is how you find out which ones pay you back.
Every customer has a Source. It's set when they first reach you and it stays with them for life. Every job they book and every payment they make counts toward that source, whether it's their first job or their tenth. It only changes if you change it.
Setting up your list of sources
Your list starts with Website, Referral, Other and AI search. Microsite and Google Ads are added for you the first time a lead comes in that way. Add whatever else you use, like yard signs, a truck wrap or a home show.
To open your sources:
- At the bottom of the menu, click the gear (Settings).
- Under Jobs & leads, click Job sources.
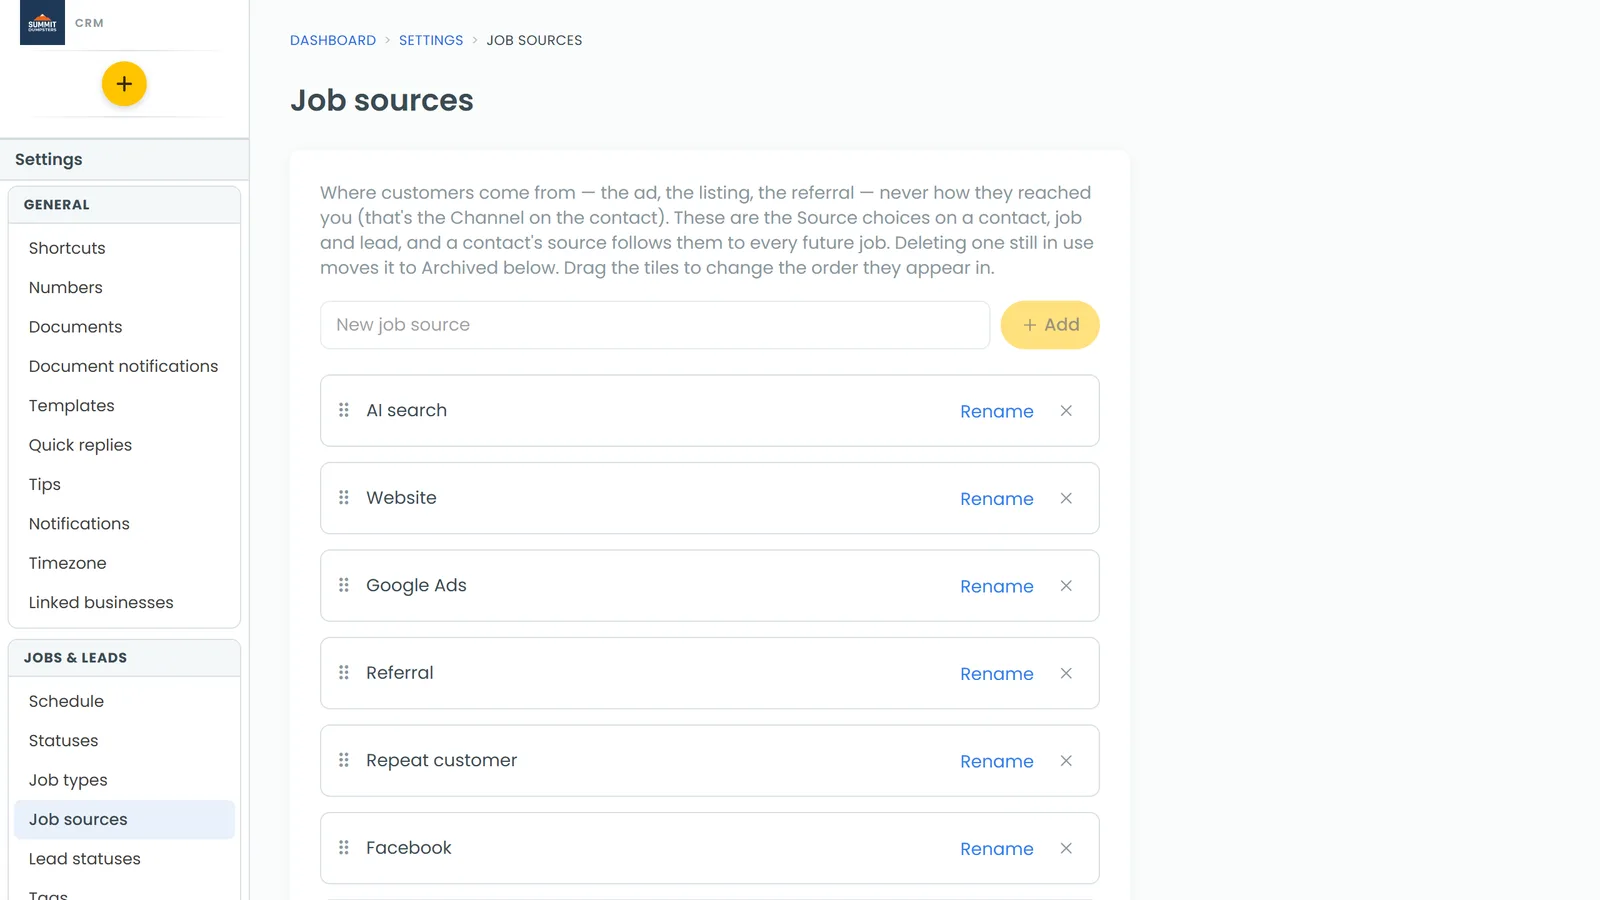
On the phone app, open the menu, tap the gear at the bottom, then under Jobs & leads tap Job sources. It opens Settings on the Job sources tab, with the same list.
Adding a source
- In the New job source box, type the name.
- Click Add.
Renaming and reordering
- To rename a source, click Rename next to it, change the name, then click Save.
- To change the order sources show up in the dropdowns, drag the tiles up or down.
Removing a source you don't use
- Click the X next to the source.
- If nothing uses it, it's deleted. If a customer, job, lead, spend rule or phone number still uses it, it's archived instead, so those records keep their source.
Archived sources sit under Archived at the bottom of the page and aren't offered on anything new. Click Restore to bring one back.
Giving each new customer a source
When you add a customer by hand, the form has a Source dropdown that starts on Other. Before you save, pick where the customer actually came from.
You'll find it under Client Details on:
- The New Client form.
- The New Job, New Lead and New Estimate forms, when you type in a new customer instead of picking one you already have.
The phone app's new client, new job and new lead screens ask the same question: Where did they come from?
If you leave it on Other and that person has called or texted you before, the CRM credits the line or tracking number they first reached. Leads from your website forms, chat and online booking come in with their source already set.
Changing a customer's source or channel
As well as a Source, every customer has a Channel: how they first reached out, like a phone call, a text, a form, chat, online booking or in person.
To change them on the web:
- Open the customer's page.
- Click the ⋮ next to their name, then click edit.
- Pick a new Source or Channel.
- Click Save.
On the phone app, or on the web on a phone, open the customer and tap the Source row. Pick from the Source and Channel dropdowns. Each change saves as soon as you pick it.
Recording what you spend
To work out a return, the CRM needs to know what each source costs you. You can file spend two ways, in the Spend rules and Spend cards under the report. Only admins can add or remove spend.
To open the report:
- In the menu, click Reports.
- Click ROAS.
Filing bank charges with a rule
If your bank is connected in Bookkeeping, a rule can file charges onto a source for you.
- In Spend rules, pick contains or is exactly.
- Type part of the charge (for example, GOOGLE ADS), or with is exactly, pick one merchant from the list.
- After then expense to, pick the source.
- Check the line under the form. It shows how many charges match and what they add up to.
- Click Add rule.
Add rule stays greyed out until your rule matches at least one charge. Matching charges are filed right away, and again every time your bank syncs. Each charge goes to one source. Untick On to switch a rule off, or click remove to delete it. Either way, the charges it filed come off the source too. Run rules again at the top of the card re-runs every rule over your ledger.
Typing in spend
For costs that don't come through the bank, like a print run or a show booth:
- In Spend, pick the source.
- Enter the amount and the date. You can add a note too.
- Click Add spend.
Reading the ROAS report
Pick a date range at the top: Last 30 days, Last 90 days, This year, Last 12 months or All time. The tiles show ROAS, Ad spend, Revenue, Leads and $/lead for that range. Below them there's one row per source.
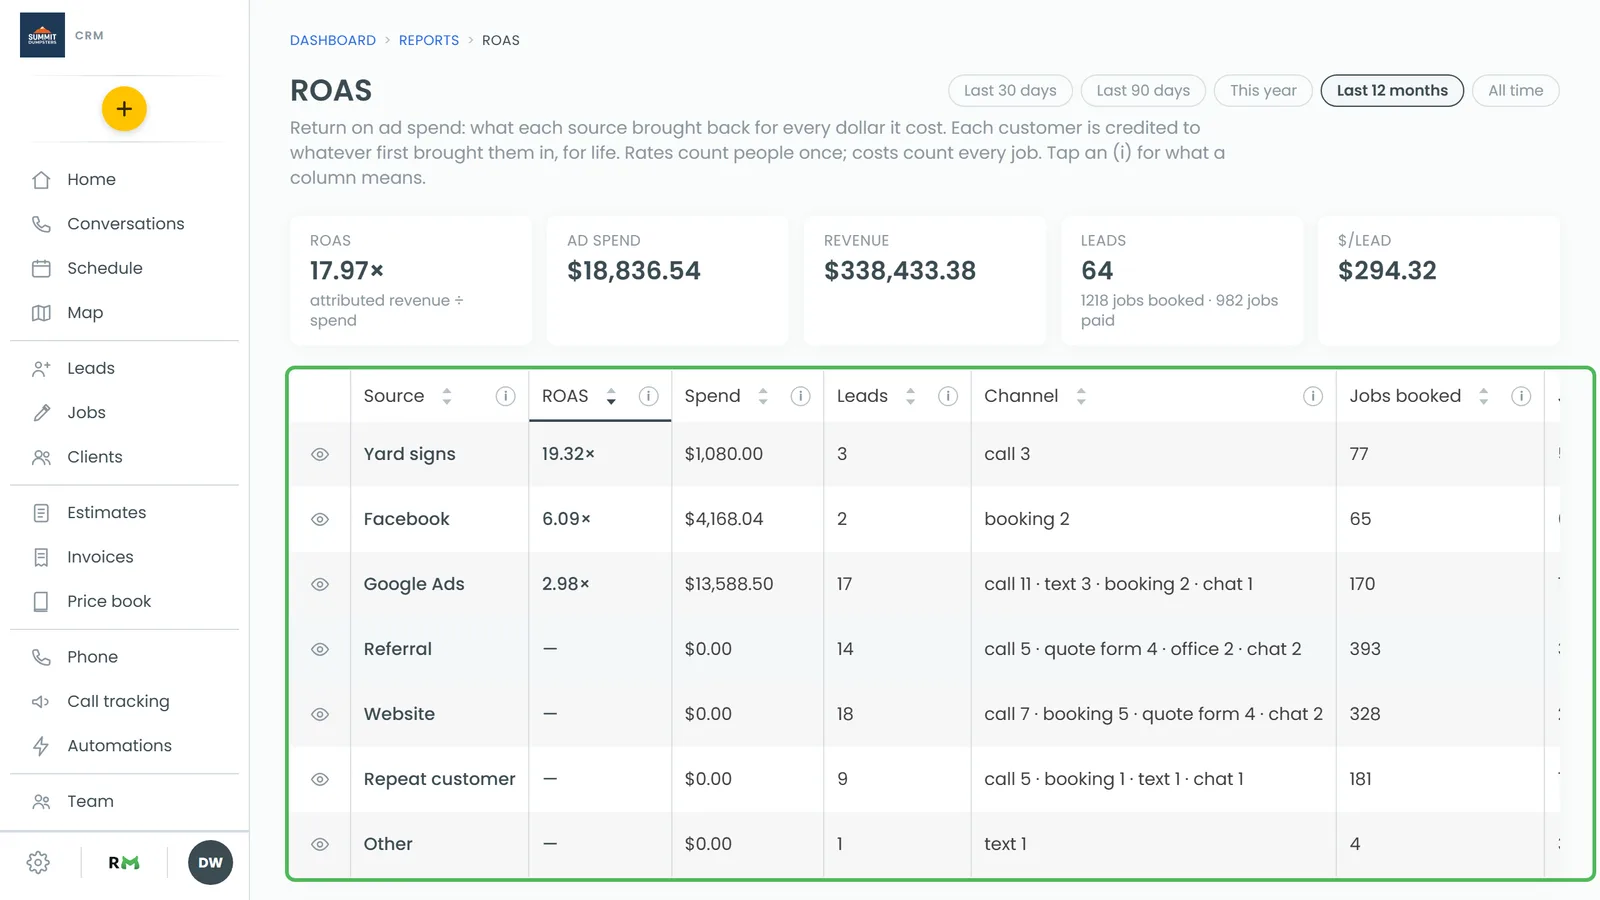
The columns you'll use most:
- ROAS: revenue divided by spend. 2.00× means two dollars came back for every dollar spent.
- Spend: what you filed on the source in the range.
- Leads: people who reached out for the first time in the range. Someone who calls three times is still one lead.
- Jobs booked and Jobs paid: jobs for that source's customers, repeat customers included.
- Revenue: money collected in the range from everyone with that source.
- $/lead, $/booking and $/conversion: what each lead, booked job and paid job cost you.
Click a column heading to sort by it, or the i beside it to see exactly what it counts. Customers with no source show up in an Unattributed row, so your totals still match your books. To take a source out of the table, click the eye on its row. It moves to the Hidden list at the bottom and still counts in the totals. Click the eye again to bring it back.