In this article, you'll learn how to add a new client to the CRM by hand. Once someone is saved as a client, you can book jobs for them, send estimates and invoices, and text them from their page.
You don't always need this step. The new job and new lead forms add the client for you, and you can save someone straight from a conversation. Both are covered below.
To open the New Client form on the web:
- In the menu, click the yellow +.
- Click New client.
If your browser window is phone-sized, tap the + in the bar at the bottom of the screen instead, then tap New client.
To open it in the phone app:
- From Home, Conversations, Schedule or Contacts, tap the + in the bar at the bottom of the screen.
- Tap New client.
Adding a client's details
The form has two cards, Client Details and Address. It's laid out the same way on the web and in the app.
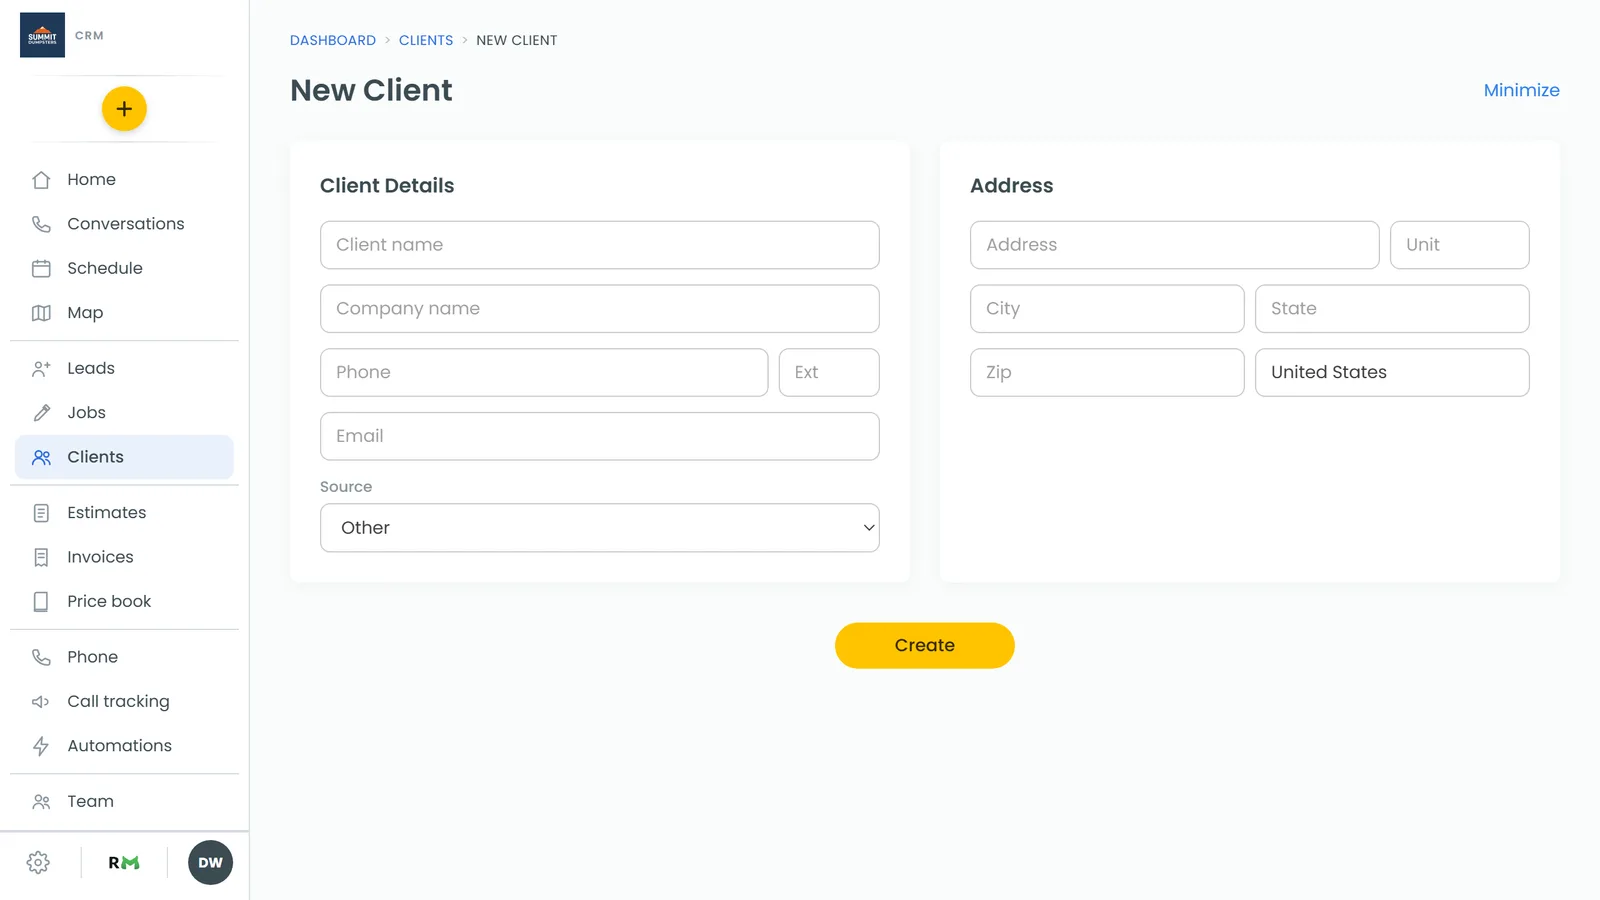
- Under Client Details, fill in what you know: Client name, Company name, Phone and Ext, and Email.
- Pick a Source from the drop-down. There's more on that below.
- Under Address, fill in Address, Unit, City, State, Zip and Country. Country starts out as United States.
- Click Create.
The CRM opens the new client's page, and you can start their first job, lead or estimate from there. Minimize at the top of the form takes you back to the Clients list without saving.
On the web, start typing in Address and a list of suggestions appears. Use the arrow keys or your mouse to highlight one, then click it or press Enter. City, state and zip fill in for you, and you can still change any of them. Pressing Enter with nothing highlighted keeps exactly what you typed. In the app, you type each address field yourself.
If the client is already in the CRM
If the phone number or email you typed already belongs to a client, Create won't make a second copy. It opens the client you already have. Any address you typed is added to that client as another address.
If you end up with two records for the same person anyway, you can merge them.
Setting where the client came from
The Source drop-down records where this customer came from: your website, a referral, and so on. In the app it sits under the question Where did they come from? It starts at Other, so pick the right one before you click Create.
The source stays with the client for good, and it's what your ROAS report uses to credit their revenue. If you leave it at Other and this number has called or texted you before, the CRM sets the source from that first call or text for you.
To learn how sources work and how to change one later, see Tracking where your customers come from.
Other ways clients get added
From a new job or lead
You don't have to add a client before you book work for them. On the new job or new lead form, start typing in Client name. If they're already a client, pick them from the list and their details fill in. If they're new, finish typing their details, pick a Source and save. The CRM creates the client along with the job or lead.
The job and lead forms match on phone and email the same way the New Client form does. So a new job for a number you already have goes under the client you already have.
From a call or text
A first call or text from a new number doesn't create a client by itself. The conversation is kept under the number until you decide to save them.
To save one on the web:
- In Conversations, find the thread from the new number.
- Click Contact on the thread. It has a small person-and-plus icon. This opens the New Client form with the number or email already filled in.
- Add their name and anything else you know, then click Create.
You can also open the thread and use the panel beside the messages. Fill in what you know under Contact and General Info, then click Save as a contact. That saves them right there, without the New Client form.
To save one in the phone app:
- In Conversations, swipe left on the thread from the new number.
- Tap + Contact. The New Client form opens with the number or email filled in.
- Add what you know and tap Create.
Or open the thread and tap the name at the top, where it says Tap to save as a contact. Tap Save, and the app saves the number as a client and opens their page.
Once they're saved, the earlier messages and calls move onto the new client's history.
Lots of clients at once
To bring in a whole list from a spreadsheet or another system, see Importing your clients.
Related articles
- Managing client details and history
- Adding multiple addresses for one client
- How to merge duplicate clients
- How to create jobs
- Importing your clients