In this article, you'll learn how to choose when your review requests go out: which days, which hours, and how long each follow-up waits. Getting this right means customers hear from you at a sensible time, not at 6 a.m. on a Sunday.
To open the sending settings:
- In your dashboard menu, click Reviews.
- Click Review Templates.
The schedule is at the top of the page, above your text and email templates.
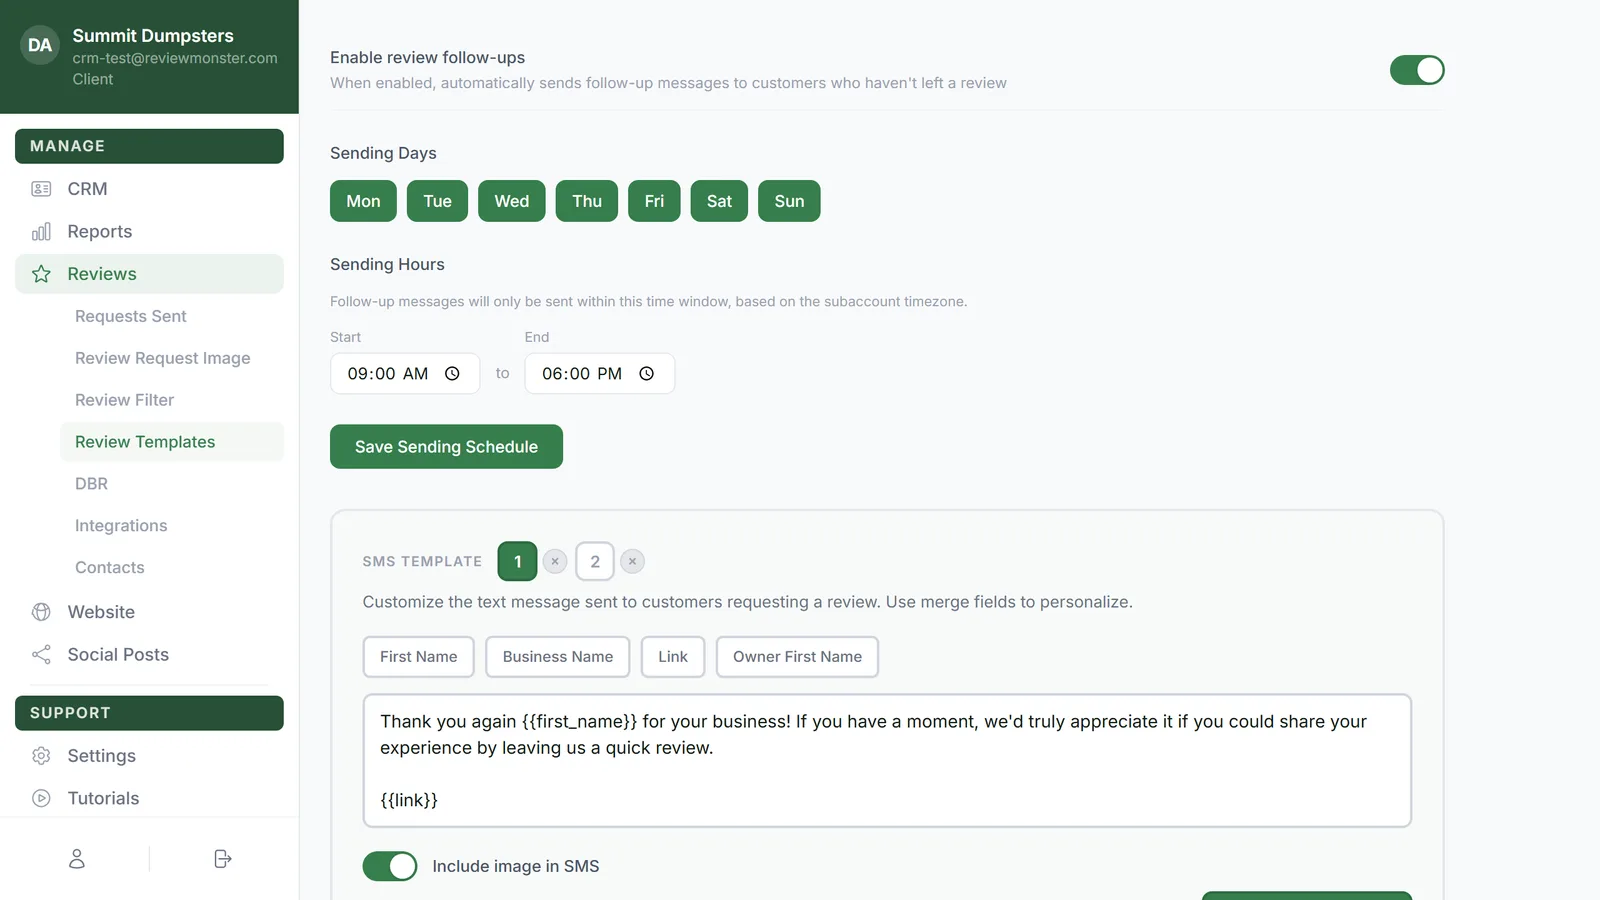
Turning review follow-ups on or off
The Enable review follow-ups switch at the top decides whether your review request messages send at all.
- Click the switch next to Enable review follow-ups.
- It's green when it's on and grey when it's off. It saves right away, so there's nothing else to click.
Choosing your sending days
Under Sending Days there's a button for each day, Mon through Sun.
- Click a day to turn it on (green) or off (white).
- Turn on every day you're happy for messages to go out.
Setting your sending hours
Under Sending Hours you set one window that applies to every sending day. Messages only go out between these two times, in your account's timezone.
- Pick a time in Start.
- Pick a time in End.
- Click Save Sending Schedule. The button shows Saved once it's stored.
Your days and hours only save when you click Save Sending Schedule. If something goes wrong, a message shows up in red under the button.
Setting the delay before each follow-up
Each follow-up has its own wait time. You'll find the delay fields inside the SMS Template and Email Template boxes further down the page. Each one has an hr box and a min box.
Text template 2
- In the SMS Template box, click 2.
- Under Delay after previous SMS, type the hours and minutes next to Template 2 delay.
Email 1
- In the Email Template box, click 1.
- Under Delay after first SMS, type the hours and minutes next to Email 1 delay.
Email template 2
- In the Email Template box, click 2.
- Under Delay after previous email, type the hours and minutes next to Template 2 delay.
Each delay saves when you click out of the box. You'll see Saved next to it for a moment.
Delays still follow your sending window. A follow-up that comes due at night waits for your start time on the next sending day.
Related articles
- How review requests work
- Editing your review request texts and emails
- Reviews menu overview
- Seeing the review requests you've sent
- Asking customers for reviews