In this article, you'll learn how to work through the Needs approval list in Bookkeeping: giving each charge a category, approving it, and setting up the charges you never want to look at again. Nothing counts as done in your books until it's approved, so this is the loop you'll come back to every week or so.
To open the approval list:
- In the menu, click Bookkeeping.
- Make sure the Transactions tab is selected. The yellow number beside it is how many charges are waiting on you.
- Click Needs approval.
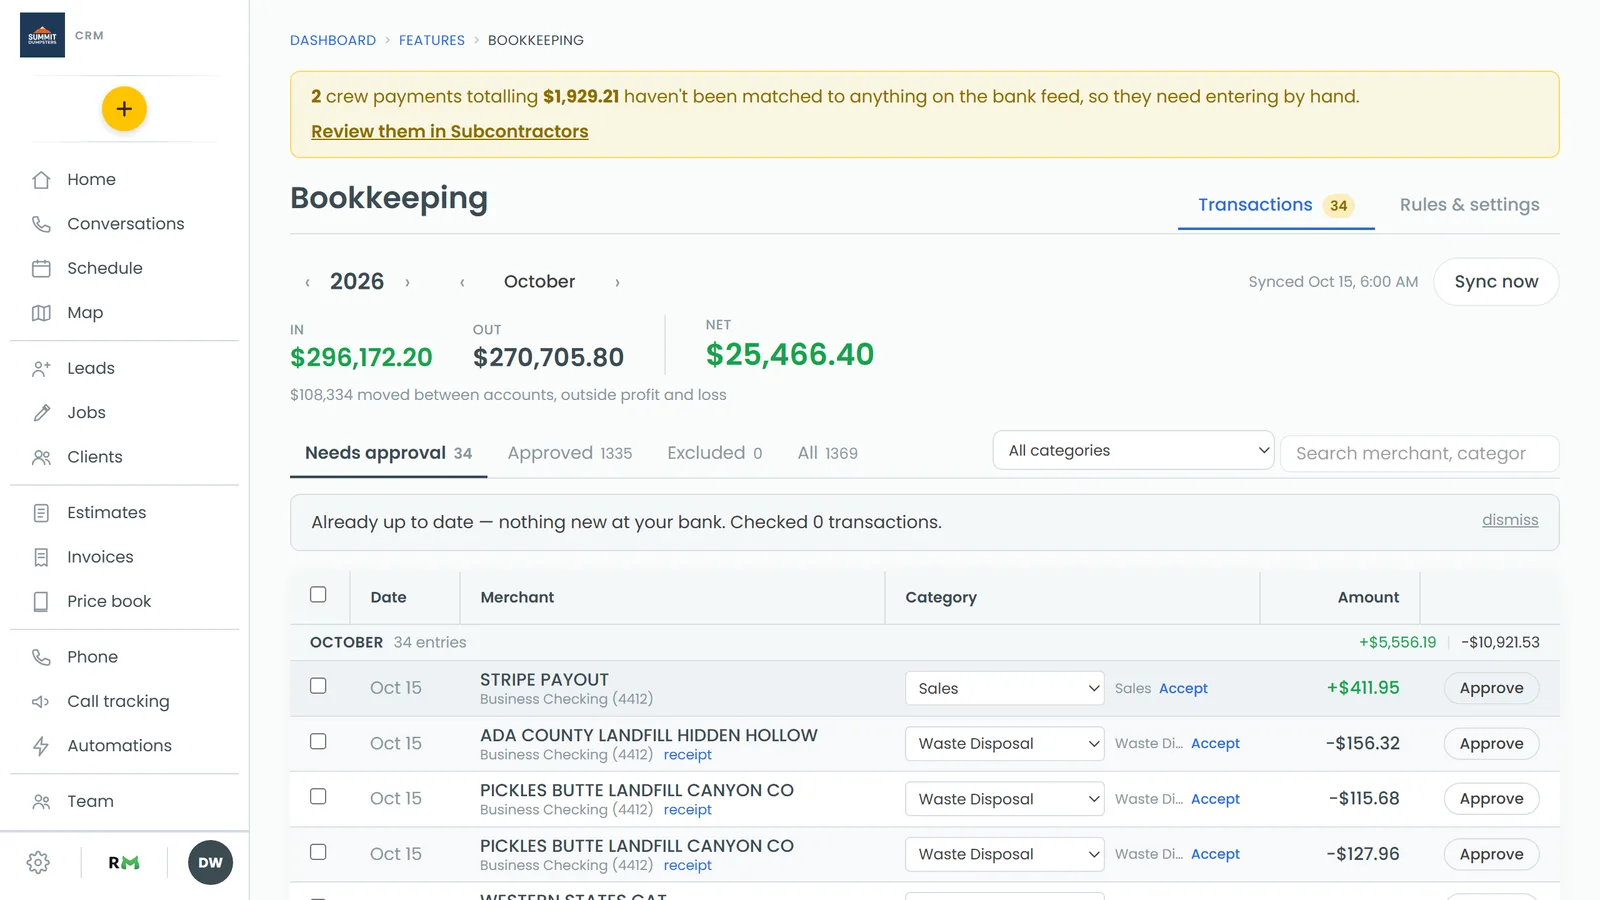
Give a charge a category
Every row has a category picker. A charge with no category has a yellow picker and no Approve button, because there's nothing to approve yet.
- Click the picker on the row.
- Choose the category it belongs in. It saves as soon as you pick.
If the CRM has a guess for a charge, the suggested category shows next to the picker with Accept beside it.
- Check the suggestion.
- Click Accept to file the charge there, or pick something else from the picker instead.
Approve one charge
- Find a row that has a category.
- Click Approve. The Approve this expense window opens.
- Check the box at the top. It shows the merchant, amount, date, account, and where the charge is filing.
- Click Approve.
The row leaves the list and moves to the Approved view.
Always approve charges like this one
For routine charges like fuel or the same supplier every week, you can tell the CRM to approve them for you from now on.
- Click Approve on the row.
- Tick Always approve expenses like this.
- Check When the description contains. It's filled in from the merchant name. Trim it down if that merchant shows up with extra text on other charges.
- Leave Only when it files to ticked if you only want it approved when it lands in that same category.
- Tick Only under $ and enter an amount if you want anything bigger to still come to you.
- Click Approve & always approve.
If an always-approve entry already covers the charge, the window tells you which entry instead of offering the box again. Future charges like that one approve themselves.
Approve several at once
- Tick the box on each row you want to approve. Only rows with a category have a box.
- Or tick the box in the header to select every row that can be approved.
- Click Approve selected.
A notice tells you how many were approved. If any didn't have a category, they're skipped and the notice tells you how many still need one.
Undo an approval
- Click Approved (or All) to find the charge.
- Hover over Approved on the row. It changes to Undo.
- Click Undo. The charge goes back to Needs approval.
A row that says Approved · auto was approved by your always-approve list, not by a person. You can undo those the same way.
On the phone app
The same list is in the app's Bookkeeping screen, with Needs approval, the category pickers, Accept, the row checkboxes and Approve selected. A few things work differently:
- Tapping Approve approves the charge straight away. There's no window, so always-approve can only be set up on the web.
- To undo an approval, tap Approved on the row.
Related articles
- Bookkeeping overview
- Creating categorization rules
- Splitting a transaction across categories
- Excluding transfers and other non-expenses
- Bookkeeping settings: accounts, automation and always approve