In this article, you'll learn how to ask for a deposit on an estimate, what your customer sees when they sign and pay it, and the two settings that change how deposits are collected. A deposit is what gets the work on your calendar before anyone shows up.
To open an estimate:
- In the menu, click Estimates.
- Click the estimate you want a deposit on.
Setting the deposit
The totals sit at the bottom of the estimate, under the items, the notes and the photos. The right-hand column runs Subtotal, Discount, Tax and then Deposit.
- Scroll down to the totals.
- In the Deposit row, type a number.
- In the dropdown beside it, pick $ for a fixed amount or % for a share of the total.
- Click anywhere else to save. Changing the dropdown saves on its own.
Under the row you'll see what that comes to, for example "$250.00 due to book it in".
A percent deposit follows the total, so it goes up or down as you add or remove items. A dollar deposit stays the figure you typed. Either way it can't be more than the estimate total.
Under the Deposit row there's also a Require a signed document box. Tick it and pick a document, such as a contract, and the customer signs that document after approving and before they can pay the deposit.
Sending the estimate
- Click Send at the top of the estimate. It reads Send Again if it has gone out before.
- Pick Via email or Via SMS.
- Under the message, under Let client pay the deposit with:, keep Credit card ticked so the customer can pay online.
- Click Send email or Send text.
If you untick Credit card, the deposit is still owed when they approve, but they aren't taken to a card form. Their pay page says "Payment is arranged directly", and you sort it out with them yourself.
What your customer sees
In their portal inbox the estimate card shows a Deposit line and a Total line. When they open it, they get Approve & pay deposit and Decline. On a phone, the bottom panel lists Total estimate and Required deposit above the same two buttons.
Approving means signing. The Sign & Pay drawer opens on step 1, Add your signature. They sign in the box (there's a Clear button if they slip), can tick Get a copy via email, then click Continue. By default that takes them straight to the deposit's pay page, where they enter their card.
Statuses and what you hear
- When the customer signs and a deposit is owed, the estimate's status becomes Approved - Pending Deposit. In their portal it carries a Deposit due chip, with a Pay deposit button that opens the deposit invoice's pay page if they come back later.
- When the deposit is paid, the estimate moves to Won, since it's been approved, signed and paid. If you required a signed document, it stays Approved until that document is signed too.
- A deposit invoice named "Deposit for EST-xxxx" is raised when they approve. It shows on your Invoices page like any other.
The office is told twice: once when the estimate is approved (the message says a deposit is pending) and again when the deposit is paid. Both go out under the Estimate approved & signed row in Settings › Document notifications.
Two settings that change how deposits work
To open the settings:
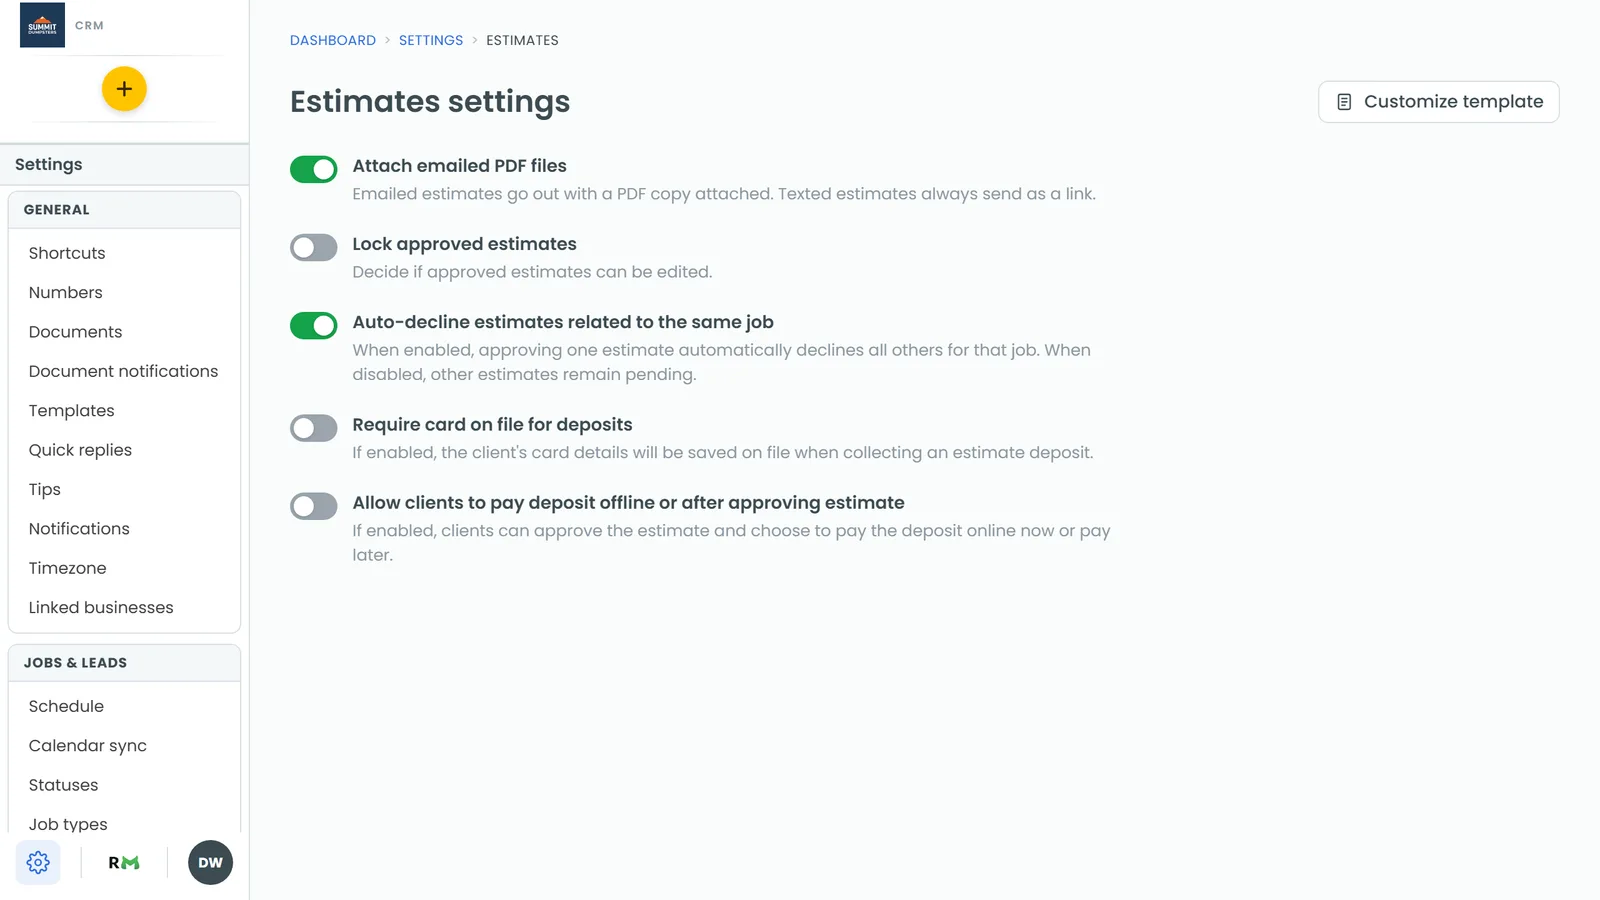
- In the menu, click the Settings gear, then Estimates under Jobs & leads. There's also an Estimates settings link at the top of the Estimates page.
Each switch saves the moment you flip it. Both are off to start.
Require card on file for deposits
When this is on, the card the customer pays the deposit with is kept on file. On the pay page the save-card box reads "This card is kept on file for the deposit" and can't be unticked. You can then charge that card for the rest of the job later. See How to add a card on file for clients.
Allow clients to pay deposit offline or after approving estimate
When this is on, signing doesn't go straight to payment. After step 1, the drawer opens step 2, Make a deposit, with two choices: Pay deposit $x or Pay later.
If they choose Pay later, the estimate stays at Approved - Pending Deposit. They can pay in one of two ways:
- Online, by opening the estimate in their portal again and clicking Pay deposit.
- Offline, by paying you directly. Record that on the deposit invoice. See Recording cash and other offline payments.
When you turn the estimate into a job
Once the deposit is paid, click Actions, then Create job. The New Job form opens with the customer, address and items filled in, and the Apply the approved estimate to this job? box shows the total, the deposit received and the balance. Click Create to save. The deposit invoice and its payment move onto the new job, so the job's balance and the invoice you raise later only bill what's left. If the customer already has a job on the books, the Link job section of the same menu puts the estimate on that job instead.
Create job doesn't appear while the estimate is still Approved - Pending Deposit. The customer has signed but hasn't paid, so it waits.
On the phone app
The estimate screen has the same Deposit row under the totals, with a $ / % switch, the "due to book it in" line beneath it and a Require a signed document switch. The footer button reads Send to client, or Send Again once it's gone out, with Create job beside it once the deposit is paid. Settings › Estimates in the app, reached from the Settings gear at the bottom of the menu under Jobs & leads, has the same two switches, and the Estimates list has an Estimates settings link at the top.