In this article, you'll learn how to work your leads from the Leads page. That covers seeing where each one stands, moving it along, updating its details, and closing it out as a job or as lost. If you check this page every day, no potential job gets forgotten.
To open your leads:
- In the menu, click Leads.
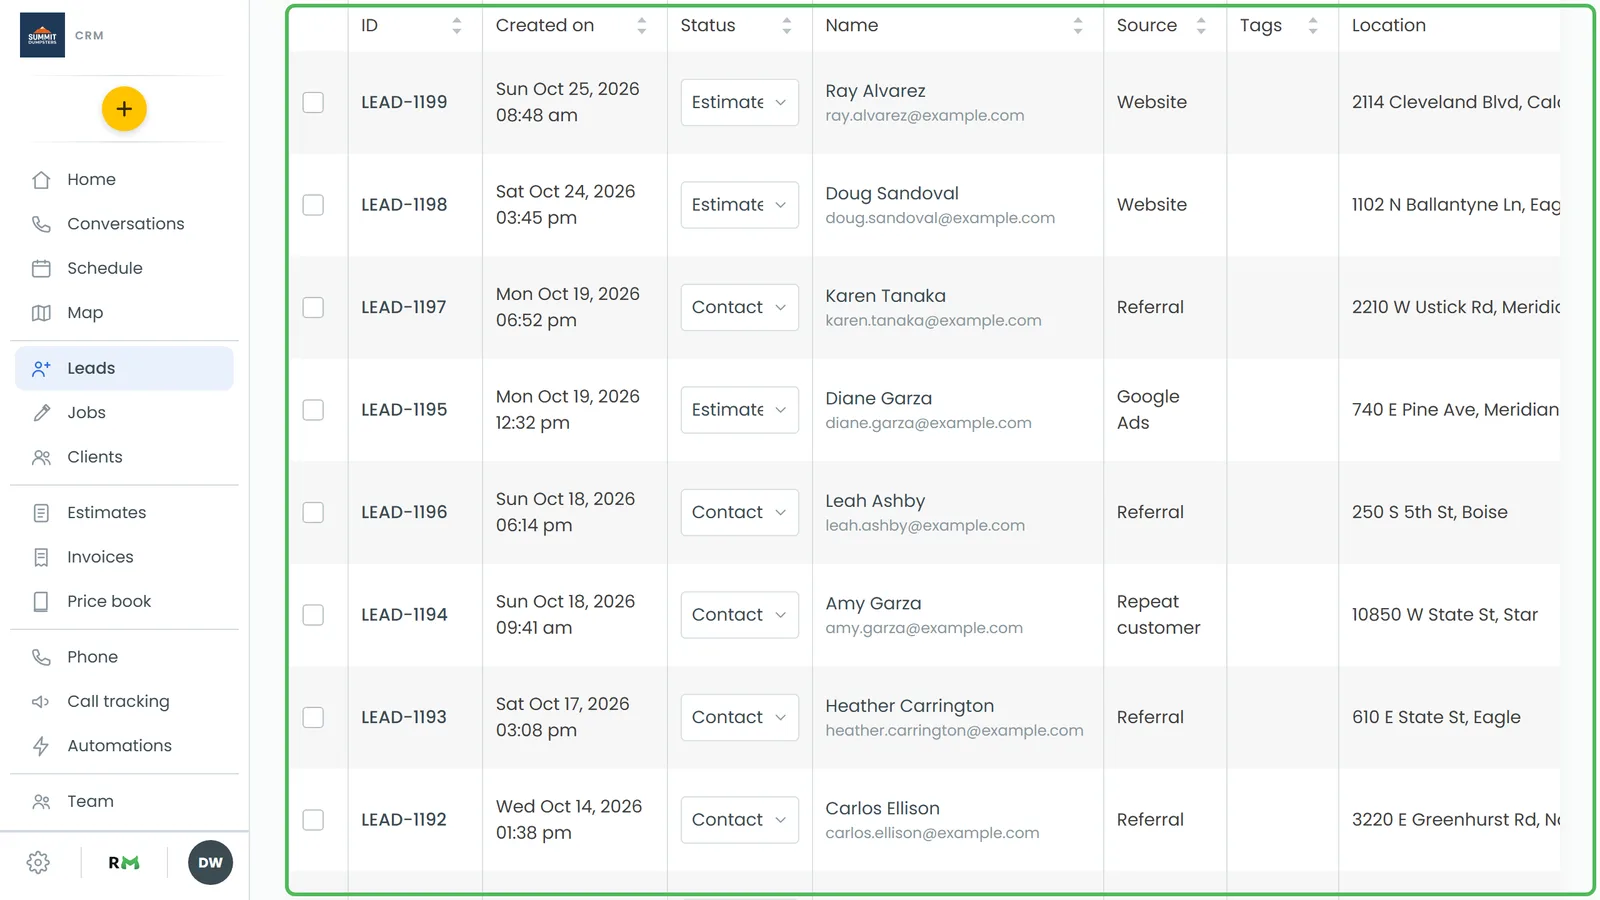
Reading the Leads page
Across the top of the page you'll see All, followed by your own lead statuses in the order you set them in Settings. Each status shows how many leads are in it. Click one to show only those leads, or click All to go back.
Under the statuses you'll find:
- A Filter results box. Type a name, phone, email, city, address or lead number to narrow the list. A full lead number like LEAD-0089 finds that lead even if it's marked Lost.
- Add New, which starts a new lead.
- The leads table, with these columns: ID, Created on, Status, Name, Source, Tags, Location, Type, Phone and Modified.
Click a column heading to sort by it, and click it again to reverse the order. You can drag the edge of a column to make it wider or narrower. Above the table, choose whether to show 25, 50 or 100 leads per page.
Changing a lead's status
You don't need to open a lead to move it along.
- Find the lead in the table.
- Click the Status dropdown on its row.
- Pick the new status. It saves right away.
To call a lead, click the phone number on its row.
Letting leads move themselves
Some status changes happen without you doing anything. When a lead gets a date, it moves to Scheduled. When you create an estimate for it, it moves to Estimated. When that estimate is approved, it moves to Approved.
That only works if your status list has a status called Scheduled, Estimated or Approved. If you've renamed or removed one of them, the lead stays where it is. Leads only ever move forward this way, and a lead you've marked Lost never moves on its own.
Working with a single lead
Click any row to open that lead's panel on the right. At the top you'll see its notes, phone, email, address, type and comments. Below that:
- Move to stage: click any status to move the lead there.
- Convert to job: turns the lead into a job and opens the new job.
- Edit details: change the notes, phone, email, address, unit, city, state, ZIP and Comments (office only), then click Save.
- Mark lost: choose why the lead didn't go ahead, add a note if you like, and confirm.
Once a lead has been converted, the panel says "This lead already became a job." and the stage buttons go away.
Managing leads on the phone app
- Open the menu and tap Leads.
- Use the status tabs at the top, the Filter results box and Add New, the same way you would on the web.
The list shows each lead's ID and status. Change the status from the dropdown on its row. A lead that's already become a job shows Won in that spot instead. Tap a lead to get Convert to job, Move to stage and Mark lost.
Related articles
- Creating custom lead statuses
- Converting a lead into a job
- Marking leads as lost
- How to create leads
- Understanding clients vs leads