In this article, you'll learn how to create a lead in the CRM. A lead is work that might happen: somebody called about a cleanout, wants a quote, or isn't sure when they need you yet. Keeping it as a lead means it's written down without putting a job on your calendar that may never happen.
To open the Leads page:
- In the menu, click Leads.
Creating a lead on the web
- On the Leads page, click Add New.
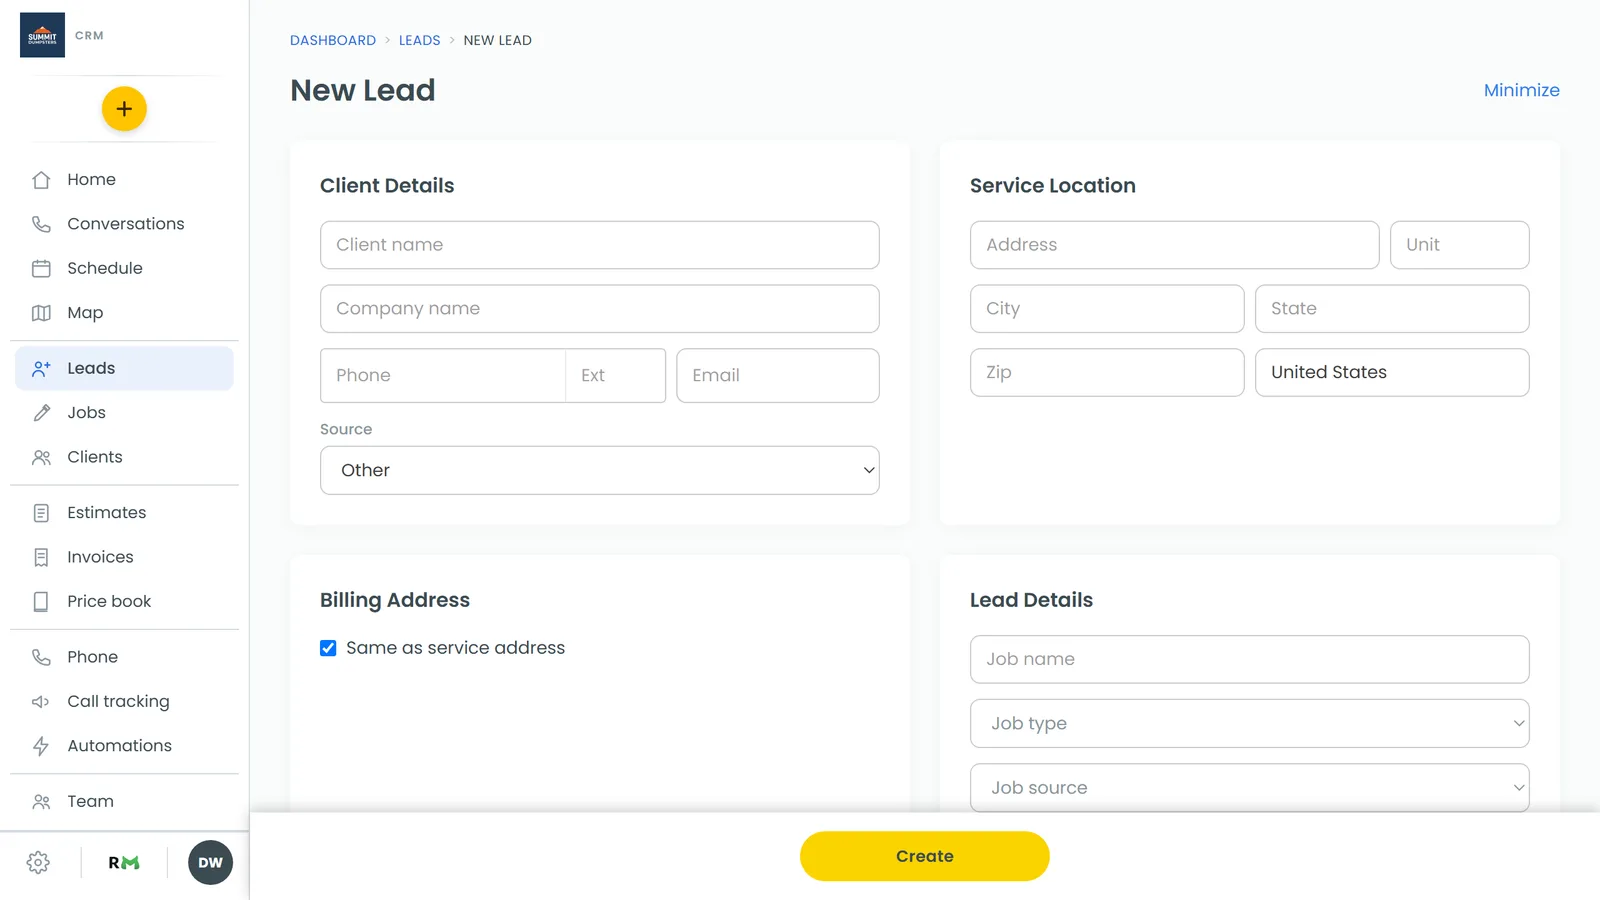
- The New Lead form opens. It's the same form you use for jobs, with lead wording.
Client Details
- Start typing the customer's name. The CRM searches your existing clients as you type, so if they've worked with you before, pick them from the list instead of making a duplicate. Their details and address fill in for you.
- Fill in or check Company name, Phone, Ext and Email.
- For someone new, you'll also see a Source drop-down. Pick where they came from (Website, Google, Referral and so on). It starts on Other if you don't change it.
A lead needs at least a name, a phone number or an email. Everything else can wait.
Service Location
- Start typing the address and pick the right suggestion. City, state and zip fill themselves in.
- Add a Unit if there is one. Every field stays editable, so you can type an address the suggestions don't know.
Billing Address
Same as service address is ticked by default. Untick it if the bill goes somewhere else, then enter that address.
Lead Details
Here you can add a Job name, pick a Job type and a Job source, and write a Job description of what they need.
Scheduled
Schedule it now? starts on No, because most leads don't have a time yet. If you've already agreed on a visit, say for an on-site quote, click Yes and set the date, time and who's going.
Saving the lead
Click Create on the bar at the bottom of the screen. It stays put as you scroll, so you can reach it from anywhere on the form.
You land back on the Leads page with your new lead in the list. A lead doesn't have a page of its own. Click it in the list and it opens in a side panel, where you can change its stage, edit its details, convert it to a job or mark it lost.
Starting a lead from the + menu
You can also start a lead from anywhere with the + in the sidebar.
- Click the + (Create new).
- Click New lead.
If you're on a client's page when you do this, the form opens with that client already filled in.
Creating a lead on the phone app
- Open the menu and tap Leads.
- Tap Add New.
- In the New lead sheet, fill in Name, Phone, Email and Notes (what they need).
- Tap Create lead.
The phone version is deliberately short. There's no address, job type or schedule on it. To add an address later, open the lead on the web and click Edit details.
Leads that come in on their own
You don't have to type every lead. Forms on your website can create leads in the CRM by themselves. See Getting new leads into the CRM automatically.
Related articles
- How to manage new leads
- Converting a lead into a job
- Understanding clients vs leads
- Creating new leads on the phone app
- Getting new leads into the CRM automatically