In this article, you'll learn what the most common words in the CRM mean. If a label on a screen doesn't make sense, look it up here first.
To find most of these in the CRM:
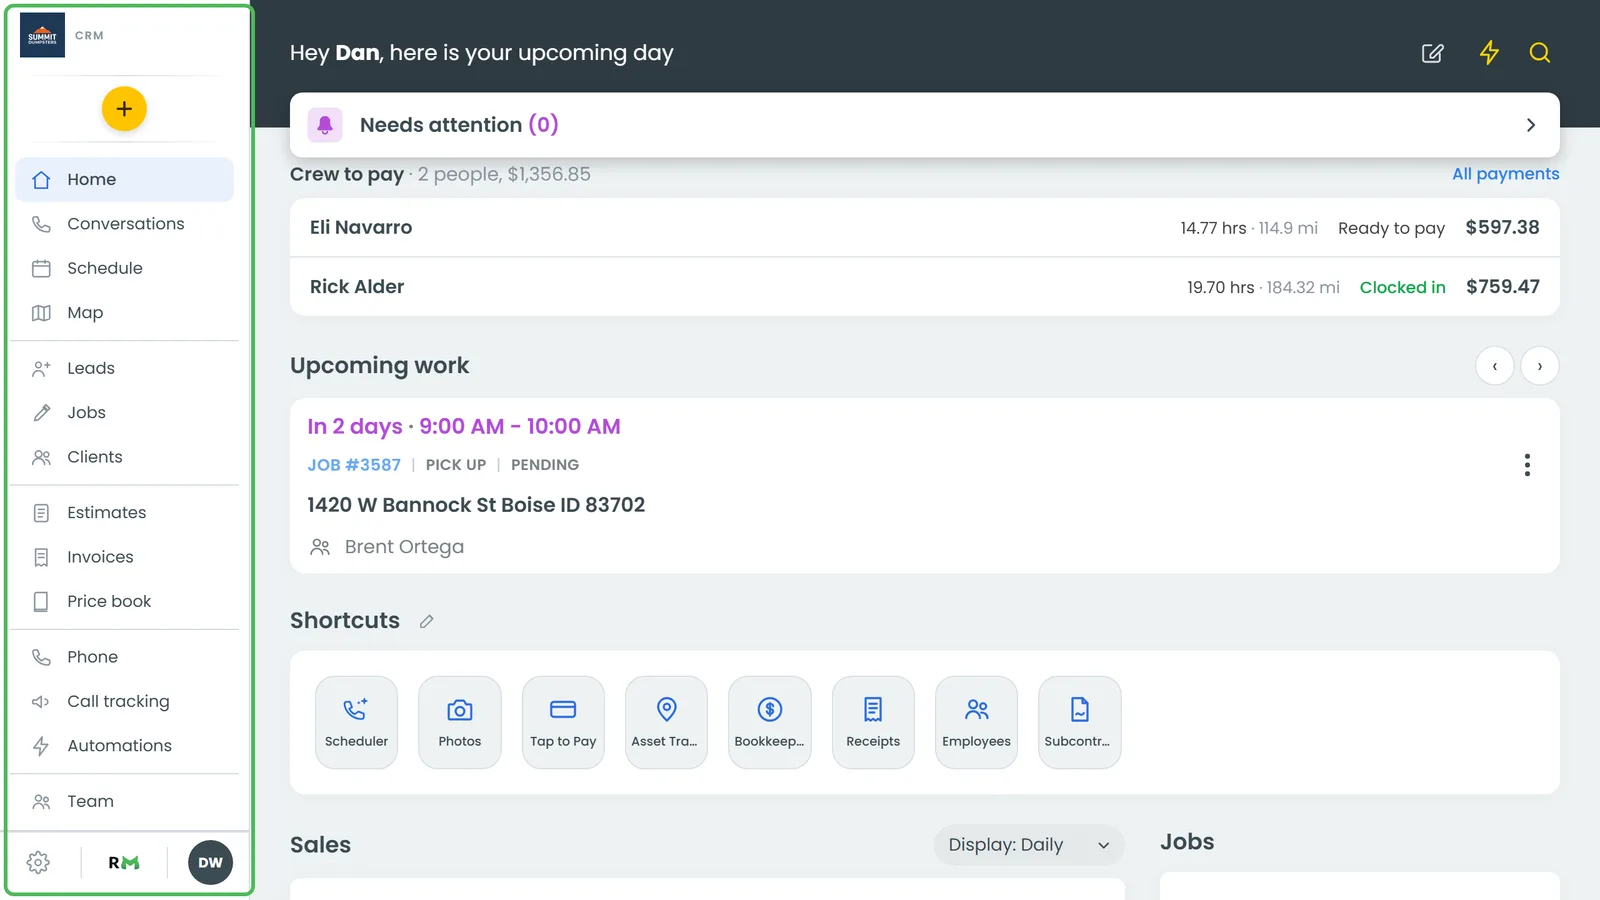
- Use the menu down the left side of the screen. In a phone browser, tap the menu button at the top left to open it.
- For settings, click the gear at the bottom of the menu. The settings list opens just above it, grouped under General, Jobs & leads, Money, Phone & booking, Data, Users & roles and Account.
A
- Admin: The top role on your account. Click your initials at the bottom of the menu and you'll see Admin or User under your name. What every role can see and do is set under Settings › Roles & permissions.
- Automations: Rules that do a job for you when something happens, like texting a customer when a job's status changes. Every account has them, so there's nothing to switch on. Click Automations in the menu, or tap the bolt at the top of the Home screen in a phone browser.
B
- Blocked callers: Numbers you've shut out. Their calls get a busy signal, their texts are turned away and their conversation leaves your inbox until you unblock them. The list is under Settings › Blocked callers. Type a number, click Block number, and click Unblock next to any entry to let them back in.
C
- Call tracking: Extra phone numbers you put on an ad, a sign or a website, so you can tell which one made the phone ring. Each number is tied to a source, so the customers who call or text it count toward that source. On a computer, click Call tracking in the menu. In a phone browser it's under Settings › Call tracking. The free CRM doesn't include it.
- Channel: How a customer reached you the first time: Phone call, Text message, Quote request, Contact form, Online booking, Chatbot, In person / walk-in or Other. It's filled in on its own from their first call, text or form. You can change it in the customer's details, and you can add Channel as a column on the Clients list.
- Client: A customer you do work for. Each client has one record with their contact details, addresses, jobs, estimates, invoices and history, all under Clients in the menu.
- Conversations: Your inbox. Texts, calls, voicemails and emails with customers sit here, one thread per person. On a computer, click Conversations in the menu.
- Customer portal: A web page where your customers see the estimates and invoices you've sent them, approve and sign estimates, pay, and download receipts. They sign in with their last name and the last four digits of their phone number. A sent estimate stays there for as long as it exists, even after the job behind it is done.
E
- Estimate: A price you send a customer before the work is booked. They approve it by signing it in the customer portal, or they can decline it there.
F
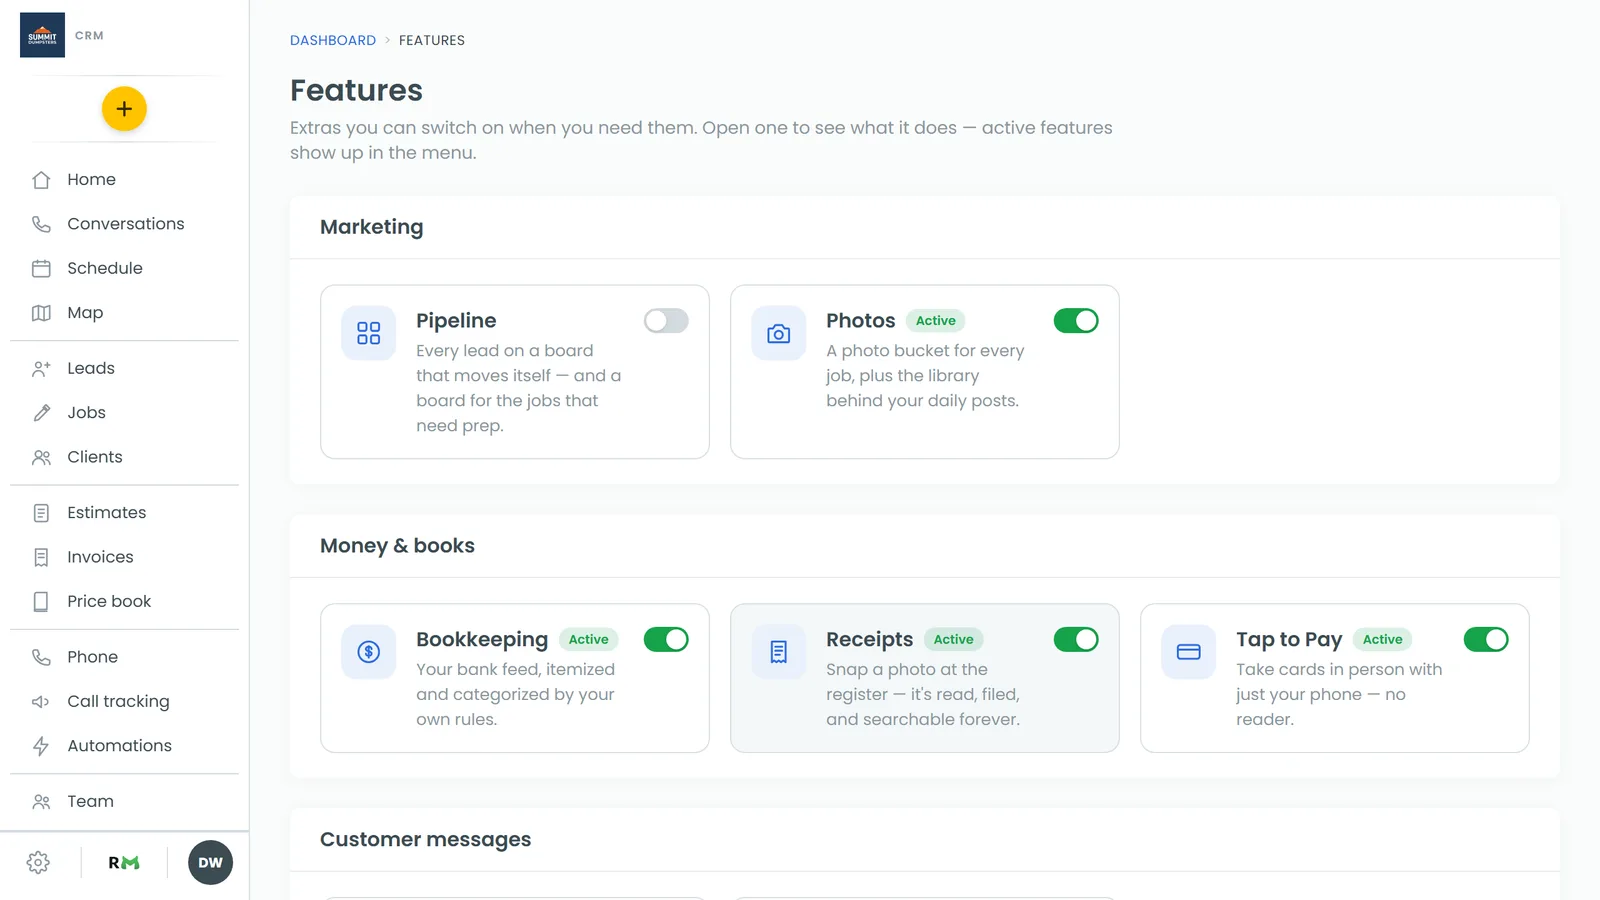
- Features: The store of optional extras, like Pipeline, Photos, Scheduler, Bookkeeping, Receipts, Asset Tracking, Employees, Subcontractors and Tap to Pay. Admins see Features in the menu. Flip the switch on a tile to use one. An Active badge shows which ones are on, and active features show up in your menu. Scheduler, Photos, Tap to Pay and Receipts start switched on.
H
- Help Center: This library. Click Help Center in the menu to search it.
I
- Import clients: Bringing your existing customer list in from a CSV file, so you don't have to type everyone in. It's under Settings › Import clients.
- Invoice: The bill for a job. When you send it, the customer gets a link straight to that invoice in the customer portal, where they can pay it.
J
- Job: A piece of work you've booked. It has a customer, an address, a date and time, the people doing it, the items you're charging for, and a status. Jobs live under Jobs and on the Schedule.
L
- Lead: Someone who might become a job but hasn't booked yet. Leads sit on the Leads page and can move through your lead statuses. When they book, open the lead and click Convert to job.
O
- OMW (On My Way): A text telling the customer you're headed their way. When vehicle trackers or phone location are set up, it includes a link to a live map so they can watch you coming. On a computer, OMW doesn't get its own spot in the menu. You'll find it under Settings › OMW. In a phone browser, OMW is a row in the menu.
P
- Pipeline: A board with a column for each step of your sales process and every lead as a tile. Tiles move on their own as you text back, book a visit or send an estimate, and quiet leads drift off by themselves. Turn Pipeline on in Features and it shows up in the menu just above Leads.
- Price book: Your list of the services and products you sell, with their prices. Add items from it to jobs, estimates and invoices so you're not typing the same lines over and over. It's under Price book in the menu.
R
- ROAS: Return on ad spend. It's one of the reports under Reports, and it lines up what you spent on each source against what that source's customers have paid you. The free CRM doesn't include it.
S
- Setup Wizard: A walk-through of the basic settings, one step at a time. On a computer, click your initials at the bottom of the menu, then Setup Wizard. In a phone browser, tap the account button at the bottom of the menu, then Setup Wizard. Admins only.
- Shortcuts: The four places pinned along the bottom of the screen in a phone browser. You pick them under Settings › Shortcuts for the whole account, then click Save shortcuts. Anyone who can't see a feature just doesn't get that shortcut.
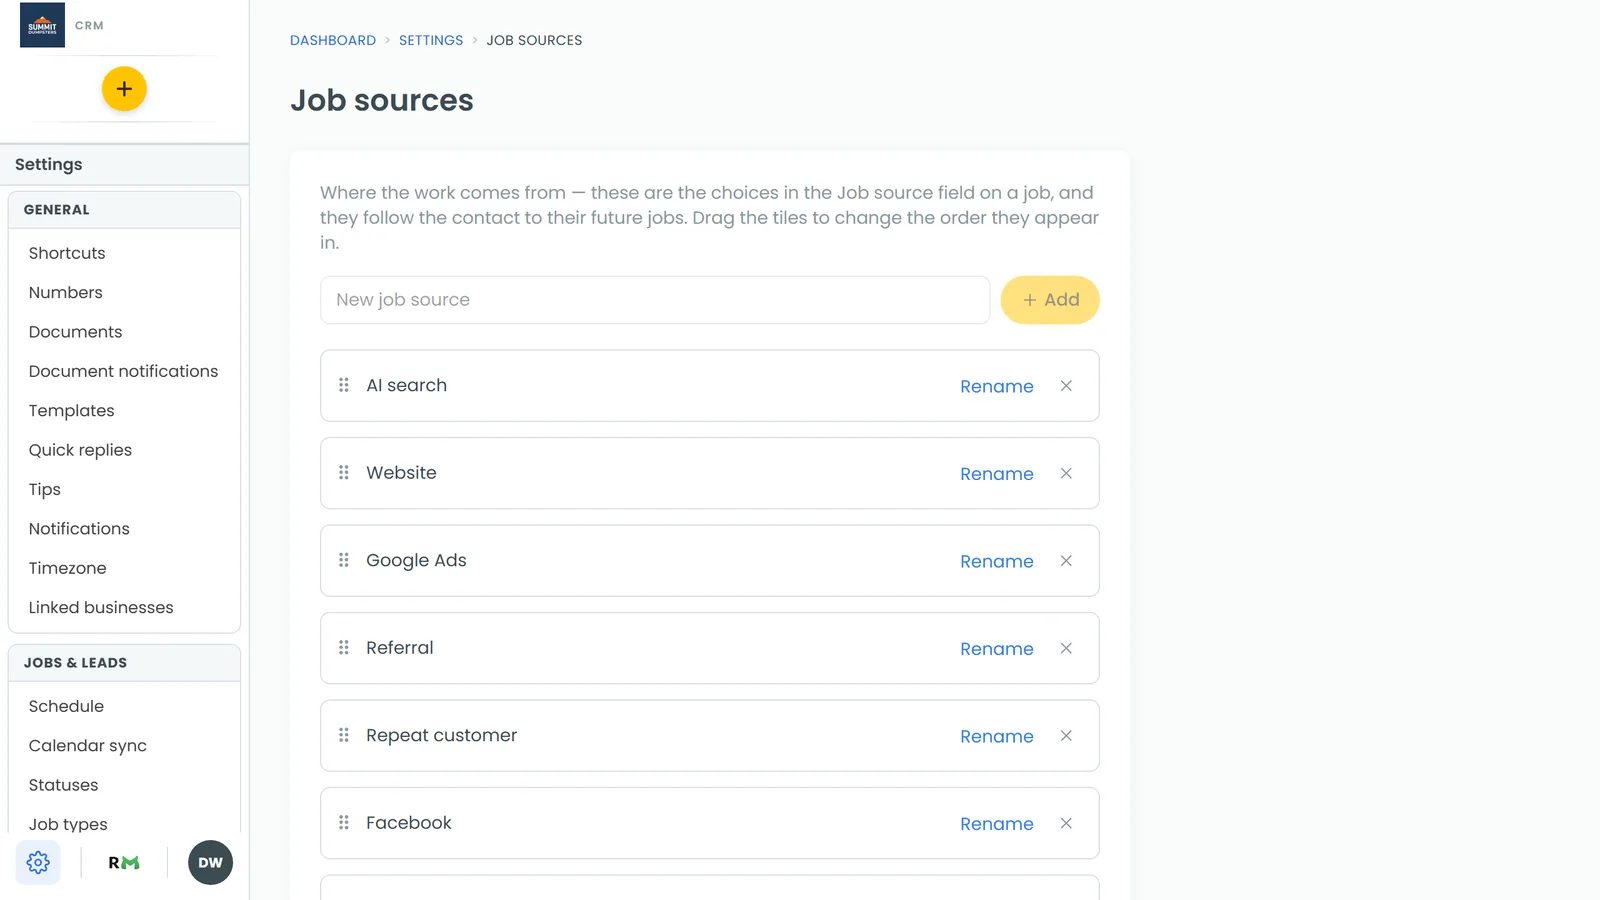
- Source: Where a customer came from. A new account starts with Website, Google Ads, Referral, Repeat customer, Facebook and Other, and AI search is added the first time the list is used. Microsite is added the first time a customer comes in from one of your microsites. The source is set from their very first contact and kept for life, so everything they pay you later counts toward it in your reports, including ROAS. When you add a client, job or lead by hand, choose it from the Source drop-down on the form. It starts on Other unless the CRM already knows better. The list lives under Settings › Job sources, where New job source adds one. Other can't be deleted. Once a source is set, only a person can change it, in the customer's details.
- Status and sub-status: Where a job sits right now. A new account starts with Submitted, Pending, In progress, Done and Canceled. A sub-status splits a status more finely, like a truck name under In progress. You manage them under Settings › Statuses. Leads have their own list under Settings › Lead statuses.
- Subcontractor: Someone you pay as a contractor rather than an employee. Turn on Subcontractors in Features to collect their W-9s, track their hours and pay them. They don't get a regular CRM login. They use their own crew portal, signed in with their phone number and the password they picked on the W-9 form. The CRM phone app takes the same login.
T
- Tags: Short colored labels you put on jobs, and on clients too, so you can spot and filter them quickly. You create them under Settings › Tags. On a job page, click the + next to Tags:, tick the ones you want and click Save. Nothing changes until you do.
- Team: The people who log in to your CRM. Add them under Team in the menu, which is the same page as Settings › Team management. What each role can see and do is set under Settings › Roles & permissions.
- Team Schedule: A weekly grid of who's working when. On a computer it shows up in the menu once Employees is on in Features.
Tip: Your menu only shows what you have permission to see and what's switched on. If a term here points to something you can't find, ask whoever runs your account.