In this article, you'll learn the two most common ways to move work through the CRM. You can quote first and book the job once the customer says yes, or you can book the job straight away. Pick the one that matches how you sell, and your job numbers stay honest.
To start something new:
- In the side menu, click the yellow + button.
- Pick New job, New lead, New note or New client.
On a phone-size screen, the same + sits in the bar along the bottom. The menu also has Contact, but that's for reaching the team, not for starting work. The phone app has the same + with the same five choices.
When you're on a customer's page, the + offers New job and New lead for that customer, with their details already filled in. On the web, it also offers New estimate there. The yellow Create new button on the customer's page has the same three: Job, Estimate and Lead.
Workflow 1: Quote first (lead, estimate, job, invoice)
This one suits businesses that give free quotes. A lead is a possible job, not booked work. If you lose a lead, it never counts as a canceled job, so your job numbers only show real work.
Log the lead
- Click the + and pick New lead.
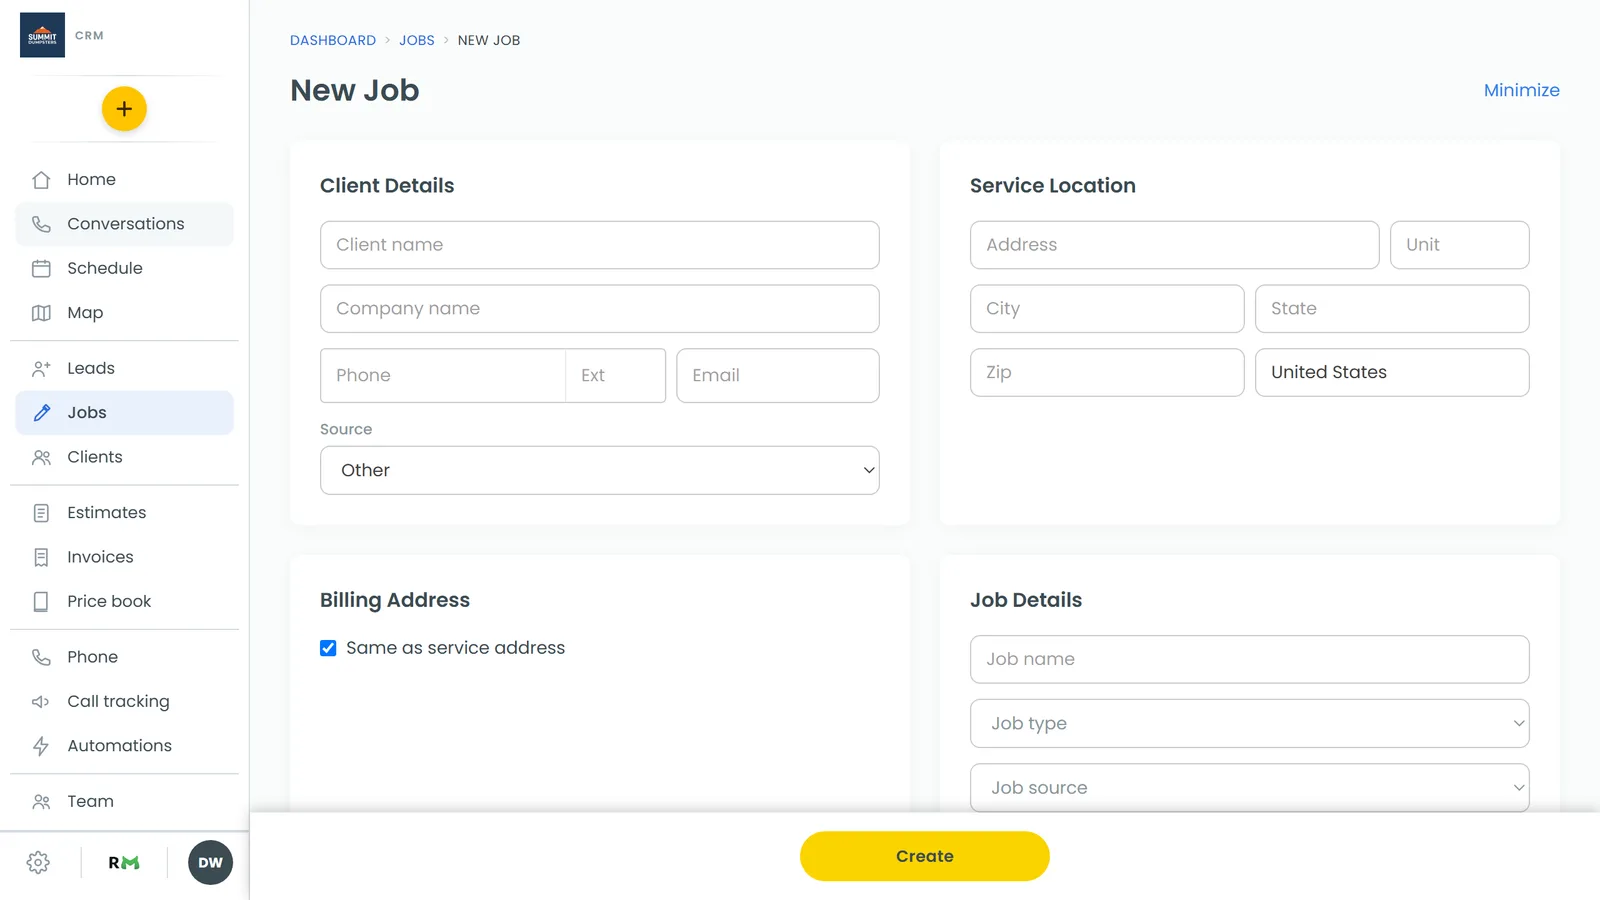
- Under Client Details, type the customer's name. If they're already in your list, pick them and their details fill in. If they're new, set Source to where they found you.
- Fill in the Service Location. If the bill goes somewhere else, untick Same as service address under Billing Address and type that address in.
- Under Lead Details, add a Job name, Job type, Job source and Job description if you have them.
- Under Scheduled, Schedule it now? starts on No. If you're going out to look at the job, switch it to Yes and set a time.
- Click Create. You land back on your Leads page with the new lead in the list.
Write the estimate
- Open the customer's page, click Create new and pick Estimate.
- Fill in the form. It's the same as the lead form, except the middle card is called Estimate Details. Click Create and the new estimate opens.
- Click Add item to add what you're quoting, or Price book to pick from your saved items.
- Click Send. Choose Via email or Via SMS, check the message, then click Send email or Send text.
When the customer approves
Your customer approves the estimate by signing it in their customer portal. You choose who hears about it, and how, under Settings › Document notifications. The row is Estimate approved & signed.
To turn the estimate into a job:
- Open the estimate.
- Click Actions, then Copy to job.
- Click Create job. A new job opens with the estimate's customer and items. Optional items don't come across, so add any the customer picked on the job yourself.
The lead is marked won by that job, and Copy to job drops out of the menu.
You can also click a lead on the Leads page and then click Convert to job in its panel. That builds the job from the lead's own details, without the estimate's items.
Invoice the job
- On the job page, click Create Invoice. The Collect payment panel opens with the invoice ready.
- Click Send invoice to text or email it, or take the payment right there.
Once a job has an invoice, the same button reads View Invoice.
Workflow 2: Straight to a job (job, invoice)
This one suits businesses that don't do free quotes, or that charge for the visit. The work is booked, so you skip the lead.
- Click the + and pick New job.
- Fill in Client Details, Service Location and Job Details. Billing Address is the same as the service address unless you untick the box.
- Under Scheduled, set the date, time and who's going. A job always has a time, so there's no yes or no switch here.
- Click Create. The job page opens.
Need to quote extra work while you're there? Open the job's Estimates tab and click Add estimate. Click Add item to build it, then send it with Text estimate or Email estimate. Once the customer has approved it, click Create job from this to make a separate new job with those items.
Nothing copies an estimate's items back onto the job it was written on. If the work goes on this same job, add the items on the job's Items tab.
When the work's done, click Create Invoice on the job and send it the same way as above.
Keeping track with statuses
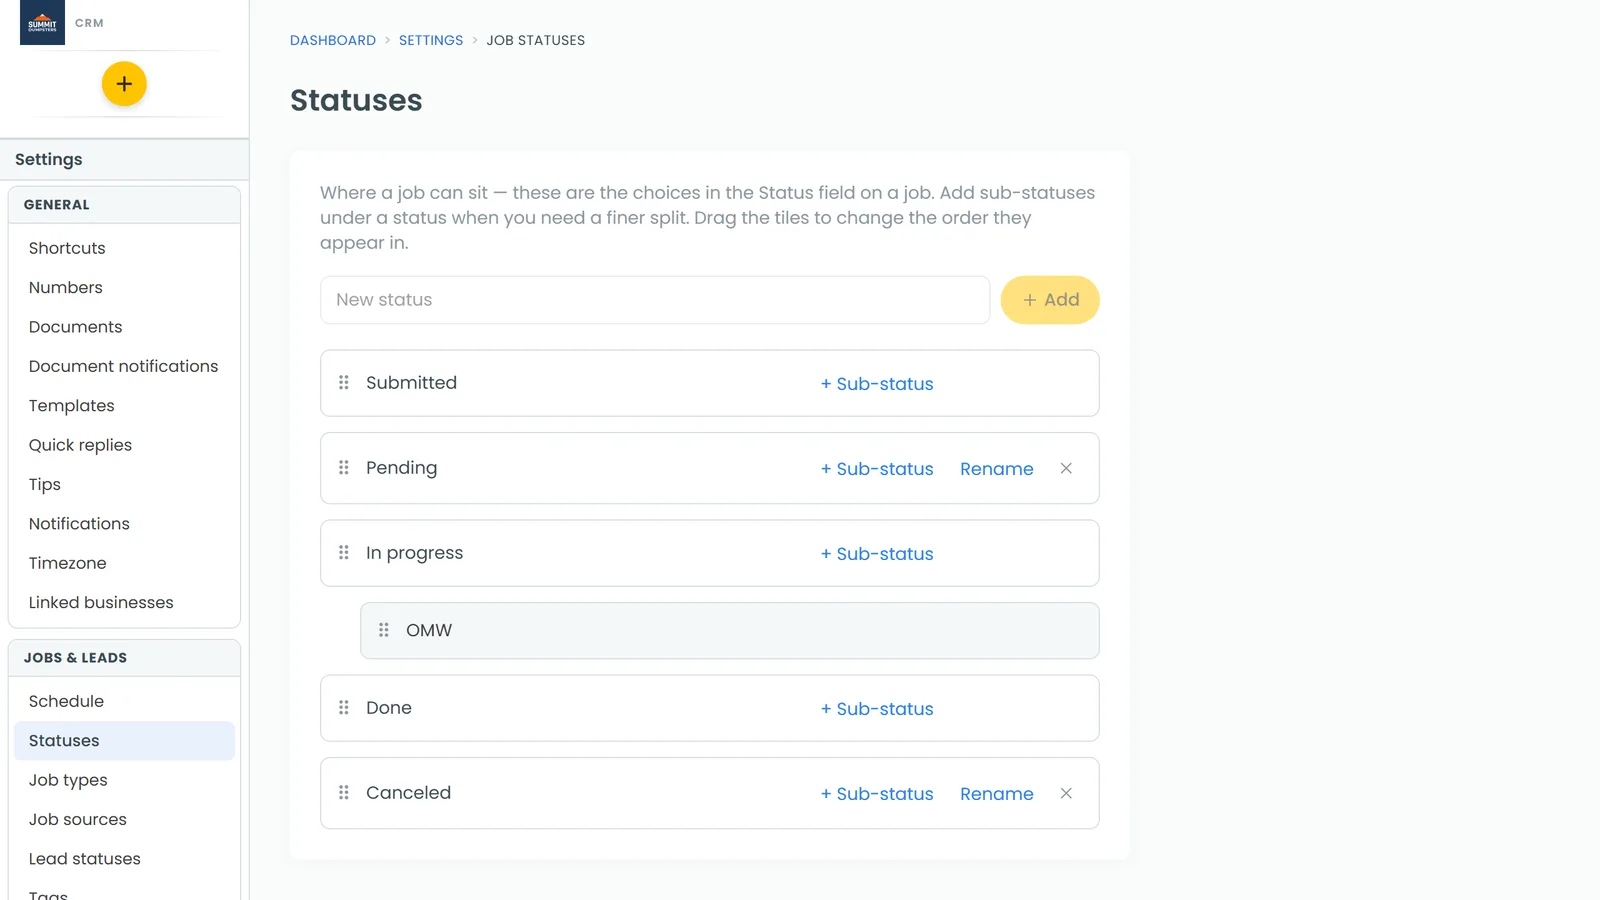
Every job shows its status next to Status: near the top of its page. Click it to pick a new one. Statuses with sub-statuses list them underneath. New companies start with Submitted, Pending, In progress, Done and Canceled, plus an OMW sub-status under In progress. Once the job's finished and paid, set it to Done.
To change the list:
- Open Settings.
- Under Jobs & leads, click Statuses.
- To add a status, type its name in the New status box and click Add.
- To add a finer step under a status, click + Sub-status on that status, type the name and click Add.
- Drag the tiles to change their order.
Whatever's on this page, in this order, is what a job's status menu offers.