In this article, you'll learn how to add units to your inventory in Asset Tracking, either one at a time or as a whole run of numbers at once. Every dumpster, container or trailer you rent out needs to be in here before it can go out on a job, and before the CRM can tell you what's free on a given day.
To open your inventory:
- In the menu, click Asset Tracking.
- Click the Inventory tab.
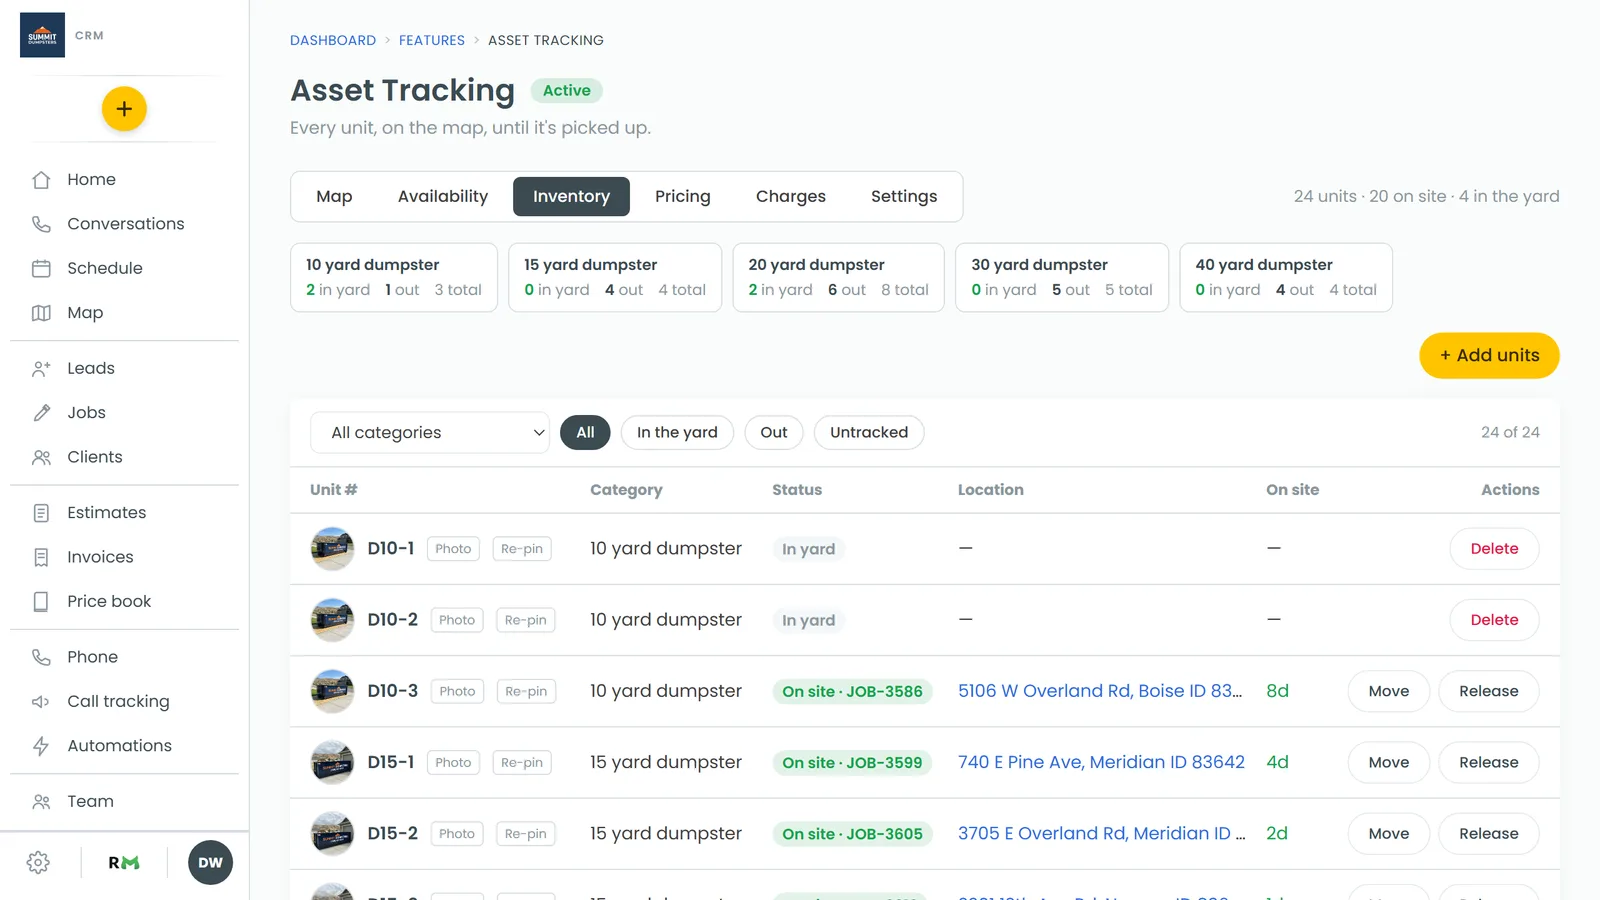
How units work here
Each physical unit is its own row with its own number. There's no quantity field to fill in. If you own twelve 20-yard dumpsters, you add twelve units, and the CRM does the counting: how many are in the yard, how many are out, and the total for each category.
The Category is the size or type a unit belongs to, like "20 ft container" or "15 yard dumpster". It matters more than it looks. Availability counts free units by category, and rental prices are set per category, so units of the same size should share the same category name. Capital letters don't matter, but the wording does. A name you haven't used before starts a new category.
Add one unit
- On the Inventory tab, click + Add units. On the phone app, the button reads Add units.
- In the Add one unit card, type the unit's number in Unit #, for example C-151.
- Type its size or type in Category, for example 20 ft container.
- Add anything worth knowing in Notes (optional).
- To add a picture, tap Take / choose photo under Photo (optional). On a phone you can take one with the camera or pick one from your photos.
- Click Add unit.
You'll see "Unit C-151 created." and the number and notes clear so you can add the next one. Each unit number can only be used once. If you type one you already have, you'll get a message saying that unit already exists.
Add a range of unit numbers
This is the quick way to load a whole size that's numbered in order.
- Click + Add units if the form isn't already open.
- In the Add a range of unit numbers card, type the Category. It's applied to every unit in the range.
- If your numbers start with letters, type them in Prefix (optional), for example C-.
- Type the First unit # and the Last unit #, for example 151 and 200.
- Check the line under the fields. It shows how many units will be made and the first and last numbers, like "Creates 50 units: C-151 … C-200".
- Click the button, which reads Create 50 units (or however many you're making).
A few things to know:
- You can create up to 200 units in one go. For a bigger fleet, do it in batches.
- Leading zeros carry through. If the first number is 001, the units come out as 001, 002 and so on.
- Numbers you already have are skipped, not doubled up. The message after you save tells you how many were created and how many already existed.
Your units list
Once units are added, a card for each category sits above the list, showing how many are in the yard, how many are out, and the total. The list itself shows each unit's Unit #, Category, Status (In yard or On site), Location, and how many days it's been on site. You can narrow it with the All categories drop-down, or with All, In the yard, Out and Untracked. Untracked means a unit that's out on a job but has no spot on the map.
If you skipped the photo when you added a unit, you can add one later with the Photo button next to its number on the web, or by tapping the empty photo square on the phone app.
A unit that's out on a job has a Move button for when the customer wants it somewhere else, and a Release button to bring it back to the yard. A unit sitting in the yard has a Delete button instead.