In this article, you'll learn how to upload photos and videos to your media library, see how close you are to the 90 photos your daily Google posts need, and delete the ones you don't want. Your daily Google Business Profile and Facebook posts are built from this library, so the more good pictures of your work it has, the longer those posts can run without repeating.
To open Media Upload:
- In your dashboard menu, click Social Posts.
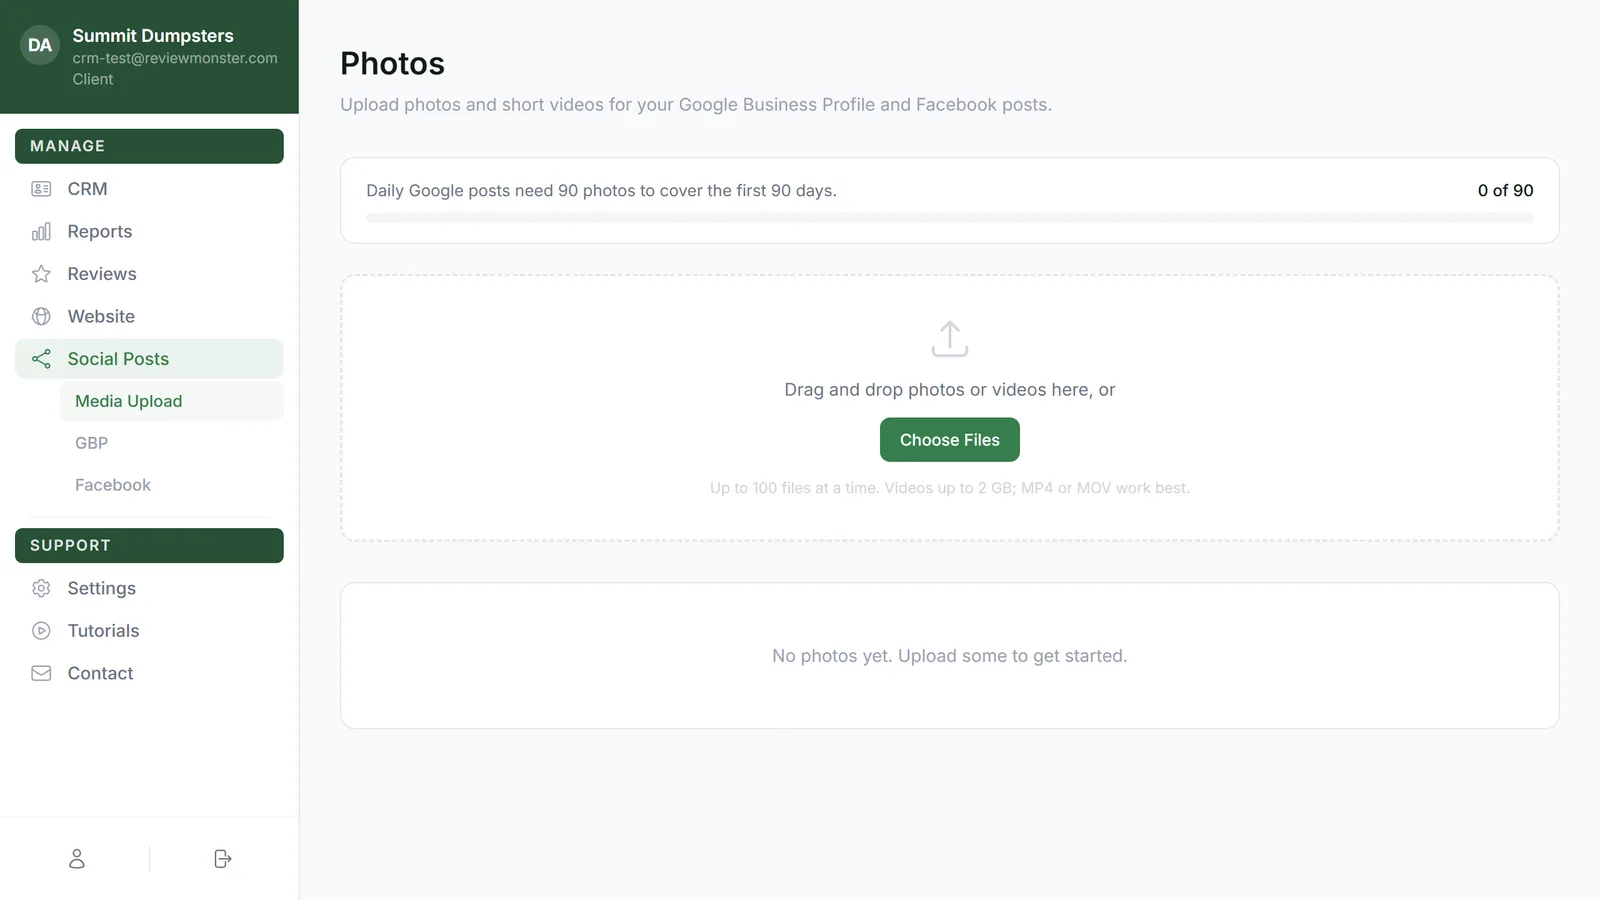
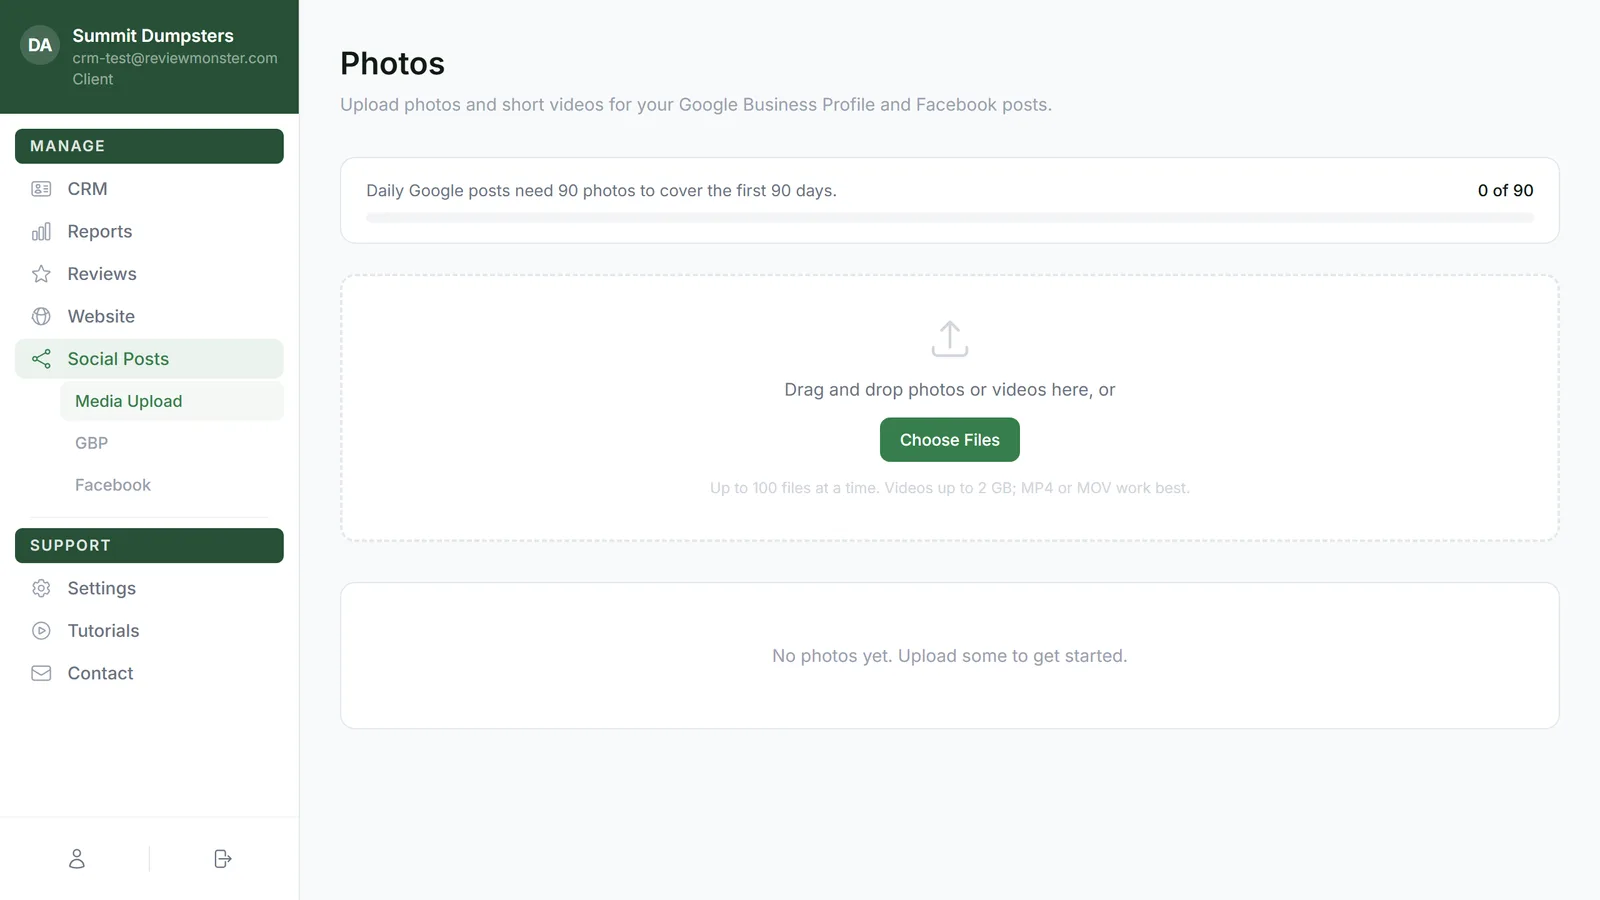
- Click Media Upload underneath it. The page that opens is titled Photos.
Check how many photos you have
The bar at the top counts toward 90 photos. Daily Google posts use one photo a day, so 90 covers your first 90 days. The number on the right shows how far along you are, like 42 of 90. When you reach 90, the line above the bar changes to You have enough photos for daily Google posts.
Only pictures count toward the 90. You can upload videos too, but they don't go into the daily Google posts, so the bar doesn't count them.
Upload photos and videos
- Drag your photos or videos onto the dashed box, or click Choose Files and pick them from your computer or phone.
- On a phone, you can tap Take Photo to open your camera and take a picture right there. That button only shows on a phone.
- Wait for the files to finish sending (more on that below).
You can add up to 100 files at a time. Videos can be up to 2 GB, and MP4 or MOV files work best.
While files are sending
A yellow Keep this page open box tells you how many files are still sending. If you close or leave the page before they finish, the ones still going will stop. Videos can take a few minutes on a slow connection.
When everything's in, the box turns green and says All uploaded — safe to leave this page.
If some files fail
If anything doesn't make it, a red box tells you how many files failed. The rest are saved. Pick the failed ones again to resend them.
Videos that say Optimizing…
A video you just uploaded can show Optimizing… in the corner of its tile for a few minutes while it's prepared in the background. You don't have to do anything, and you can leave the page.
Duplicates are skipped
If you upload the same picture twice, or a file with the same name as one already in your library, it's skipped. That keeps the same photo from going into your posts two days in a row. To add a different photo that happens to share a name, rename it first.
Look at and delete your photos
Everything you've uploaded shows in the grid below the upload area, newest first.
Delete one photo
- Click a tile to open a bigger preview above the grid. Videos play right there.
- Click Delete under the preview.
You can also click the red trash button on a tile. On a computer it shows when you hover over the tile. On a phone it's always there.
Delete several at once
- Click the checkbox in the top-left corner of each tile you want to remove.
- At the top of the page, check the count, like 3 selected.
- Click Delete selected, or click Cancel to clear what you picked.
Adding photos from the CRM and the phone app
The same library also shows up in the CRM and the phone app, so a photo you add in either one counts toward your daily posts too. Both take photos only, up to 10 at a time, and skip a picture that's already in the library.
On a computer:
- In the CRM menu, click Photos. The page opens on Job photos, which is a separate thing: those are photos kept on each job for that customer, and they never go into your posts.
- Click the Social posts tab. It's only there on the SEO plan.
- Click Take Photo or Upload from Camera Roll.
On the phone app:
- Open the Photos screen. On the SEO plan it has a Job photos and Social posts switch at the top. Tap Social posts.
- Tap the camera button to take a picture, or the gallery button to pick from your camera roll.
In both places, Your photo library shows how many photos you have and how many are ready to post, and a posted tag marks the ones already used. Tap the × on a tile to delete one photo, or tap Select, pick several, and tap Delete. Here, deleting asks you to confirm first.
Add a job photo to your posts as you take it
On the SEO plan, the camera on a job has an Add to social posts checkbox. Tick it before you take or pick photos, and each photo goes on the job as usual and a copy lands in your library. It only applies to photos, not videos, and it's off again the next time you open the job. You'll find it on a job's Attachments tab in the CRM, on the job screen in the app, and on the Job photos side of the Photos page.
When you're running low
When your library gets down to 10 or fewer photos that haven't been posted yet, we'll send you a message (usually a text) with a link to upload more. You only get it once. After your library is back above 10, it resets for next time.