In this article, you'll learn how to connect your Google Business Profile during onboarding and pick the listing that's yours. It's the first thing setup asks for, because your listing fills in most of your business details for you, so you type less and the details match what customers already see on Google.
This is done on the web, in your Review Monster dashboard.
To open the Google screen:
- Start onboarding. The first step, Your business, opens on a screen that says Start with Google.
- If you've already moved past it, go to your Setup page and click Link your profile (under Google profile) or Connect Google (under Google connection, on SEO plans). Both open onboarding at the first step you haven't finished.
Connect your Google account
- Click Connect Google. A Google window opens on top of the page.
- Sign in with the Google account that manages your Business Profile.
- When Google asks for permission, choose Allow.
- The window closes by itself and the button shows Reading your Google account… while we look up your listings.
When we find your listing, the screen moves on by itself.
If you closed the Google window or didn't choose Allow, you'll see "Google access wasn't granted. Click Connect and choose Allow." Click the button and try again.
Pick your listing
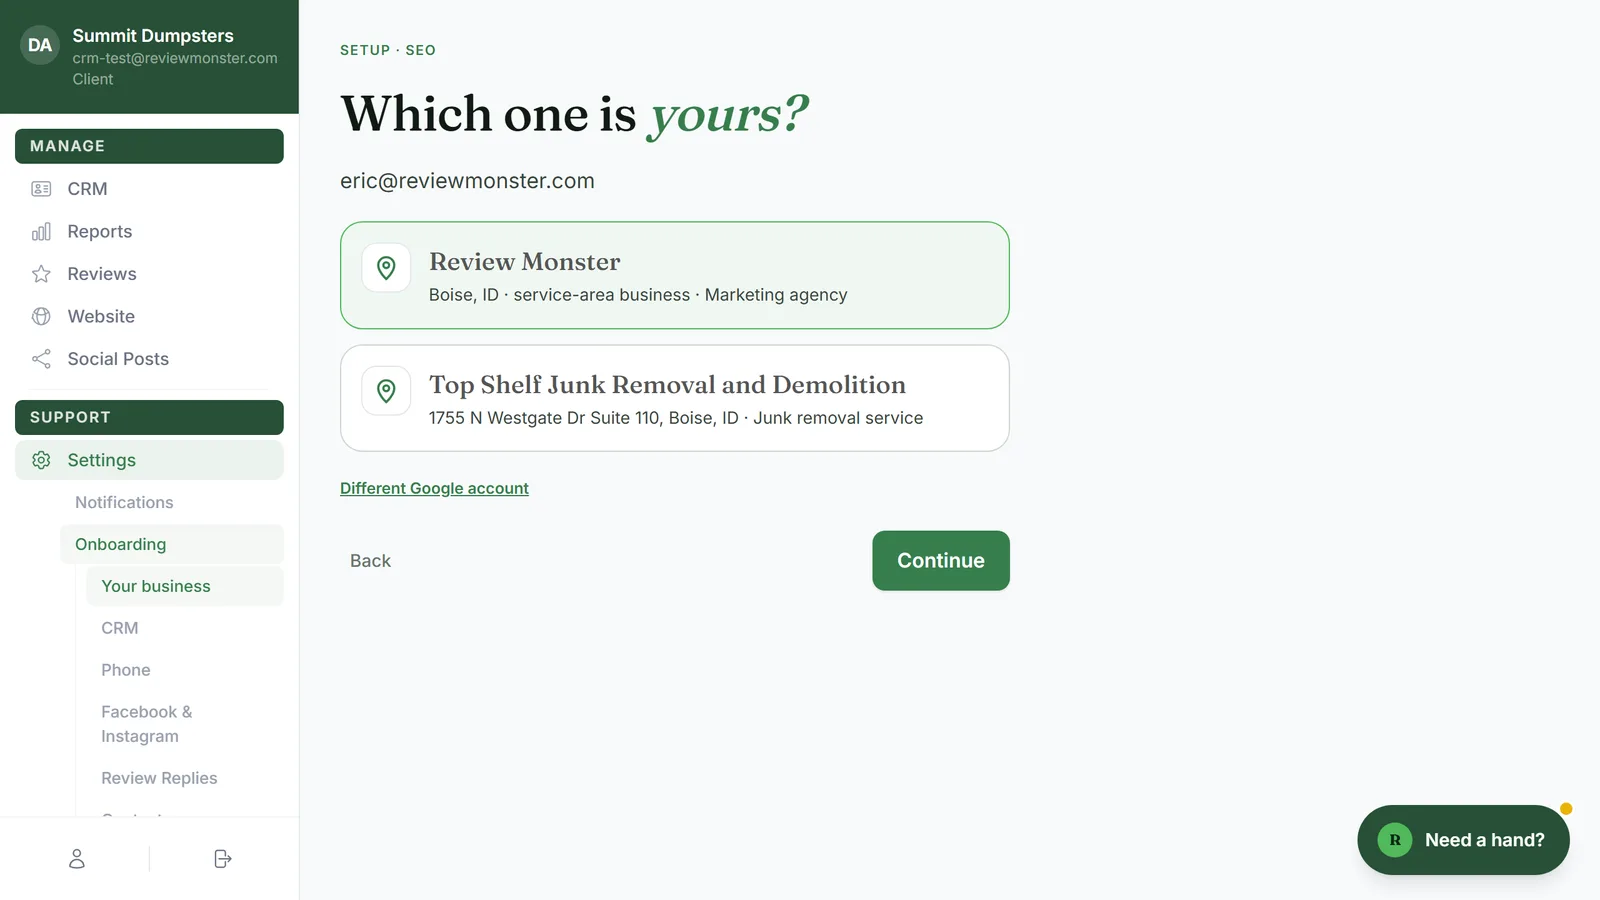
Once you're connected, you'll see the Google account's email at the top and a list of the listings it manages.
- If there's one listing, the heading says Found your listing.
- If there are several, it says Which one is yours?
Each card shows the listing's name, its address (or its city and "service-area business" if it doesn't show an address), and its main category. A listing marked matches your account is the one we already had on file for you, and it's picked for you.
- Click the listing that's yours.
- Click Continue. We read the listing and your state's business filing, then show the Check it over sheet with your details filled in.
If the list isn't right, click Different Google account under it to sign in with another account. Back returns you to the Start with Google screen.
For what to do on the sheet itself, see Checking your business details.
If your account has no Business Profile
If the account you signed in with doesn't manage a listing, you'll stay on the Start with Google screen with a message like "you@example.com manages no Business Profile." It suggests trying the account that gets your review emails. That's usually the one that owns the listing.
- Click Connect a different Google account.
- Sign in with the other account and choose Allow.
Continue stays greyed out until we find at least one listing.
What the connection is used for
- Filling in your details. Your business name, website, address and time zone come from the listing, and each field on the sheet is tagged with where it came from.
- Your listing on file. When you finish onboarding, we save your listing's name, its link, and its main and other categories to your account.
- Your hours. The hours on your listing are used as the business hours for your CRM phone line.
- Posting for you. On plans with Google posts, the same connection lets us post photos and updates to your listing. See Turning on daily Google Business Profile posts.
Related articles
- Onboarding overview
- Checking your business details
- Reopening your onboarding steps from Settings
- Setup page overview
- Working through your Google listing checklist