In this article, you'll learn how the onboarding screens work: what's on each part of the page, which steps your plan shows, and how to come back later and pick up where you left off. It's worth a quick read before you start, because once you know how the screens fit together you can get through setup in one sitting.
To open onboarding:
- Log in to your dashboard.
- If you haven't finished setup yet, the dashboard sends you straight to onboarding. You can also go to /onboarding yourself.
The welcome screen
The first time you open onboarding, you'll see a short welcome: "Hi (your name), let's get (your business) set up." It reminds you that nothing is set in stone. Every setting can be changed later from your dashboard, so don't worry about getting it perfect.
- Click Let's go to open the first step.
You only see the welcome until you've finished the first step. After that, onboarding opens on a step.
Finding your way around
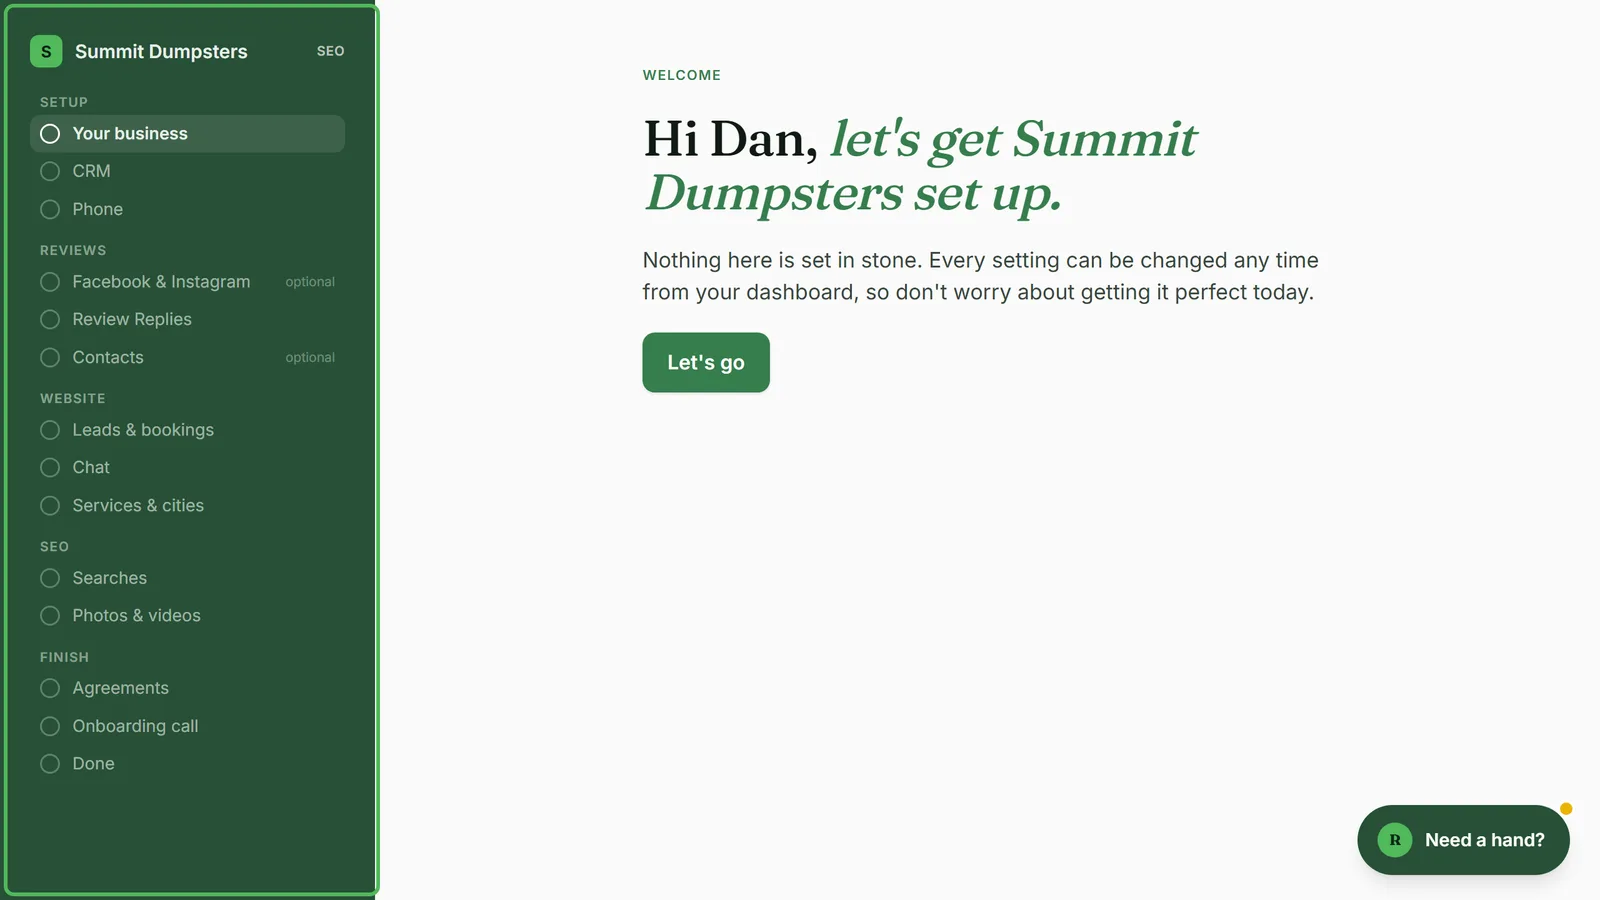
On a computer, a dark panel runs down the left side. Your business name sits at the top, next to its first letter. Under that, the steps are grouped into sections:
- Setup
- Reviews
- Website
- SEO
- Finish
You only see the sections your plan uses (more on that below).
As you work through the list:
- The step you're on is highlighted.
- A step you've finished gets a green tick.
- Steps you don't have to fill in say optional on the right.
- You can click any step in the list to jump straight to it.
On a phone
On a narrow screen the left panel is hidden. You get a bar across the top instead, with the name of the step you're on, where you are (for example, "3 of 9"), and a progress bar that fills as you go.
Which steps your plan shows
Everyone gets the Setup steps (Your business, CRM and Phone) and the Finish steps (Agreements, Onboarding call and Done). What comes in between depends on your plan:
- Review Automation: the Reviews steps, which are Facebook & Instagram (optional), Review Replies and Contacts (optional).
- Website: the Website steps, which are Leads & bookings, Chat and Services & cities.
- Reviews + Website: both the Reviews and Website steps.
- SEO: the Reviews and Website steps, plus the SEO steps, Searches and Photos & videos.
Moving through the steps
Every step has the same buttons at the bottom:
- Fill in the step.
- Click Continue to save it and move on. Continue stays grayed out until the step has what it needs.
- To go back a step, click Back.
A few optional steps also have a skip link next to Continue, like Skip for now, Not now or Later. Use it if you'd rather come back to that step another time.
Coming back later
You don't have to finish in one go. Close the page whenever you like. The next time you log in, the dashboard brings you back to onboarding until setup is done. It opens on the first step you haven't finished, with everything you already saved still filled in.
Getting help with the setup guide
There's a Need a hand? button in the bottom-right corner of every step. When you move to a new step, it leaves a short note about that step, and a small gold dot shows up on the button until you open it.
- Click Need a hand? to open the Setup guide.
- Click one of the suggested questions under the chat, or type your own in the box.
- Click Send.
- To close the guide, click the × at the top or the Close button.
The guide knows which step you're on and can explain what a field is for, why we ask for it, or what happens next.
Related articles
- What happens when you finish onboarding
- Checking your business details
- Reopening your onboarding steps from Settings
- Booking your onboarding call
- Creating your account after checkout