In this article, you'll learn how to link an item in your price book to the units you track in Asset Tracking, and how to turn that item into a rental rate.
On its own, a price book item is just a name and a price. Once it's linked to a category of units, the price book shows how many of those units are in the yard, how many are out on jobs and the total. That way you can see what's free before you quote it.
To open your price book:
- In the menu, click Price book.
- Stay on the Items & products tab.
Link an item to your units
- Click the item you want to link, or click Add New to make a new one.
- Open the Tracked units (inventory) drop-down and pick the category of units this item stands for. The choices are the unit categories you already have in Asset Tracking.
- Under the drop-down you'll see the live count for that category: how many are in the yard, how many are out and the total.
- Click Save.
To unlink an item, set Tracked units (inventory) back to Not tracked and save.
There's no stock number to type in. The count comes from the units themselves. When a unit goes out on a job, the in-yard number drops, and when it comes back, it goes up again.
See stock in the price book
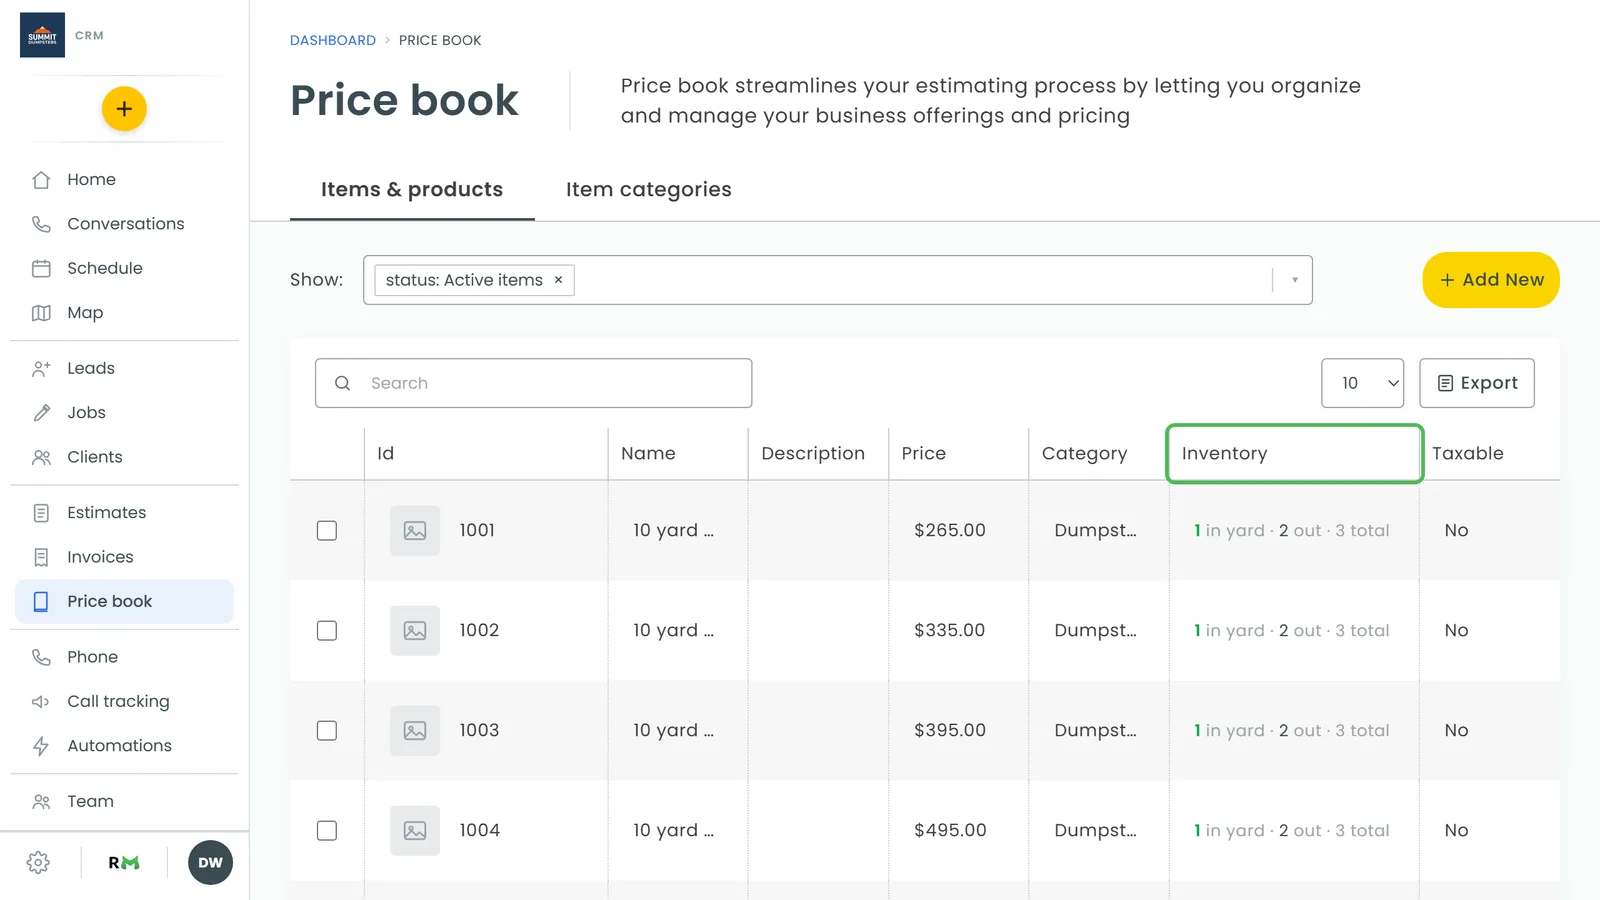
On a computer, linked items show their stock in the Inventory column, for example "3 in yard · 2 out · 5 total". The in-yard number turns red when none are left. Items that aren't linked show a dash. You can sort the list by this column.
Make the item a rental rate
Once an item is linked to units, you can set the rental period its price covers.
- Open the item in the price book.
- Under Rental period this price covers, pick day(s), week(s) or month(s). The number box next to it starts at 1, so change it if you need a longer period.
- In the drop-down that appears under it, choose what happens when the period is up:
- Nothing automatic
- Schedule the pickup
- Bill again, until the unit comes back
- Click Save.
To stop an item being a rental rate, set the period back to Not a rental rate. If you unlink the item from its units, it stops being a rental rate too.
One price, two places
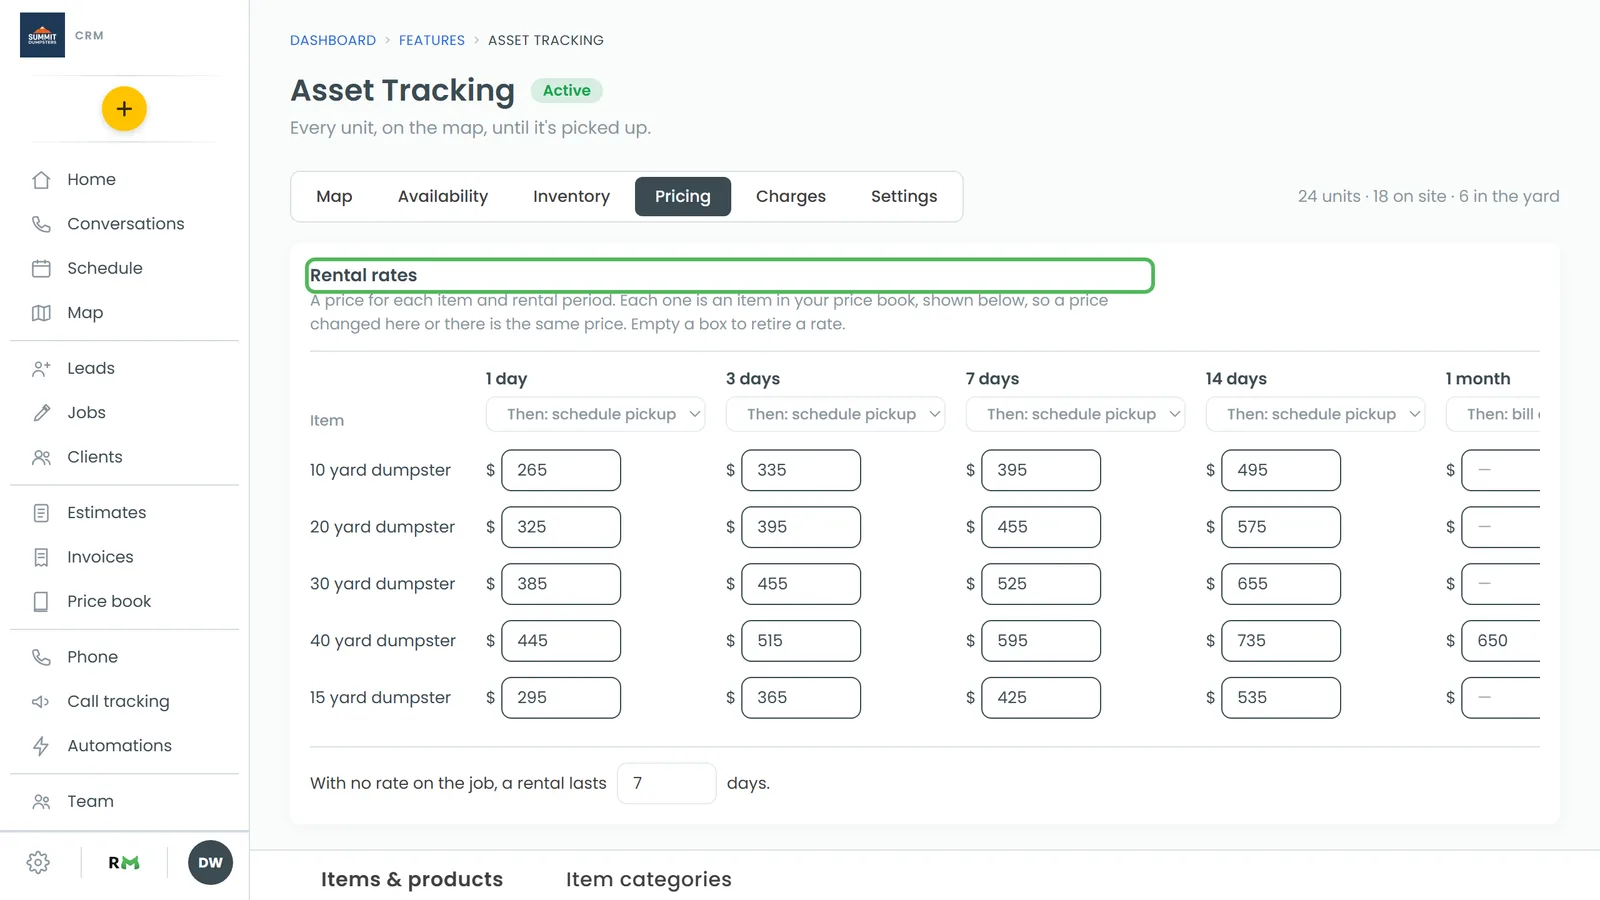
Rental rates also show on the Pricing tab of Asset Tracking, in a Rental rates grid with a row per item and a column per rental period. Each box in that grid is the same price book item. Change a price there and it changes in the price book, and the other way round. The price book itself sits under the grid on that tab.
On a phone, the Pricing tab opens the price book itself instead of the grid.
On the phone app
The app's price book has the same fields. Open an item and you'll see Tracked units (inventory), the live count, Rental period this price covers and the end-of-period choice, as long as Asset Tracking is on and you have units. The number box for the period only appears once you've picked day(s), week(s) or month(s).