In this article, you'll learn how to switch on Asset Tracking, get through its setup, and find your way around the page. It's built for companies that rent things out and bring them back, like dumpsters, storage containers, trailers and equipment. You can see which unit is where, how long it's been out, and what's free on any day.
Asset Tracking follows numbered units. Each dumpster, container or trailer gets its own number. It doesn't count supplies you use up, and there's no barcode or QR scanning. When a unit goes out, your driver picks it from a list on the job.
Switching on Asset Tracking
Asset Tracking lives in Features, and it's off until you switch it on. The Features link is in the menu for admins.
To switch it on:
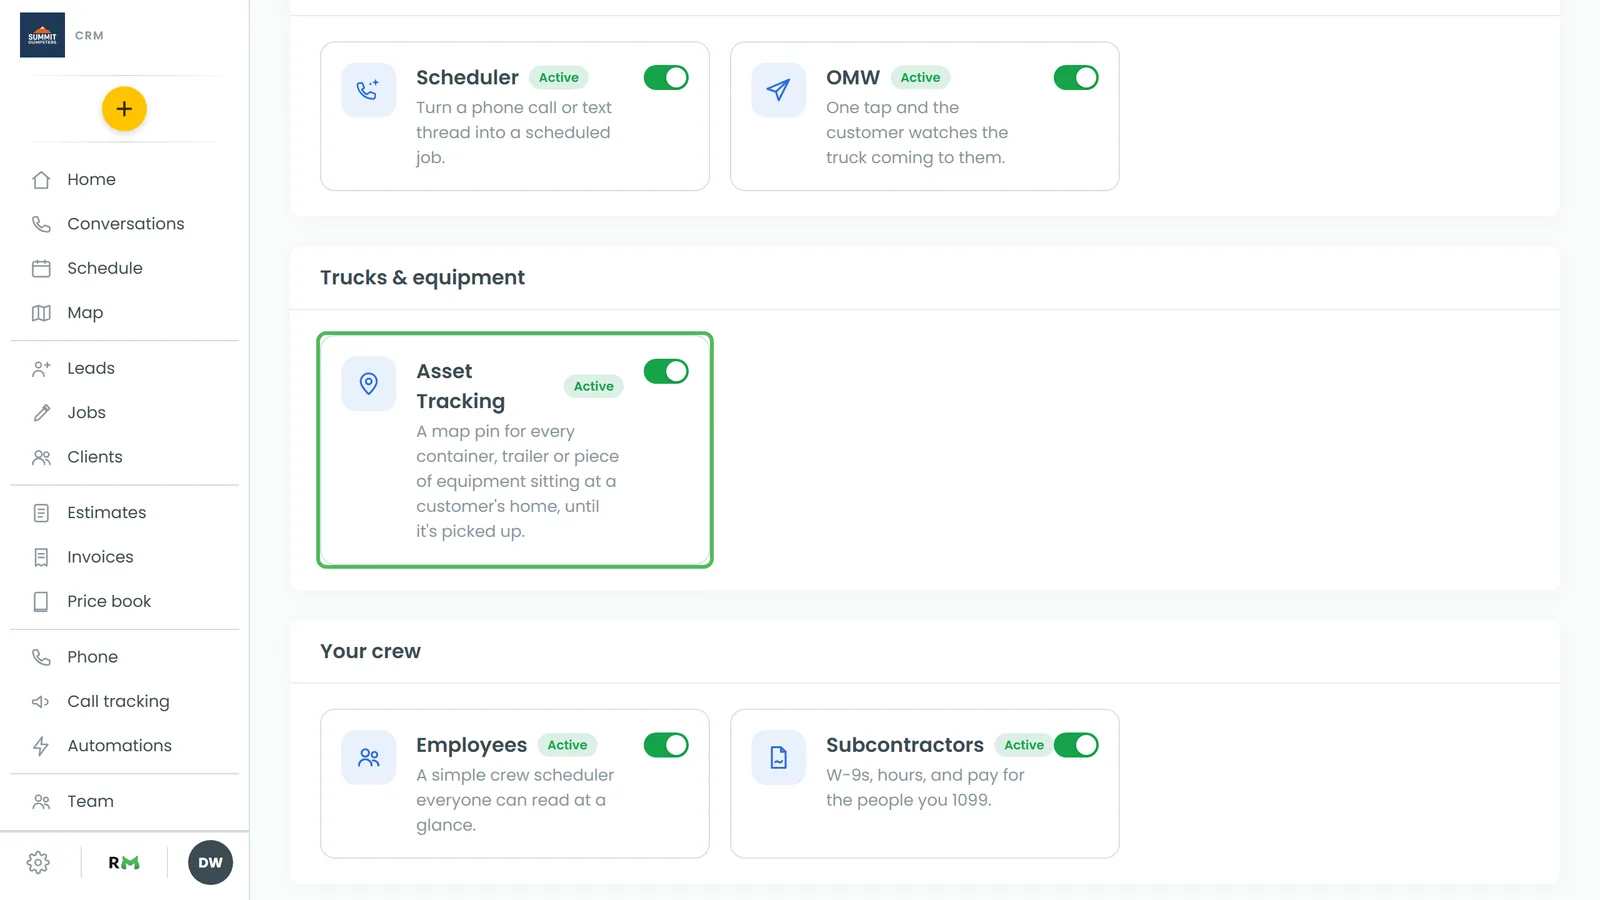
- In the menu, click Features.
- Find Asset Tracking under Trucks & equipment. If you'd like to read what it does first, click the card.
- Click the switch on the Asset Tracking card.
The CRM takes you straight to the Asset Tracking page, and Asset Tracking now shows in your menu. The phone app's Features screen has the same switch and opens the page the same way.
Setting it up
The first time you open the page, you get a short setup with six steps. The numbered circles across the top show where you are, and you can click any step you've already reached to go back to it.
- Inventory: under What is it?, type a kind of thing you rent out, like a 20 yard dumpster. Fill in the First unit # and Last unit # (and a Prefix if you use one), then click Add to inventory. Do this for each kind, then click Continue. This is the only step you have to do.
- Rental pricing: set a price for each rental length. You start with 1 day, 1 week and 1 month, and + Add a length adds more. For each price, choose what happens when the rental ends: One time: it just ends, One time: schedule the pickup, or, for whole weeks or months, Recurring: renews and bills again. Leave a price empty to skip that length. Each price becomes an item in your price book.
- Extra charges: tick the extras you bill on top of the rental and set your price. The ones marked Automatic add themselves to a job when they apply. If you tick Travel charge, you also enter how many miles are free and your yard address. You can add your own under Add your own.
- Contract: choose whether customers sign a rental contract on their phone before you take payment. You start with a standard contract you can edit.
- Job types: pick the job type that takes a unit out to the customer, the one that brings it back, and (optional) the one that dumps a unit and brings the same one back. If you don't have one yet, choose Create "Drop Off", Create "Pick Up" or Create "Dump and Return".
- You're set: a summary of what's in place, with Set up next to anything you skipped. Click Open Asset Tracking, or Book your first delivery to start a job.
Every step after Inventory has Skip for now. Each step saves as you leave it, so you can close the page and pick up where you left off.
Getting around the page
The page has six tabs, on the web and in the phone app:
- Map: every unit that's out, pinned at the customer's address, with how many days it's been there. On the web, your yard has its own Yard pin, and clicking a unit shows its photo, its job and Open in the list. In the app, tapping a pin shows the unit, and tapping its label opens the job.
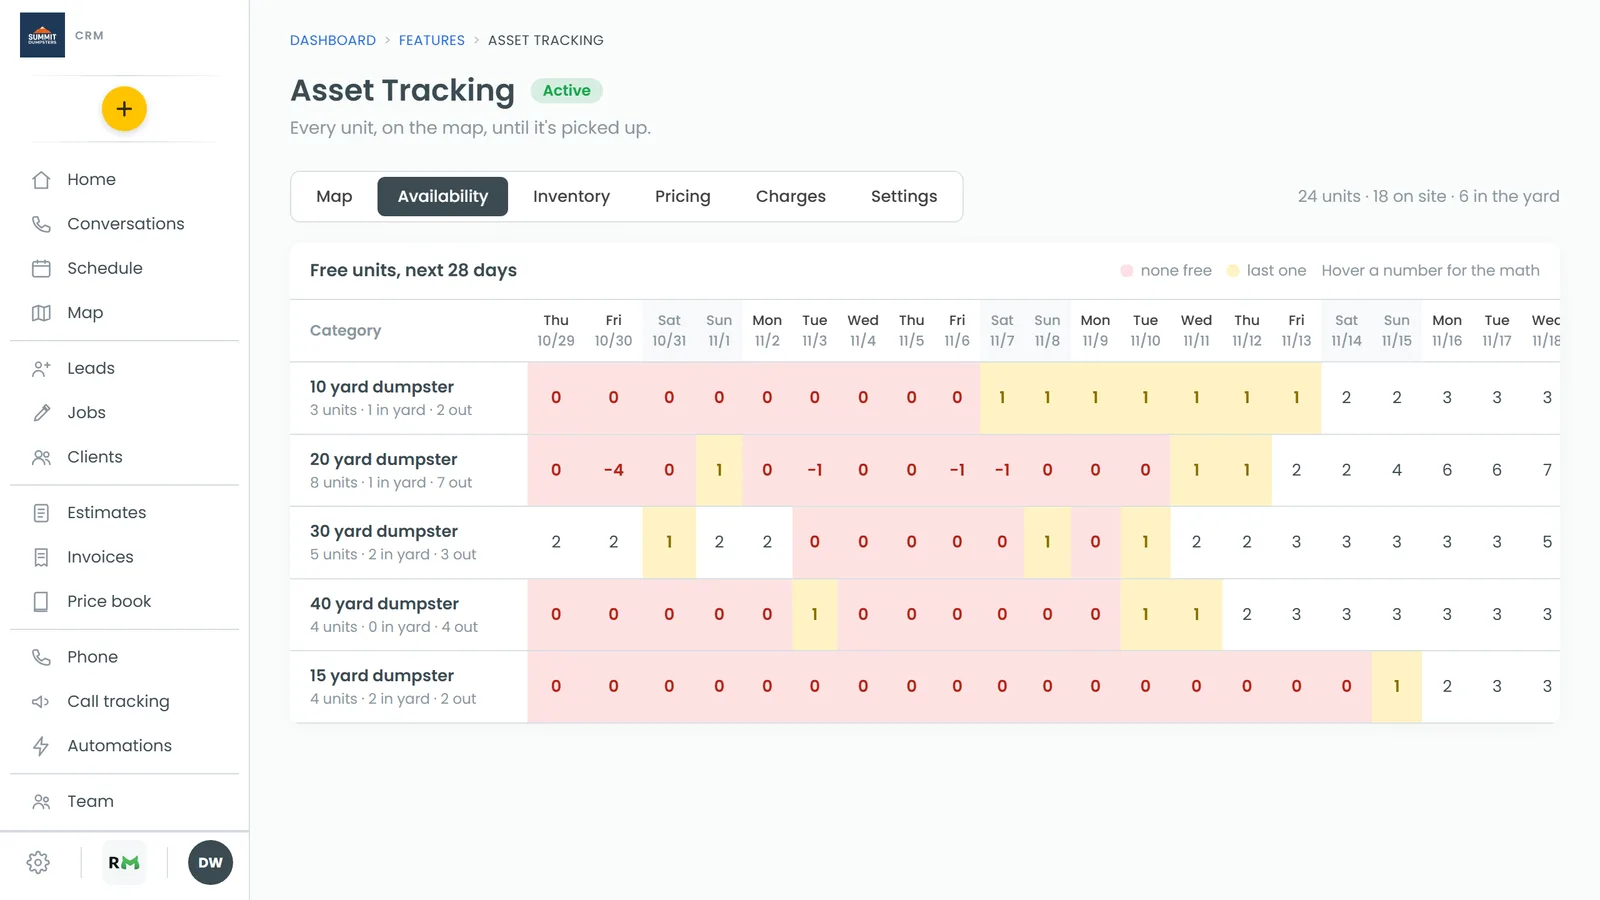
- Availability: how many units of each kind are free on each of the next 28 days. Hover a number on the web, or tap it in the app, to see how it's worked out.
- Inventory: your full list of units. Filter by category, or by All, In the yard, Out and Untracked (out, but with no spot on the map). Units that are out have Move and Release. Click + Add units (Add units in the app) to add more.
- Pricing: a Rental rates grid, one row per item and a column per rental period, on top of the price book itself. In the phone app, this tab opens the price book.
- Charges: the extras that add themselves to jobs, each with a switch. Charges you don't use sit under Not in use.
- Settings: your Yard, Unit categories, Job types and Contracts, plus a What you rent line at the bottom with Change.
How the counts work
You never type in a count. Next to the tabs you'll see how many units you have, how many are on site and how many are in the yard. On the web, the Map and Inventory tabs also show each category with how many are in yard, how many are out and the total. Those numbers come straight from the units themselves. Putting a unit on a delivery takes one out of the yard, and releasing it puts it back.
Bookings count too. A delivery holds a unit of its kind for the length of the rental, and the Availability tab adds those up. If a booking would leave you short on a day, it waits under Waiting for approval on that tab until an admin clicks Approve or Decline.