In this article, you'll learn how to send a work order from a job. A work order lays out the job for your customer before you start, and you can ask them to sign it so you've got their OK in writing.
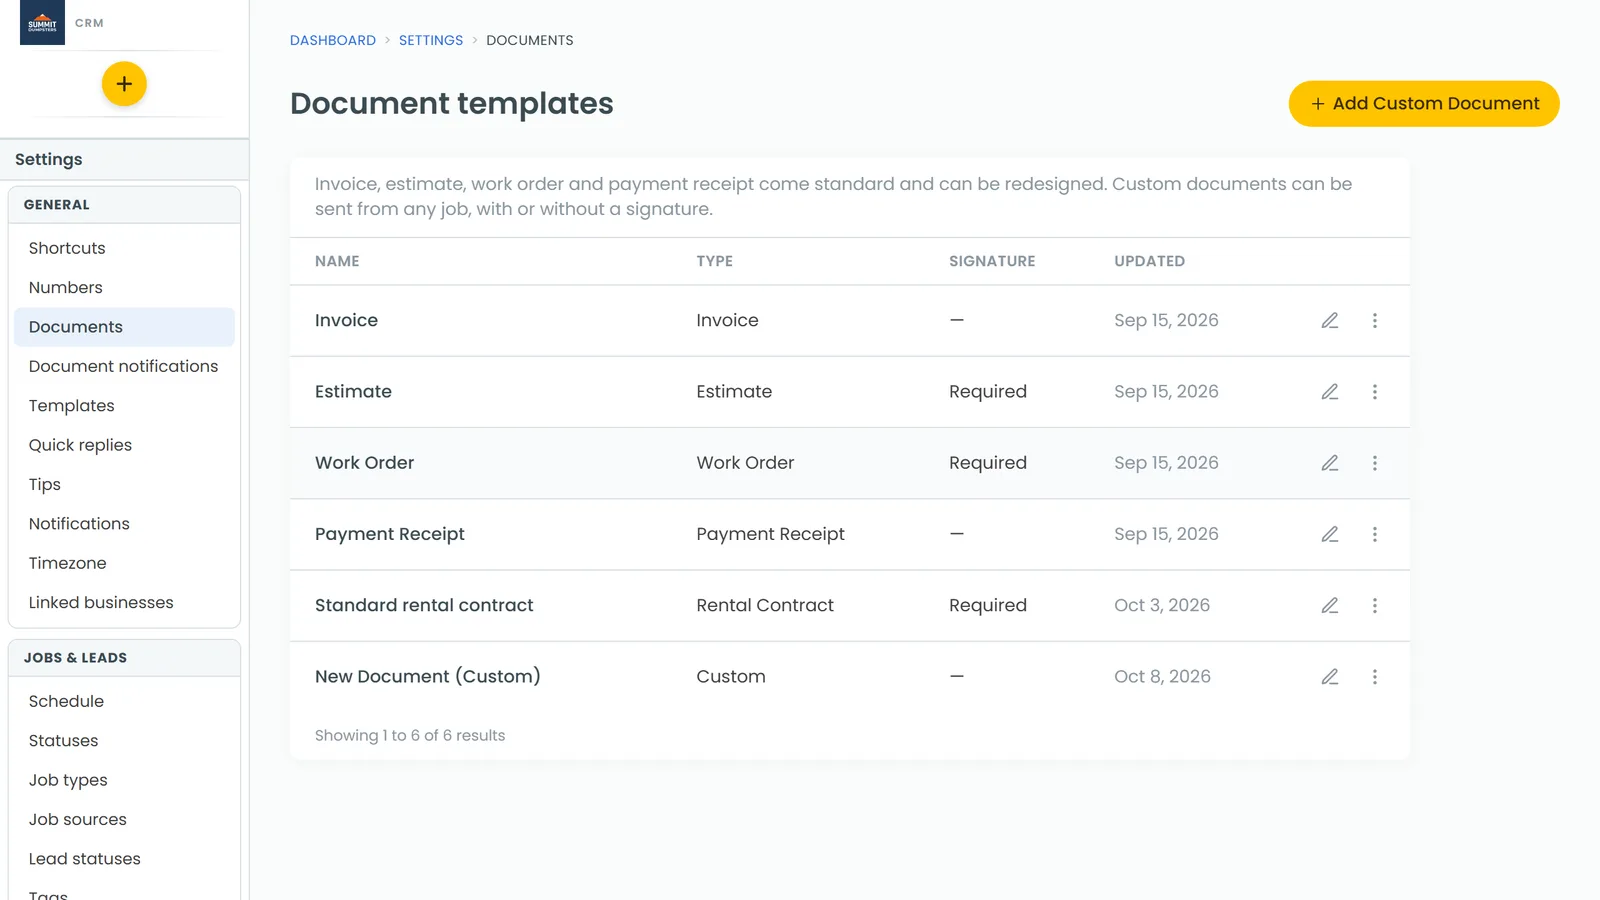
Work Order is one of the four document templates every account starts with, along with Invoice, Estimate and Payment Receipt. It fills itself in from the job, so there's nothing to type before you send it.
To open the send window on the web:
- Open the job you want to send a work order for.
- Click Actions at the top of the job.
- Click Send document.
You can also open the job's Attachments tab and click Send document in the Documents section.
To open it on the phone app:
- Open the job and stay on the Details tab.
- Scroll down to the Documents section.
- Tap Send document.
Send a work order
The Send document window opens with Work Order already picked under Document, so most of the time you only need to choose how it goes out.
- Check that Work Order is selected under Document.
- Leave Ask the customer to sign it on if you want a signature, or turn it off if they only need to read it. The Work Order template has a signature box, so this starts on.
- Choose how to send it:
- Text sends it to the customer's phone number.
- Email sends it to the customer's email address.
- Copy link makes the link and copies it so you can paste it wherever you like. On the phone app this button is Share link, and it opens your phone's share sheet.
The window closes once a text or email goes out. On the phone app you'll also see "Document texted to the customer." or "Document emailed to the customer." On the web, a copied link shows under the buttons as Link copied: followed by the link.
What your customer gets
The text or email carries a link into your customer portal, where the customer sees the work order with your logo and the job's details. If you asked for a signature, they sign it right there.
The wording comes from the template's Document settings. Out of the box it says hi using the customer's first name and tells them their work order is ready to view, with the link underneath. Emails go out with the subject "View your work order from" followed by your company name.
See where it's got to
Every document you've sent from a job is listed in its Documents section: under the Attachments tab on the web, and on the Details tab in the phone app. Each one shows where it's at:
- Sent by text or Sent by email, with the date
- Viewed, with the date the customer first opened it
- Signed by the customer's name, once they sign
- awaiting signature after the name, while you're still waiting on them
Click or tap a document to see it the way the customer does.
Change what the work order looks like
The Work Order template lives in Settings › Documents. Open it there to change the layout, add your own wording or move the signature box. Every work order you send after that uses the new design. Ones you've already sent stay the way they were.
Related articles
- Limiting what customers see on documents
- Creating estimates and invoices from jobs
- Generating and sending custom documents
- Collecting client signatures
- Sending custom documents from the phone app