In this article, you'll learn how to send a document built from one of your templates to a customer straight from a job, and how to see when they've opened or signed it. It's the way to get a work order, a waiver, a contract or any other custom document in front of a customer without leaving the job.
Your templates live in Settings › Documents. Estimates and invoices have their own send buttons on the job, so the steps below are for work orders and the documents you've built from scratch.
To open the job you want to send from:
- In the menu, click Jobs.
- Click the job.
Sending a document from a job
There are two ways in on the web, and both open the same Send document window.
- Click the Attachments tab. Under your files there's a Documents section.
- Click Send document. You can also click Actions at the top of the job and pick Send document.
- Under Document, pick the template. Your built-in templates show by name. Anything you built yourself shows with (Custom) after its name. The list opens on Work Order when you have one.
- Tick or untick Ask the customer to sign it. It starts out matching the template, so a template with a signature box asks for one by default.
- Choose how it goes out:
- Text sends the link to the phone number on the customer's record.
- Email sends the link to their email address.
- Copy link creates the link and copies it to your clipboard so you can paste it anywhere. The window shows the link under Link copied.
The message the customer gets uses the subject and message saved on the template. If the template has none, the CRM sends a short note with your company name and the link.
What the customer sees
The text or email carries one link. Opening it signs the customer into their customer portal and shows the document filled in with the job's details.
- If you asked for a signature, the page says Your signature is needed below and ends with a Sign to approve box. They draw their signature, type their full name and click Sign document. A Clear link lets them start over.
- Once signed, the page shows Signed with the date, and the signature appears on the document itself. A document can only be signed once.
- On a computer, the ⋮ menu offers Print and Download as PDF. On a phone, Download PDF asks for an email address and sends the PDF there.
Keeping track of what's been sent
Every document you've sent from a job is listed under Documents on the Attachments tab, newest first. Each one shows where it's got to:
- Link created when you copied the link but haven't texted or emailed it.
- Sent by text or Sent by email with the date.
- Viewed with the date the customer first opened it.
- Signed by their name and the date.
A document that still needs a signature shows awaiting signature after its name. Click any row to open the customer's own view of it.
Getting told when a document is viewed or signed
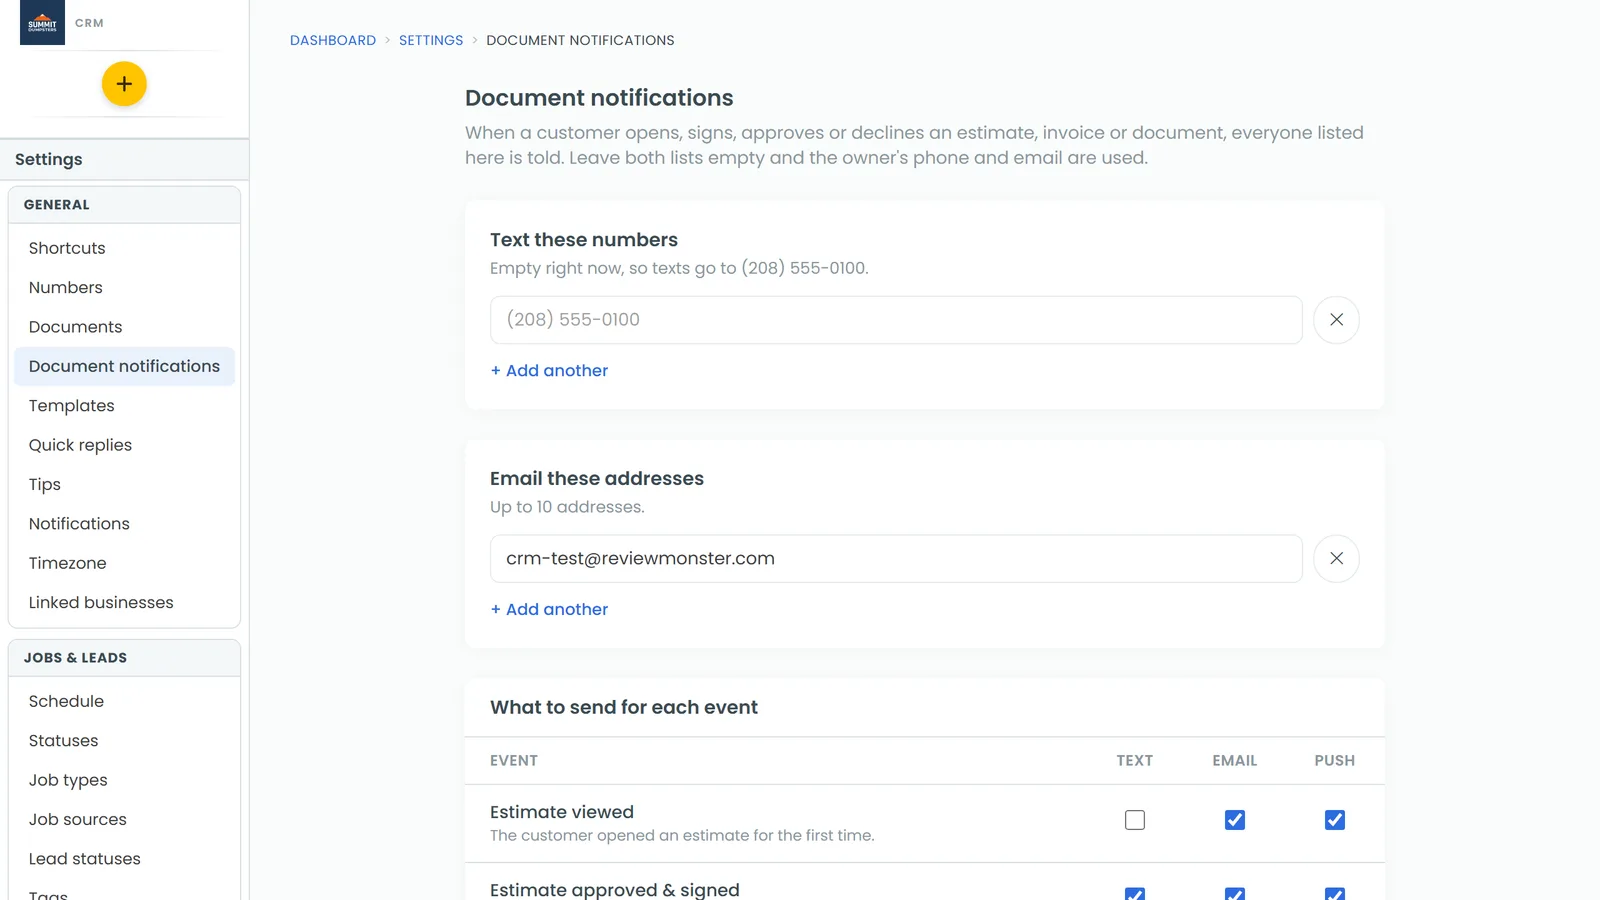
The office hears about the first view and the signature by text, email or app push. Who hears, and how, is set in one place. You need an admin login to change it.
To choose who gets told:
- At the bottom of the menu, click the gear (Settings), then Document notifications.
- Under Text these numbers, add up to 10 mobile numbers. Click + Add another for each one.
- Under Email these addresses, add up to 10 email addresses.
- Under What to send for each event, tick Text, Email or Push on the Document viewed and Document signed rows.
- Click Save.
On the phone app
The app sends documents the same way. Open the job, stay on the Details tab and scroll past Attachments to Documents. Tap Send document, pick the template, switch Ask the customer to sign it on or off, then tap Text or Email. The third choice is Share link, which opens your phone's share sheet instead of copying to the clipboard. The sent list and its statuses are the same as on the web, and tapping a row opens the customer's view.
Related articles
- How to create a custom document from scratch
- Customizing estimate, invoice and receipt templates
- Generating and sending work orders
- Sending custom documents from the phone app
- Collecting client signatures