In this article, you'll learn how to choose which events reach you and how: a push to your phone, a spot in Needs attention, a count on the app icon, or a text or email to the office. You'll also pick your sounds and, if your techs are tracked by their phones, who hears when a tech's location is off.
Set it up once and you hear about what matters without your phone buzzing all day.
To open your notification settings:
- In the dashboard menu, click Settings.
- Click Notifications under it.
It's the same page as Settings › Notifications in the CRM and in the phone app. They all save to one place, so a change in one shows up in the others.
How the grid works
Events are grouped into cards: Communications, Leads & booking, Jobs, Team schedule, Money, Documents and Reviews. Each row is one event, like New text message, Missed call, Estimate approved or New review left. Hover the (i) beside a name for a one-line explanation.
Each row has five checkboxes. The first three are yours alone, and everyone on your team sets their own:
- Push sends a notification to your phone.
- Needs attention adds it to the Needs attention list on the app's home page.
- App badge adds it to the number on the app icon and to the total on the app's home page.
The last two are company-wide:
- Text texts the office about the event.
- Email emails the office about it.
Tick or untick a box and it saves right away. There's no Save button for the grid.
What the badge counts
Some events clear themselves. Unread messages and calls, new leads, approved estimates and jobs past their day come off the icon as you deal with them.
Everything else has nothing to clear. So when you tick App badge on one of those rows, Needs attention turns on with it, and the item stays in Needs attention on the app's home page until you tap Dismiss. Untick Needs attention on one of those rows and App badge goes off too.
Choose who gets the office texts and emails
The Text and Email column headings are links. Under each one you'll see who gets them right now: a number or address, a count, or the owner while the list is empty.
- Click Text (or Email) at the top of any card.
- In Who gets the texts (or Who gets the emails), type a number or address and click Add.
- Click Remove beside anyone you want off the list.
- Click Save.
While a list is empty, alerts go to the account owner. Remove everyone and they go back to the owner.
These are the company's one set of alert lists. The chat widget, online booking, voicemail, on-my-way and document pages show and edit the same lists.
Pick your sounds
The Sounds block sets what plays for Incoming calls, Texts, Emails and New leads. These are your own choices too.
- Pick a sound from the list beside each one. It plays as you pick it.
- Click Play to hear it again.
- Tick Desktop to hear it in the CRM in a browser or the installed web app. Tick Phone to hear it in the phone app.
Calls always ring on the phone, so the Phone box for Incoming calls stays ticked.
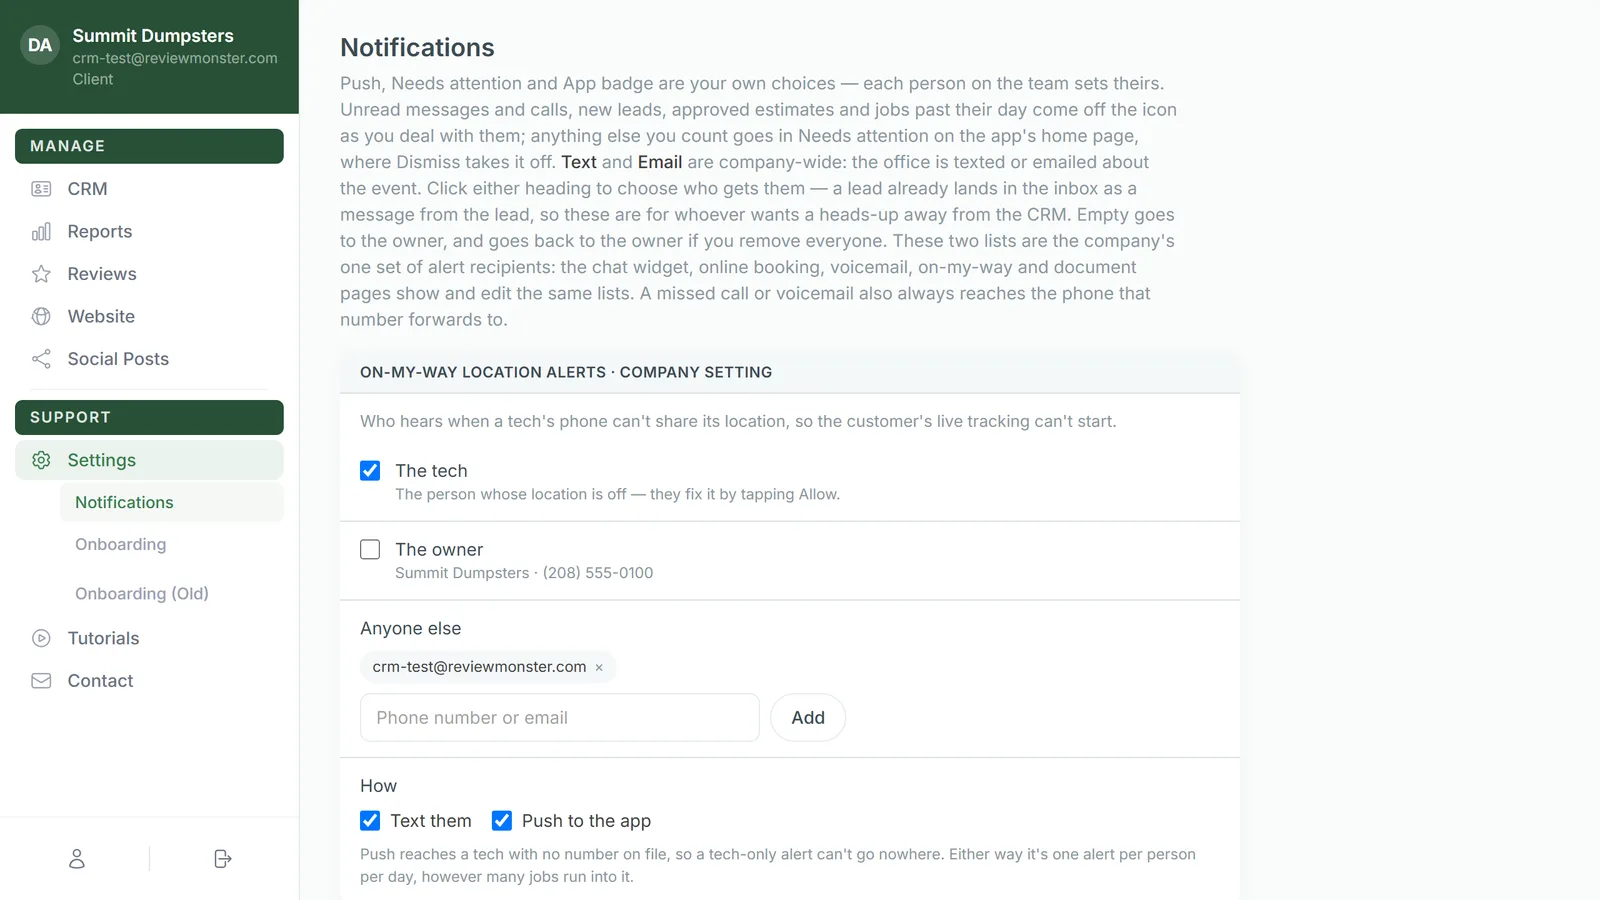
On-my-way location alerts
If your company tracks techs with Phone GPS, you'll also see On-my-way location alerts · company setting. If it doesn't, the block doesn't show at all.
It decides who hears when a tech's phone can't share its location, so the customer's live tracking can't start.
- Tick The tech, The owner, or both.
- Under Anyone else, type a phone number or email and click Add. Click the × on anyone to take them off.
- Under How, tick Text them, Push to the app, or both.
Each person gets one alert per day, however many jobs run into it. Only an account admin can change this block.
On the phone app
In the app, open Settings › Notifications. It's the same page in a phone-sized layout:
- The switch on each row is Push.
- The numbered circle is App badge.
- The chips under the name are Needs attention, Text and Email.
- Tap the (i) to read what the event is.
The office lists sit at the top in Who gets the texts and emails, as Texts go to and Emails go to. On the phone there's no Save step: each Add or Remove saves straight away.
In Sounds, tap a row to open its list, then tap a sound to hear it and keep it. The Phone chip for Incoming calls reads Phone always rings.