In this article, you'll learn how to snap a receipt at the register, save it, and check what the scan read. The photo is filed where it can't get lost, and the merchant, amount, date and category are read for you.
To open Receipts:
- On the web, click Receipts in the menu under Features.
- On the phone app, open the menu and tap Receipts.
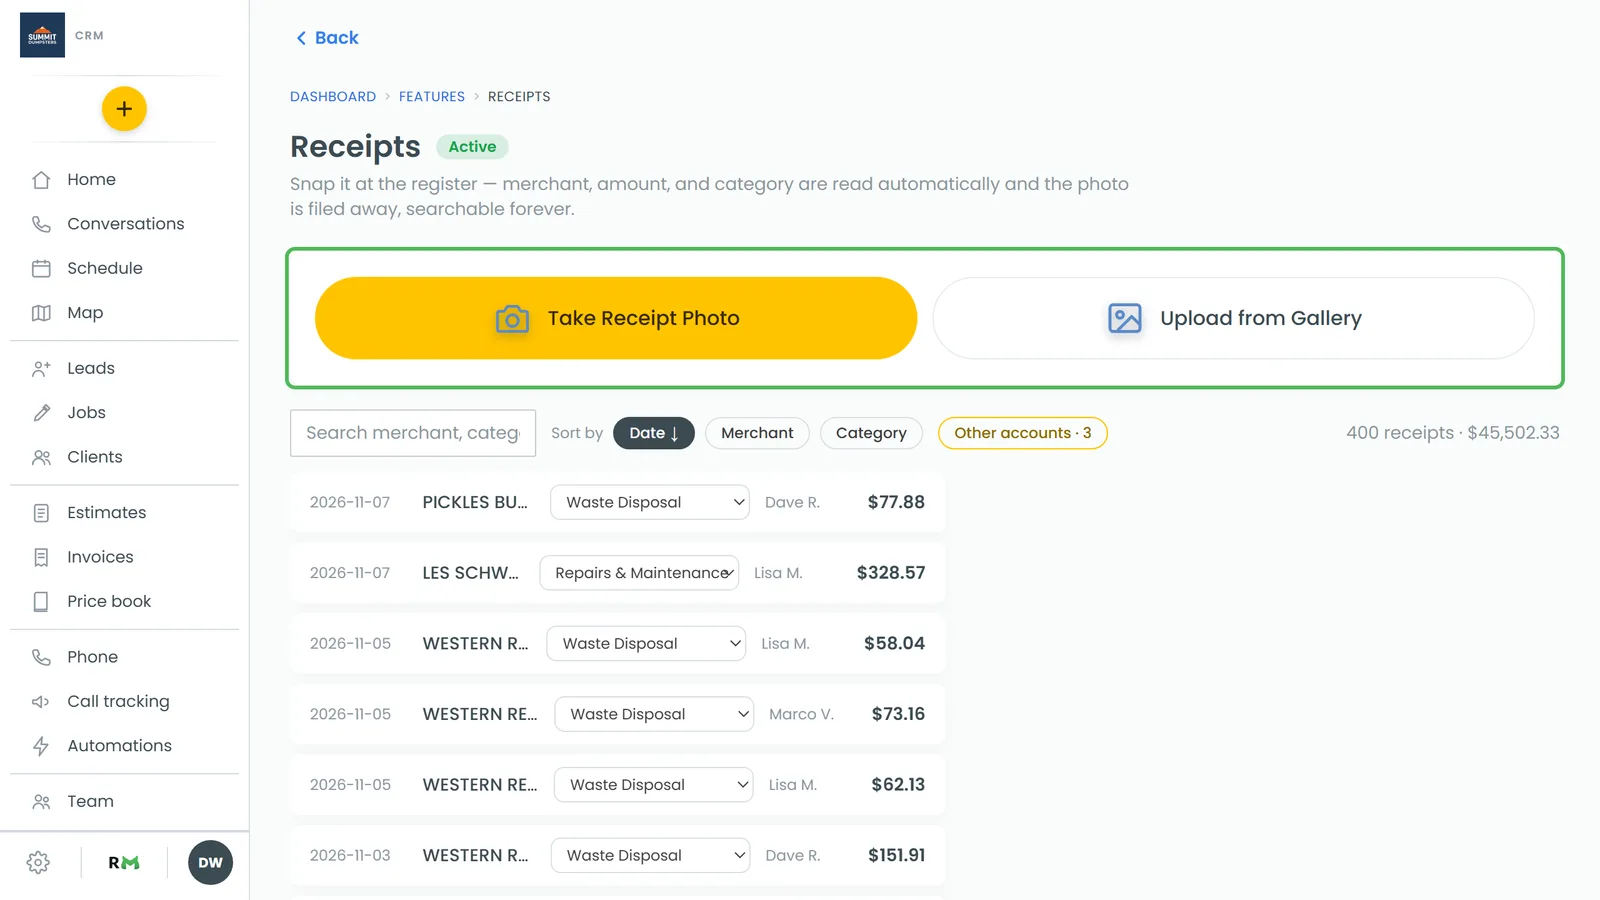
Take or upload the photo
On a desktop, the capture card has two buttons:
- Click Take Receipt Photo to use your device's camera.
- Or click Upload from Gallery to pick a photo you already have.
On the app, and on the web at phone width, the card shows two icon buttons instead: a camera on the left and a gallery on the right. The first time, the app asks for camera or photo library access. If you said no earlier, allow it in your phone's Settings and try again.
Add details and choose what paid for it
Once you've picked a photo, a preview appears with a few fields under it.
- Type anything useful in Expense details (optional — helps categorization), like the job number or what the fuel was for.
- Under Paid from, leave Business account selected if a connected bank account paid for it. That lets the receipt match itself to the bank charge later.
- Pick Other if it was paid with a personal card, cash or Venmo. A note explains it won't match a bank charge and goes on the Other accounts list for a manual bookkeeping entry, so put anything the bookkeeper needs in the details box.
- Click Scan and Save Receipt. Click Cancel if you picked the wrong photo.
What happens next
A progress box takes over the card:
- Sending photo… shows the upload. On the web it has a percentage and asks you to keep the page open until the photo is sent. On the app it just says it only takes a second.
- Almost there… is the moment the web finishes handing the photo over. The app skips this one.
- Reading receipt… means the photo is sent and safe. You can leave the page or screen now. The reading finishes on its own.
- Receipt saved ✓ shows the merchant, amount, date and category the scan read. If the reading is still going, the box says it's still reading the details and updates by itself.
The new receipt appears in the list below. While it's being read, its row says processing…. If the scan couldn't read it, the row says needs review with a retry link, and a message under the card says the receipt was saved but the details couldn't be read. The photo is already saved either way.
No signal? It waits on your device
On the web, every photo is saved to your device before anything is sent. With no connection you'll see No connection — receipt queued. It uploads automatically in the background, even if you close the app, and a line under the card counts how many receipts are waiting to upload.
If the server refuses a receipt, a red bar says how many receipts the server wouldn't take and that they're still on this device. Click Try again to send them again, or Discard to throw them away.
Check what the scan read and fix it
The scan's read is a starting point, not the final word. Open the receipt and check it against the photo.
On the web:
- Click a receipt row. A viewer opens with the photo and the fields above it.
- Correct Merchant, Purchase date or Amount. Each saves when you press Enter or click away, and shows saved ✓.
- Change Paid from in its dropdown if needed. Switching to Other shows a Needs a bookkeeping entry checkbox. Tick it once the expense is in the books and it reads Recorded in bookkeeping.
- Click Enlarge, or the photo itself, to see it bigger. Use the arrows to step through receipts, or the arrow keys on your keyboard.
- To fix the category, use the dropdown on the receipt's row in the list. It's hidden while the list is sorted by Category.
On the app:
- Tap a receipt row. A sheet opens with the photo and Merchant, Purchase date and Amount fields. Tap the photo to open it full screen.
- Change what's wrong and set Paid from if needed. With Other picked, a Recorded in bookkeeping switch appears.
- Tap Save.
The category can't be changed from the app. Use the dropdown on the web for that.