In this article, you'll learn how to set how long each online booking lasts and when customers are allowed to book. Get these right and customers only see times you can make, with room between jobs to drive from one to the next.
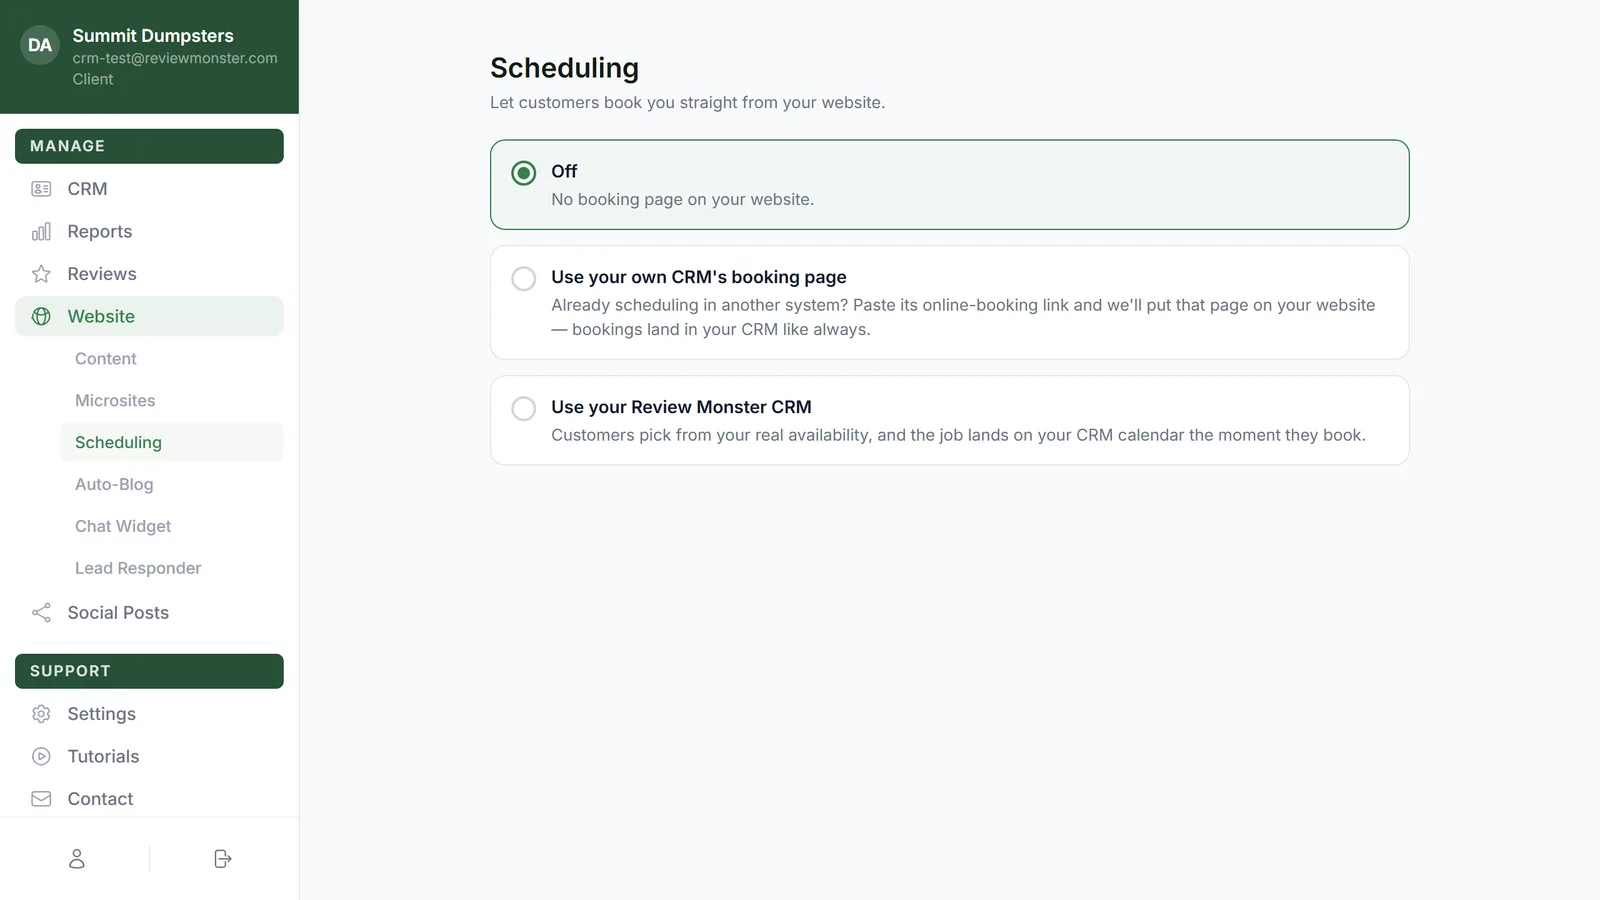
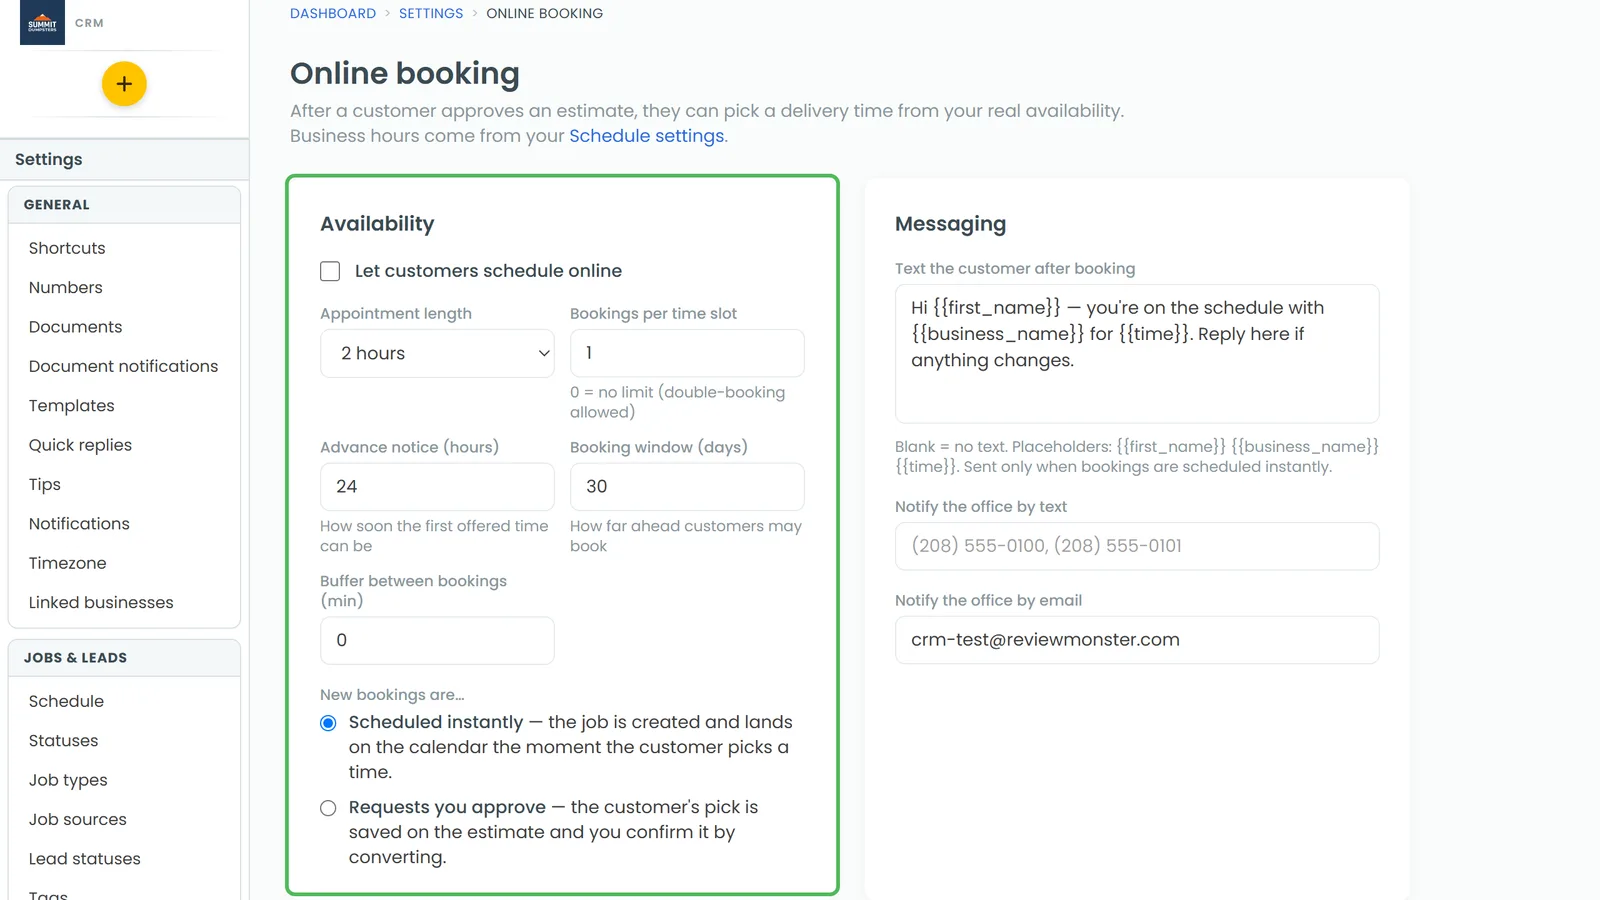
You can change these settings in two places: the CRM's Online booking settings page, or the Scheduling page under Website in your dashboard. Both save to the same settings, so a change in one shows up in the other.
To open the online booking settings in the CRM:
- At the bottom of the menu, click the gear (Settings).
- Under Phone & booking, click Online booking.
To open them from your dashboard instead:
- In the menu, click Website, then Scheduling.
- Pick Use your Review Monster CRM. The When customers can book and Appointment slots cards only show while this option is picked.
Set how long each appointment lasts
Every online booking gets the same length. There's no per-service length, so pick the one that fits most of your jobs.
- In the Availability card (CRM) or the Appointment slots card (dashboard), open the Appointment length dropdown.
- Pick a length. On the web you can choose 1 hour, 1h 30m, 2 hours, 3 hours, 4 hours or 8 hours.
Choose how many bookings can share a time
- In Bookings per time slot, type how many jobs can be booked for the same time. The most you can enter is 50.
- If you're fine with double-booking and don't want a limit, type 0.
Set advance notice and how far ahead customers can book
- In Advance notice (hours), type how much warning you need. This is how soon the first offered time can be. For example, 24 means nobody can book a time that starts within the next day.
- In Booking window (days), type how far ahead customers can book, from 1 to 120 days.
Leave room between jobs
In Buffer between bookings (min), type how many minutes you want kept free between back-to-back jobs. On the dashboard the field is labeled Buffer between bookings (minutes). Think of it as drive time.
Save your changes
- In the CRM and the phone app, click Save settings. You'll see Saved ✓ next to it.
- On the dashboard, click Save changes. The button only appears once you've changed something, and you'll see Saved beside it when it's done.
Where your business hours come from
The booking page only offers times inside your business hours, minus anything already on your calendar. In the CRM, those hours live under Business hours in your Schedule settings, not on the Online booking page.
You can also change them on the dashboard's Scheduling page, in the When customers can book card:
- Turn a day on and set its start and end times, or turn it off to show it as Closed.
- Turn on Open around the clock to ignore the hours and offer every day, all day.
- Turn on Bookable on holidays to allow bookings on US federal holidays.