In this article, you'll learn how to read your Setup page: how far along you are, what Review Monster is working on, and what's waiting on you. It's the quickest way to see where your account stands while it's being set up.
The Setup page is on the web dashboard only. It's not in the phone app.
To open the Setup page:
- Log in to your dashboard.
- In the menu, click Setup. It's the first item.
While your account is being set up, logging in brings you straight here. If you haven't finished your onboarding questions yet, you'll land on onboarding first. Once everything's in place, Review Monster takes Setup out of your menu and you'll land on Reports instead.
The percentage at the top
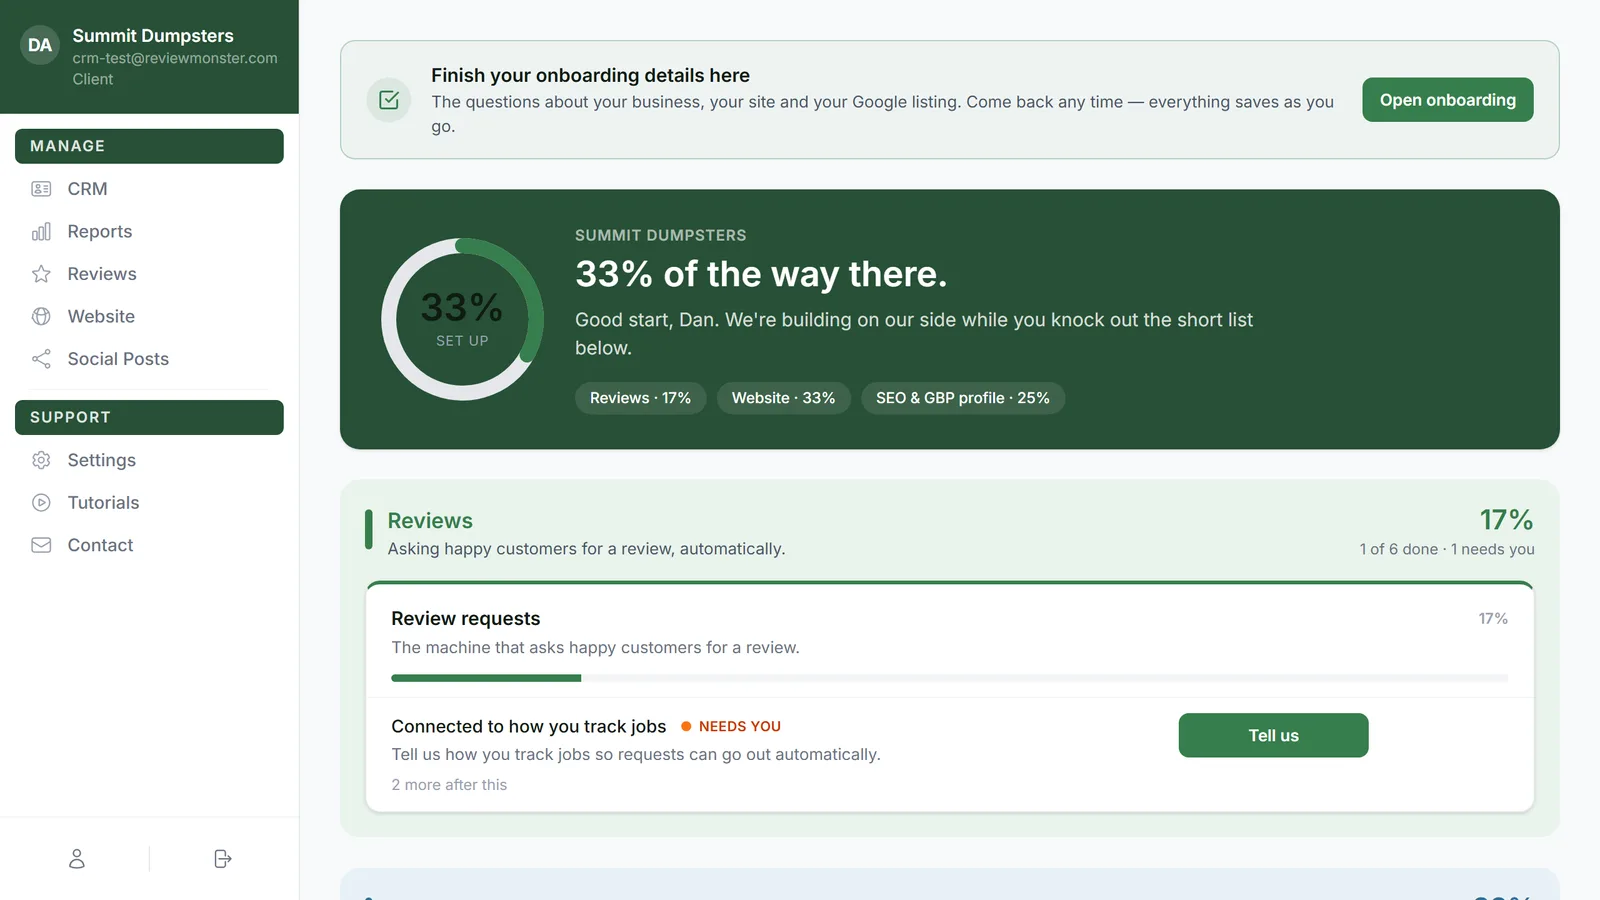
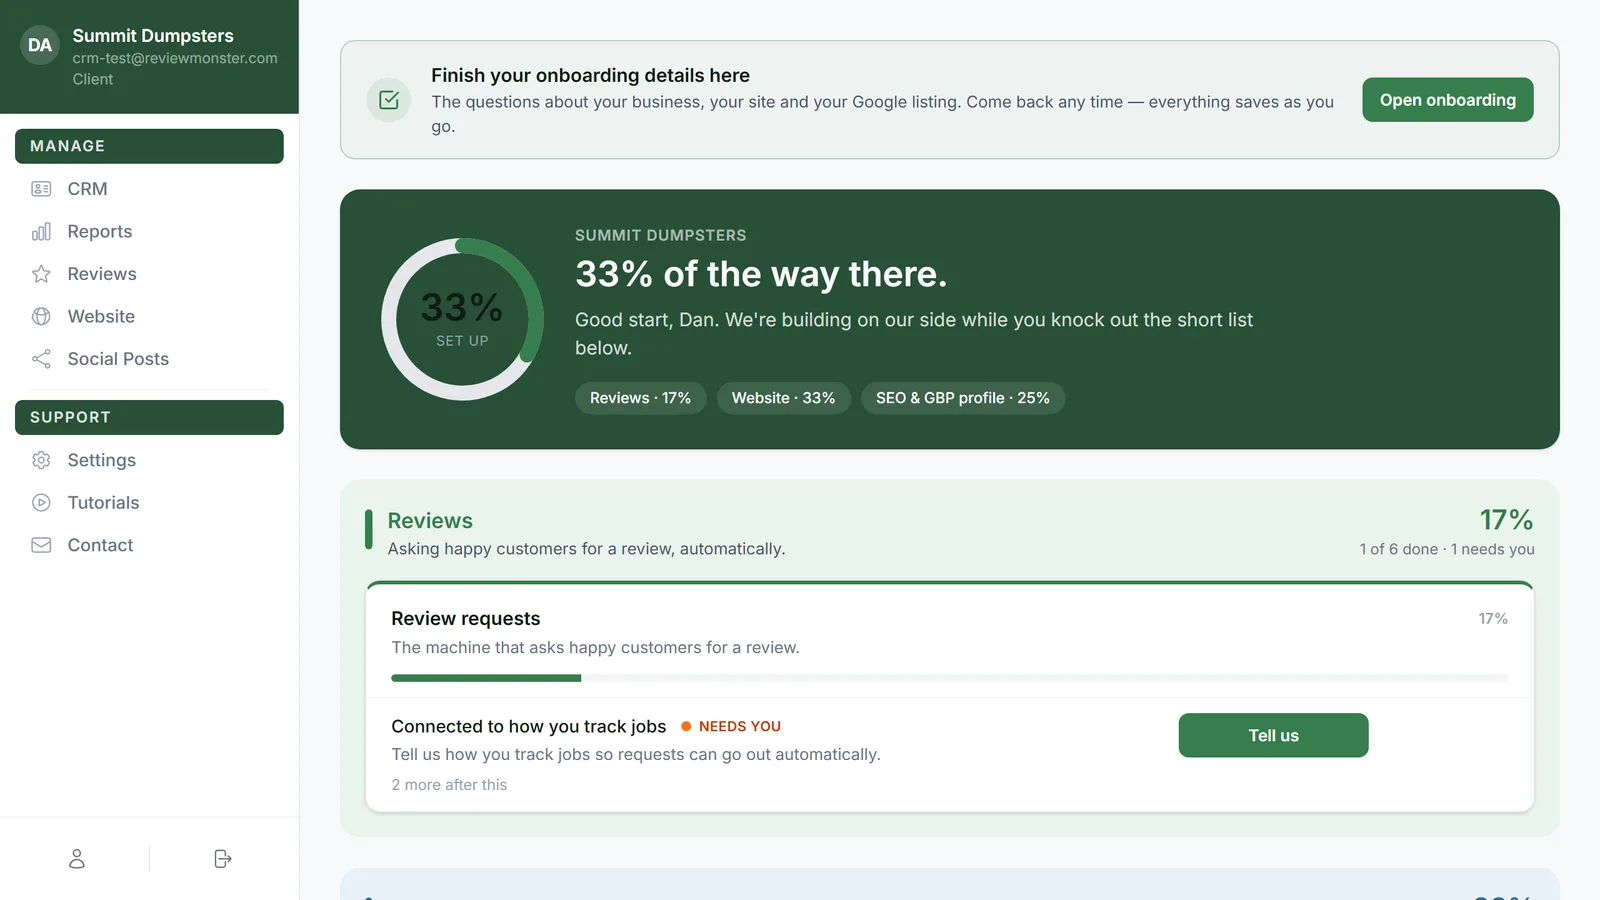
The dark green banner shows your business name, a ring with your overall percentage, and a headline like "40% of the way there." Under that is a short note that changes as you move along, from "Welcome aboard" at the start to "Everything's in place" at 100%.
The percentage counts every item behind the page, including a few account basics that don't get their own section, like your signed agreements, billing, business details, logo and which Google listing is yours.
Below the note there's a chip for each part of your plan, each with its own percentage:
- Reviews
- Website
- SEO & GBP profile
You only see chips for what's on your plan. Click a chip to jump down to that section.
Sections and tiles
Each part of your plan has its own colored section. The header shows the name, a one-line description, the section's percentage, and a count like "3 of 5 done · 2 need you."
Inside each section are tiles, one for each piece of the work, such as review requests, photos of your work or daily posts. Each tile has its own percentage and progress bar.
One thing at a time
Most tiles show just one item: the next thing to do. If there's more waiting behind it, you'll see a small line like "2 more after this." When that item's done, the next one comes up.
The tile for your Google listing is the exception. It's a checklist, so every setting that still needs a change shows at once.
Each item has a status next to its name:
- Needs you: something only you can do, like connecting an account or adding photos.
- We're on it: we're partway through it. Nothing for you to do.
When a tile has nothing left, it says All done here.
The buttons on each item
The buttons sit on the right of each item. What you see depends on the item.
Action buttons
Most items have one button that takes you where you finish the task, like Add photos, Connect Google or Open reviews. If it opens a different site, such as your preview site or your review page, it opens in a new tab.
How to change it
Items on your Google listing checklist have a How to change it button instead. Click it to open the steps right there under the item. Some also have a short extra section you can click to expand. Click Hide steps to close it again.
Mark done and Approve
Google doesn't show us some listing settings, so we can't check them ourselves. Those items have a second button:
- Mark done: click it once you've made the change.
- Approve: shown when we can see the current value and you only need to agree with it.
Once you click it, the item counts as done and drops off the tile.
Finished sections fold up
When every item in a section is done, the section shrinks to one line with its name and "all 5 done" (or however many there were). Click show to open it back up.
Finishing your onboarding
If you still have onboarding questions open, a green bar sits at the top of the page: Finish your onboarding details here. Click Open onboarding to go back to the questions about your business, your site and your Google listing. Your answers save as you go, so you can leave and come back.
Switching your domain over
When your new website is ready, a card shows up at the bottom of the Website section called "Switching (your domain) over to the new site." Click Switch it over to start. That has its own walkthrough, linked below.
Related articles
- What each item on your Setup page means
- Working through your Google listing checklist
- Onboarding overview
- Switching your domain over to your new site
- Reopening your onboarding steps from Settings