In this article, you'll learn how to create your Review Monster login right after you pay, and what the screens after checkout mean. This is the step that gives you access to your dashboard, so it's worth getting right the first time.
Everything here happens on the web, in the browser you checked out in.
To get to the account form:
- Finish paying on the checkout page.
- You're brought back to Review Monster automatically. A short progress bar at the top shows three steps: Payment, Account and Confirm.
If the payment went through, Payment shows a checkmark and you land on Account.
Filling in the Set up your account form
At the top of the card you'll see Payment successful, then Set up your account. This is where you create the login you'll use for your dashboard.
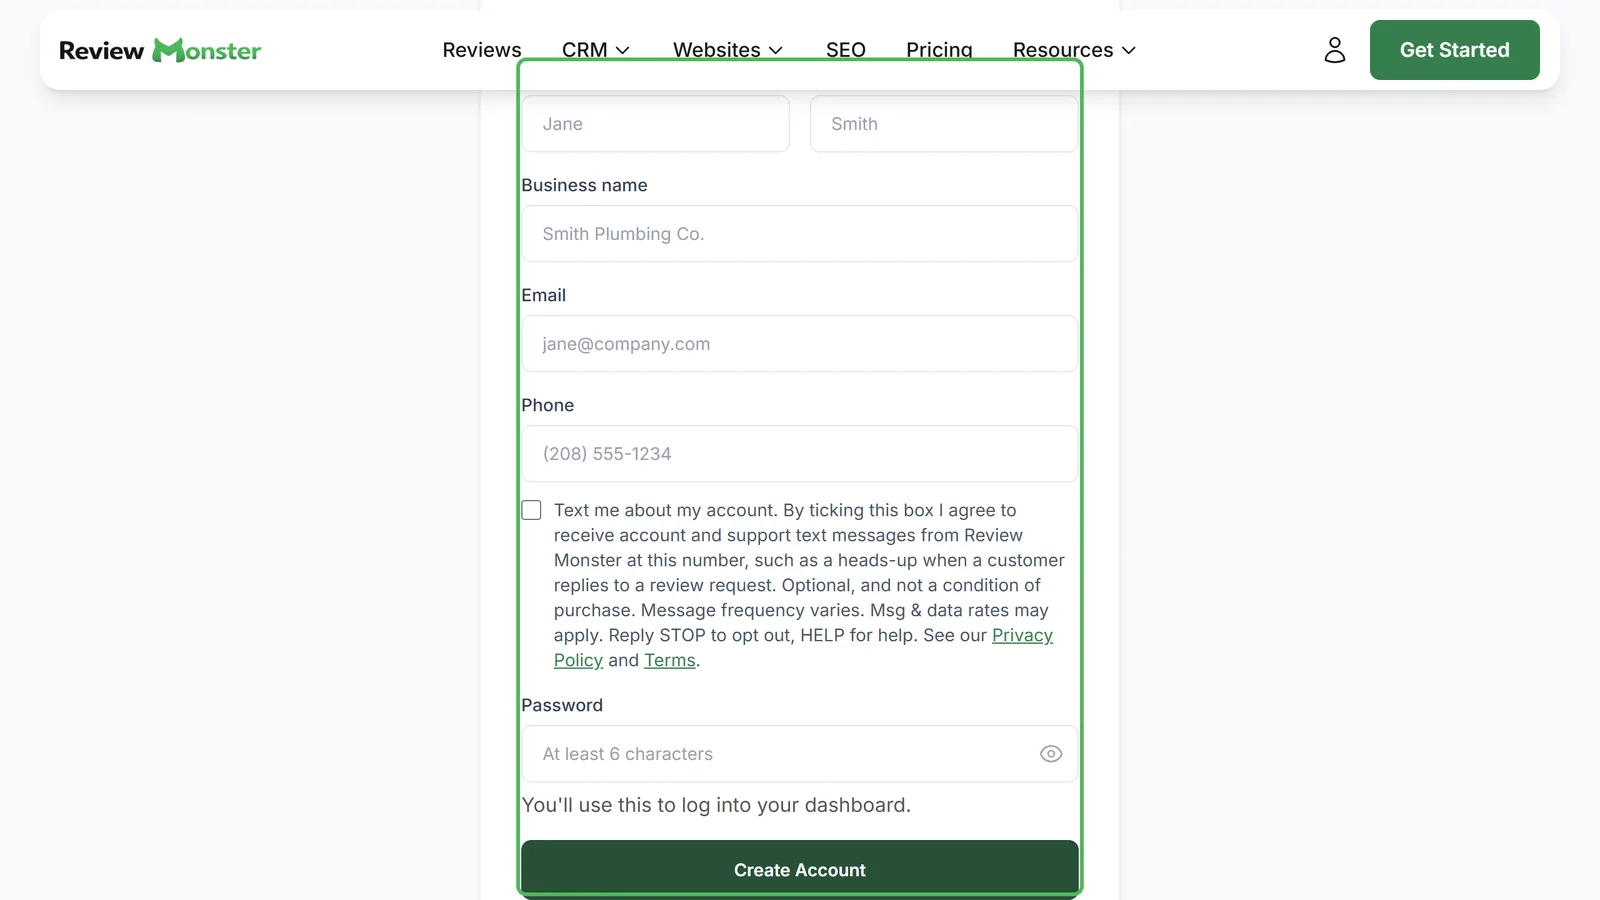
- Type your First name and Last name.
- Type your Business name. Write it the way you want customers to see it.
- Check the Email field. If your email came through from checkout, it's already filled in. Change it if you'd rather log in with a different address.
- Type your Phone number. It formats itself as you type, and it needs all 10 digits.
- If you want texts from Review Monster about your account, tick Text me about my account. This is optional. It covers account and support texts, like a heads-up when a customer replies to a review request. Leave it unticked if you don't want them.
- Type a Password of at least 6 characters. Click the eye icon in the field if you want to see what you typed.
- Click Create Account. The button changes to Creating account... while it works.
If the form shows an error
The form checks your entries before it creates anything. You'll see a red message under the fields if something needs fixing:
- All fields are required. Every field except the text box needs to be filled in.
- Please enter a valid email address. Check for a typo in your email.
- Please enter a valid 10-digit phone number. Add the missing digits.
- Password must be at least 6 characters. Make your password longer.
- An account with this email already exists or An account with this phone number already exists. That email or phone is already on a Review Monster account. Try logging in instead, or use a different one.
Fix the field and click Create Account again.
The Welcome screen
Once your account is created, you're signed in and the progress bar shows all three steps checked. The screen says Welcome... let's get started! with Setting up your new dashboard... underneath.
You don't need to click anything. After about five seconds, your onboarding opens on its own, and you can start setting up your account from there.
If your payment couldn't be processed
If checkout didn't go through, you'll see Payment couldn't be processed instead of the account form. The good news is you haven't been charged. This can happen if your card was declined, the checkout timed out, or there was a temporary problem.
Under A few things to try, the page suggests:
- Double-check your card number and expiration date.
- Try a different payment method.
- Make sure your bank isn't blocking the charge.
- Clear your browser cache and try again.
To try again:
- Click Try Again. This takes you back to the pricing page.
- Pick your plan and go through checkout again.
If it still won't go through, click Contact Support, or email info@reviewmonster.com.
Related articles
- Onboarding overview
- Checking your business details
- What happens when you finish onboarding
- Logging in and out
- How to reset your own password