In this article, you'll learn how to edit the pages on your website: the words and photos in each section, the order the sections run in, and each page's name, menu label and what Google shows for it. It's the quickest way to keep your site current without waiting on anyone.
To open your pages:
- In the menu, click Website.
- Click Content if it isn't open already.
- The Pages tab opens first.
Your edits go live on your site within a couple of minutes of saving.
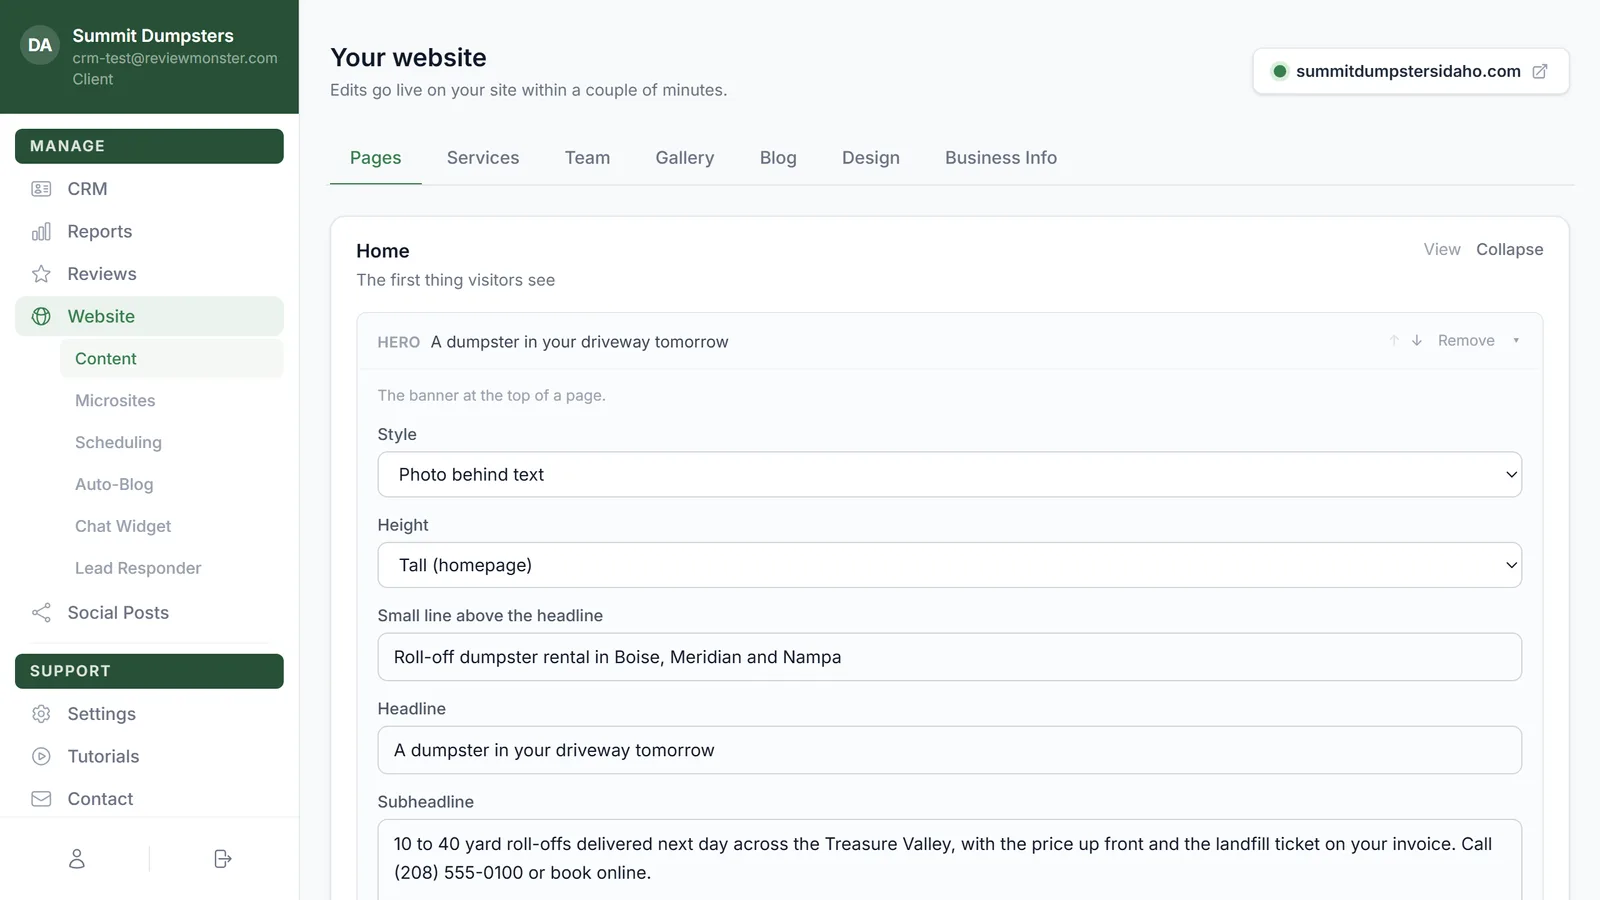
Finding your way around the Pages tab
Every page on your site has its own card. Home sits at the top and opens on its own. The rest stay closed until you open them.
Each card shows the page name. Under it, Home says "The first thing visitors see" and every other page shows its web address. On the right you'll see:
- View opens the live page in a new tab.
- Edit opens the page so you can change it. Once it's open, the same button reads Collapse, which closes it again.
- Delete shows only on pages you added yourself. The standard pages, like Home, About, Services, Contact and Gallery, can't be deleted.
Editing a section
An open page is a list of sections, top to bottom, in the same order visitors see them. Each section's bar shows what kind of section it is and its heading. The first one opens on its own.
- Click a section's bar to open it (or use the small arrow at the right end).
- Read the short line at the top. It tells you what the section does.
- If the section comes in more than one look, pick one from Style.
- Change the fields. Each kind of section has its own, like a heading, text or buttons.
- Click Save changes at the bottom of the page card.
Save changes only shows up once you've changed something. It reads Saved when it's done. If you see "Couldn't save — try again", click it again.
Some sections hold a list, like a set of cards or questions. Each item has its own box with ↑, ↓ and Remove, and there's a + Add button under the list for a new one.
Moving and removing sections
Every section's bar has three controls on the right:
- ↑ moves it up one spot.
- ↓ moves it down one spot.
- Remove takes it off the page.
None of it is final until you click Save changes. If you remove something by mistake, click Collapse without saving.
To add a new section, use + Add a section under the last one. See Sections you can add to a website page.
Adding a photo to a section
Sections that take a photo show a box for it.
- Click Add photo (or hover over the current picture and click Replace photo).
- Pick a JPEG, PNG, WebP or GIF from your computer.
- Wait for Uploading… to finish.
The photo is saved straight away. If you'd changed anything else on that page, the page saves first, so those changes are saved too.
Sections kept from your original site
If your site was moved over from an older website, some sections may show as Original section, with the line "Kept as built from the original site." You can move these with ↑ and ↓ or take them off with Remove, but you can't edit their words here. If you need the wording changed, ask us and we'll do it for you.
Changing a page's name, menu and Google listing
- Open the page with Edit.
- Under the sections, click Page settings (name, menu, Google title & description).
- Change what you need:
- Page name is the page's name in your editor and on the site.
- Show in the site menu puts the page in your site's menu. It's only on pages you added.
- Menu label is the shorter name the menu shows. It appears once Show in the site menu is ticked. Leave it empty to use the page name.
- One-line summary shows on a parent page's cards that link to its sub-pages.
- Google title is the title Google shows in search results.
- Google description is the short blurb under that title in search results.
- Click Save changes.
Click Hide page settings to fold these away again.
Related articles
- Sections you can add to a website page
- Adding and removing pages on your website
- Customizing your website's menu
- Changing your website's colors, fonts and layout
- Website overview