In this article, you'll learn how to add your past customers during onboarding so each one gets a review request. People who've already used you are the easiest reviews you'll ever get, and this step lets you start asking before your first new job is even done.
The step is optional. If you don't have a list handy, you can skip it and add people later from your dashboard. It's on the web only.
To get to the Contacts step:
- Work through onboarding until you reach the screen marked Reviews · optional with the heading Past customers to ask.
- You'll see two cards: Add Single Contact and, below the OR line, Upload a CSV file of your contacts. Use either one, or both.
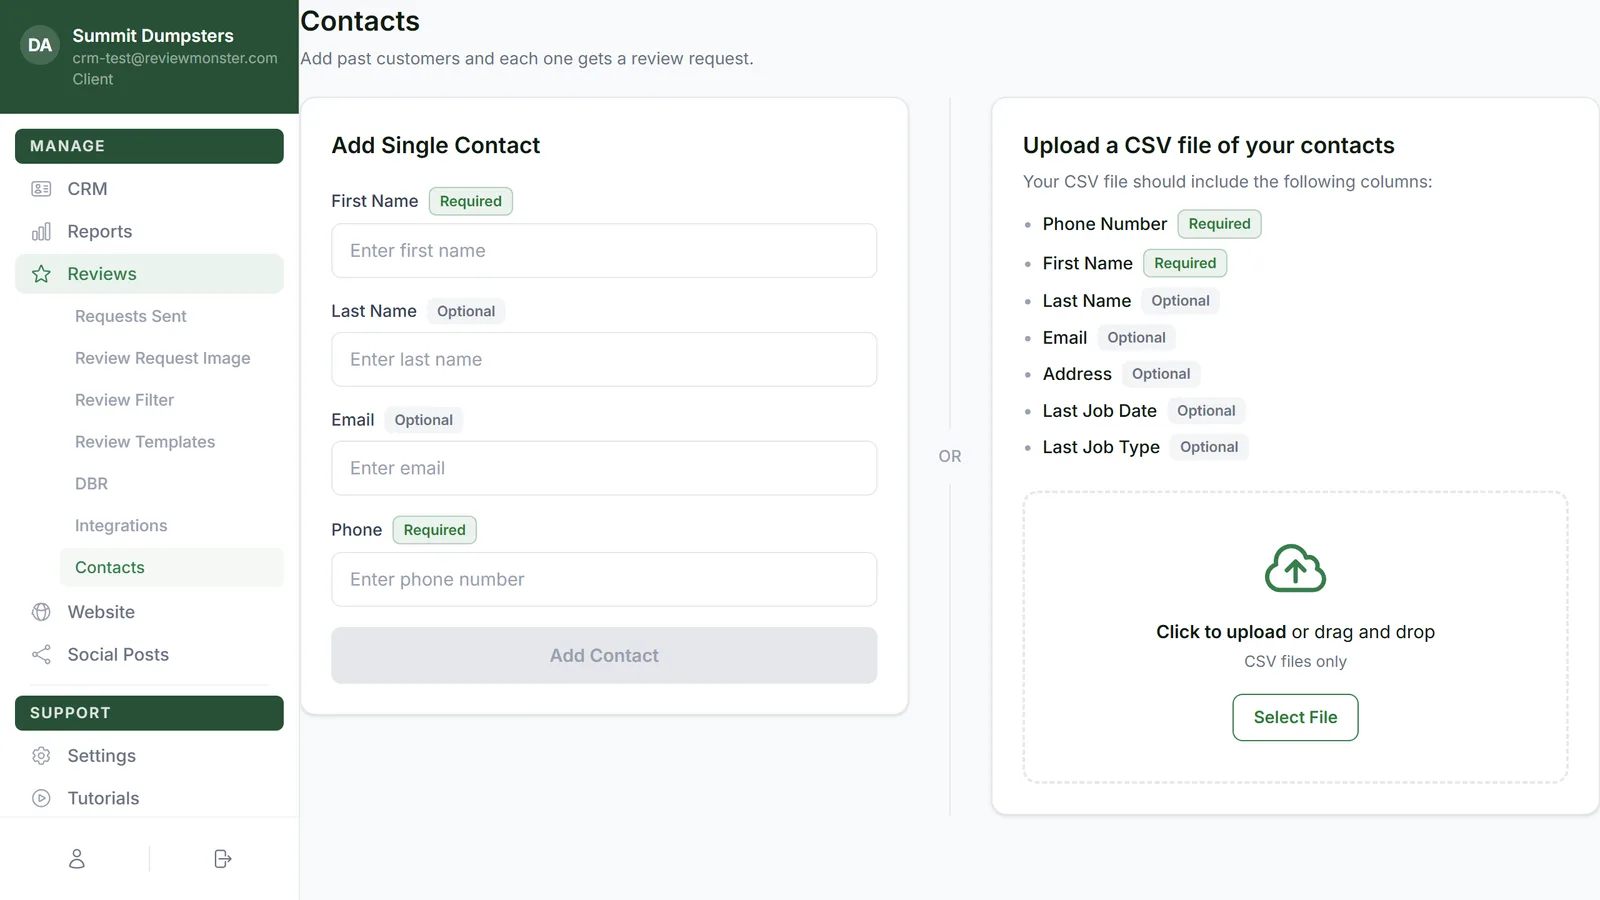
Add one customer at a time
This is the quickest way if you only have a handful of people, or you're typing names in from memory.
- In the Add Single Contact card, type the customer's First Name. It's marked Required.
- Type their Phone. It's also Required, and it needs to be a full 10-digit number (a leading 1 is fine).
- Add a Last Name and Email if you have them. Both are Optional.
- Click Add Contact.
If everything went through, you'll see a green line saying the person was added and queued for a review request, and the form clears so you can add the next one. If they're already waiting for a request, it says they're already in the queue instead, and nobody gets asked twice.
Upload a CSV of your customers
If you can export a customer list from your old software or a spreadsheet, upload it here instead.
The card lists the columns your file can have:
- Phone Number and First Name are Required.
- Last Name, Email, Address, Last Job Date and Last Job Type are Optional.
You don't have to rename your columns to match exactly. Common names like "Mobile", "Cell" or "Given name" are picked up too.
- Drag your file onto the dashed box, or click Select File (or anywhere in the box) and choose it. It says CSV files only, and that's all it takes.
- Check the line that shows your file name and how many contacts were found.
- Click Add followed by the number of contacts, for example Add 48 contacts. Click Cancel if you picked the wrong file.
- Read the summary. It tells you how many were added, how many were already queued, and how many were skipped. Each skipped row is listed with its row number and the reason.
Every number and email is checked as it's added. Anyone who's asked not to be contacted, or has already left you a review, is skipped.
Moving on
Every person you add here gets a review request. When you're done:
- Once you've added at least one person, the button reads Continue with the number you added, like Continue (12 added). Click it to go to the next step.
- If you didn't add anyone, click Skip for now. Continue only works once someone's been added.
- Click Back to return to the previous step.
You can add more people any time after onboarding. In your dashboard, open Reviews and click Contacts. You'll find the same two cards there.
Related articles
- How to add customers for review requests
- Uploading a CSV of past customers
- How review requests work
- Onboarding overview
- Reactivating past customers with DBR