In this article, you'll learn how to turn on online booking so customers can pick a time without calling you. It saves you phone tag, and people who book themselves tend to show up.
Online booking has two parts, and they're switched on in two different places:
- The booking page on your website. This is what most people mean by online booking. You turn it on in your Review Monster dashboard, not inside the CRM.
- Online booking settings in the CRM. A separate page with its own switch, Let customers schedule online, that's tied to estimates rather than your website.
There's nothing to buy or add from the Features store for either one.
Turn on the booking page on your website
The booking page only exists on a website we host for you. If your site isn't set up yet, the Scheduling page says "Your website isn't set up yet. Once it's live, you'll manage scheduling right here."
To open the Scheduling page:
- In your Review Monster dashboard, click Website in the menu.
- Click Scheduling under it.
You'll see three choices:
- Off — no booking page on your website.
- Use your own CRM's booking page — if you already book in another system, paste its booking link into Booking page link and we'll show that page on your website. The link has to start with https://.
- Use your Review Monster CRM — customers pick from your real availability, and the booking lands on your CRM calendar.
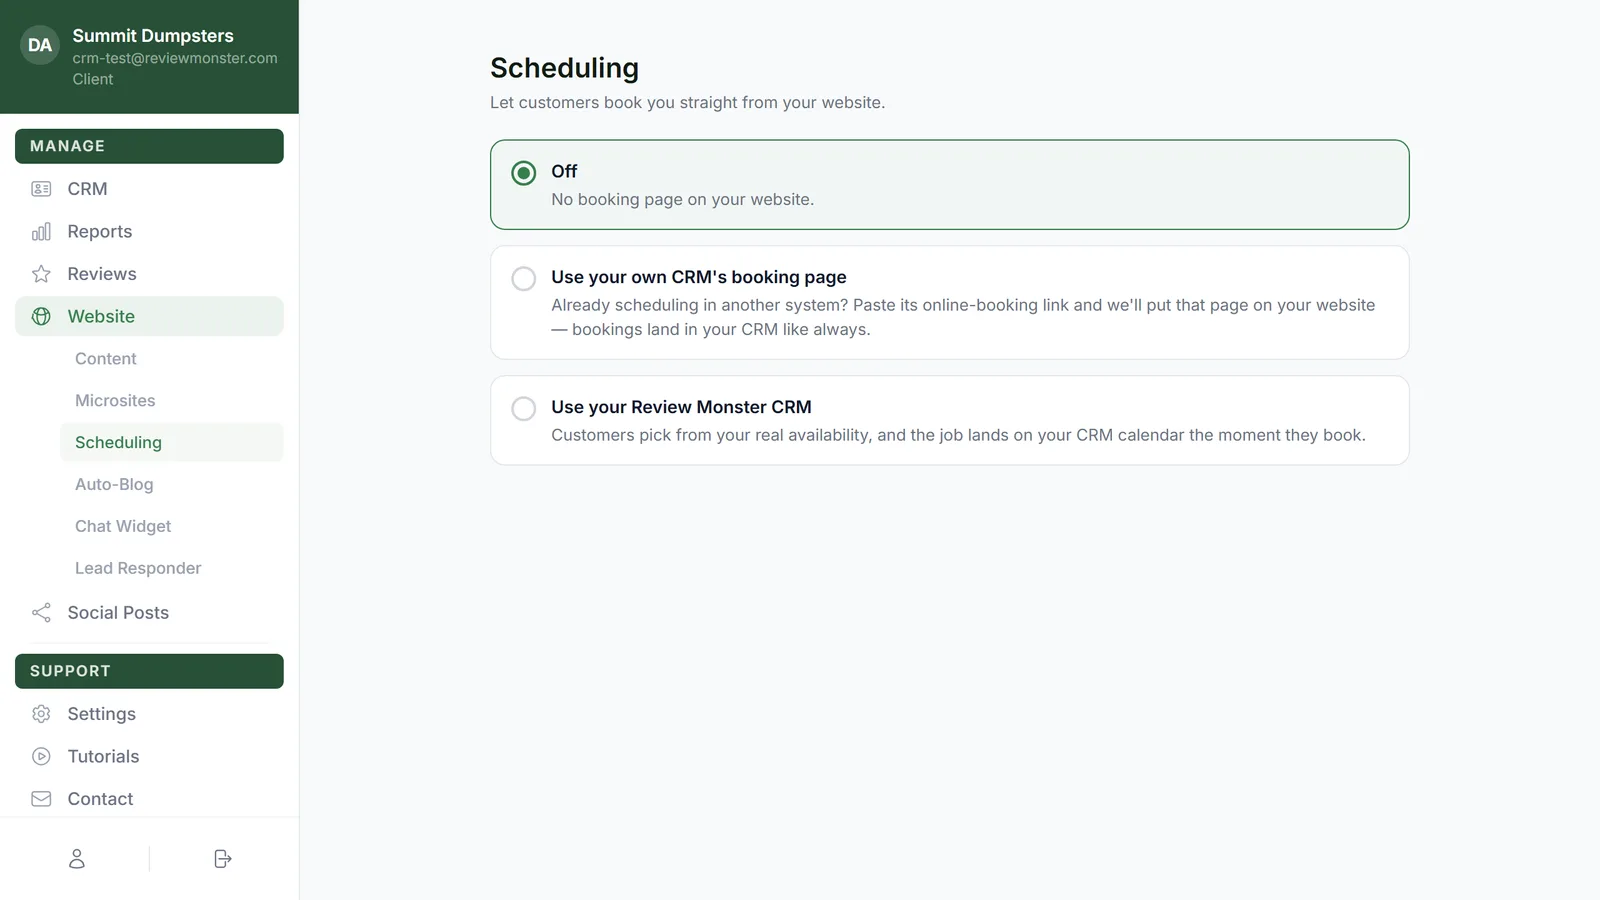
To book customers straight onto your CRM calendar:
- Click Use your Review Monster CRM.
- Look over the settings that open below it: when customers can book, appointment length, whether new bookings are scheduled instantly or wait for your OK, what the form asks for, and who hears about new bookings.
- Click Save changes.
Once it's saved, the top of the page says "Your booking page is live at" followed by your domain and /book. That's the page customers use.
Microsites
If you have microsites, they follow your main website's choice. You don't set booking up on each one.
Share your booking link
There's no separate widget for Facebook, Instagram or Google. To let people book from your social pages, copy your /book link (your domain followed by /book) and paste it into your profile, a post or a message.
Online booking settings in the CRM
The CRM has its own Online booking page. It's always there in Settings, nothing to switch on first.
To open Online booking settings on the web:
- In the CRM menu, click Settings.
- Under Phone & booking, click Online booking.
To turn it on:
- Tick Let customers schedule online.
- Check the appointment length, booking window and the other settings on the page.
- Click Save settings.
On the phone app it's the same page: open Settings, then Online booking under Phone & booking. The switch is a toggle instead of a checkbox, and the button is still Save settings.
Related articles
- Setting appointment length and availability for online booking
- Customizing your booking page
- How to create jobs and leads from booking requests
- How to turn off online booking
- Telling your website where to send leads and bookings