In this article, you'll learn how to keep track of your invoices from the Invoices page. It shows what you're owed, what's late and what hasn't gone out yet, all in one place, so you get paid on time.
To open your invoices:
- In the menu, click Invoices.
Tracking your invoices
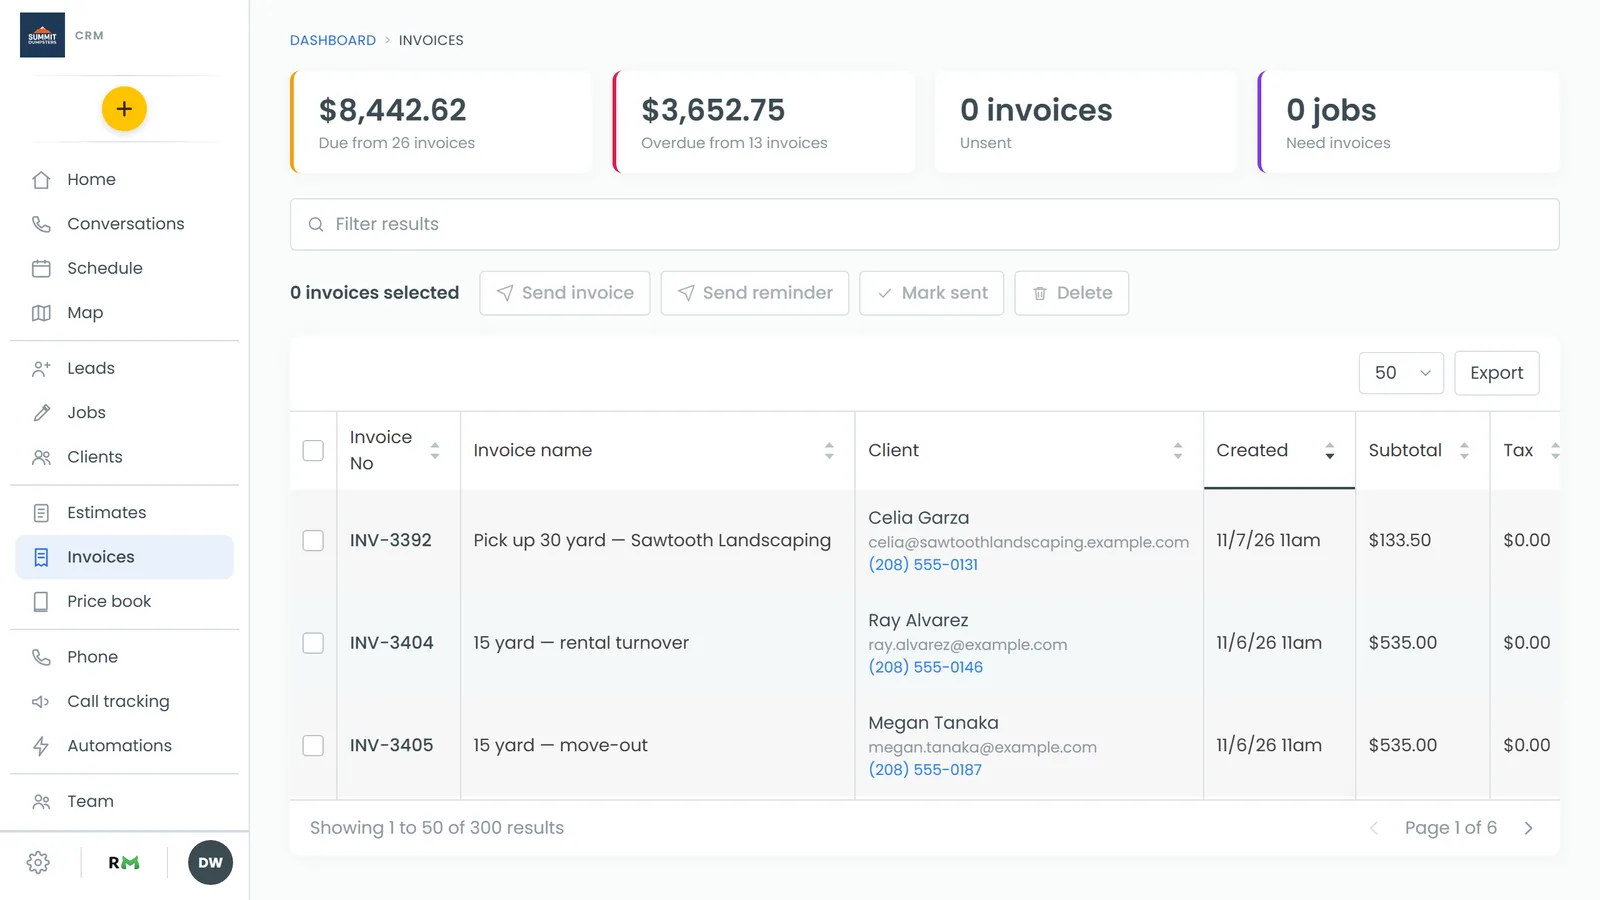
Four tiles run across the top of the page. They're counted from your real invoices every time the page loads:
- Due from N invoices is the total still owed across every invoice with a balance.
- Overdue from N invoices is the total owed on invoices whose due date has passed. Refunded invoices don't count.
- Unsent is how many invoices have been made but never sent and aren't paid yet.
- Need invoices is how many jobs are marked Done, still have money owing, and don't have an invoice.
Reading the invoice list
Every invoice is listed under the tiles. Each row shows:
- Invoice No, with Not sent underneath if it hasn't gone out yet. Click the number to open the invoice.
- Invoice name
- Client, with their email and phone underneath. Click the name to open the client. Click the phone number and the CRM asks if you want to call them. Click the email and it offers to open their page so you can write to them from there.
- Created, Subtotal, Tax, Discount, Amount and Due (what's still owed)
- Status, such as Draft, Due, Partial, Past Due, Paid or Refunded
- Job and Job name. Click the job number to open the job.
Finding an invoice
Type in the Filter results box above the list. It matches invoice numbers and names, client names, emails and phone numbers, statuses, job numbers and job names.
Use the drop-down above the table to show 10, 25, 50 or 100 invoices per page, and the arrows at the bottom to move between pages.
Sorting your invoices
Click any column heading to sort by it. Click it again to flip the order. The sorted column gets a line under its heading. The list opens sorted by Created, newest first.
Exporting your invoices
Click Export to download the list as a CSV file. It includes everything in your current filter, in your current sort order, plus each client's email and phone.
Working with several invoices at once
Tick the box at the start of a row to select it, or tick the box in the header to select every invoice on the page. The count above the list changes to N invoices selected and the buttons next to it wake up.
When an action finishes, a yellow line at the top of the list tells you how many went through and names any that didn't.
Sending invoices
- Tick the invoices you want to send. Look for the Not sent label under the invoice number to spot the ones that haven't gone out.
- Click Send invoice.
Each customer gets a text if they have a phone number, an email if they have an email address, or both if they have both. The message links straight to their invoice. A draft becomes Due, and the due date counts from the day of the first send. An invoice whose customer has neither a phone nor an email is named in the yellow line as not sent.
Sending reminders for overdue invoices
- Tick the invoices you want to follow up on. Sort by Status to group the Past Due ones together.
- Click Send reminder.
Reminders use the wording under Invoice reminders in Settings > Templates. Change it there if you want them to say something different.
Marking invoices as sent
Sometimes you hand an invoice over in person or mail it. Mark sent records it as sent without texting or emailing the customer.
- Tick the invoices.
- Click Mark sent.
The Not sent label goes away, a draft becomes Due, and the due date counts from that day, just as if you'd sent it from the CRM.
Deleting invoices
- Tick the invoices.
- Click Delete, then click Yes, delete.
On a phone
On the phone app, and on the web when you open it on a phone, the Invoices screen works a little differently:
- It shows invoices and estimates together. Tap All, Invoices or Estimates to switch between them.
- The tiles are Due from N invoices, Overdue · N, Unsent invoices, and how many estimates are outstanding with their total.
- An invoice that's still owed past its due date shows how many days overdue it is in red under the client's name.
- Use the search box to find a document by number, client, job or status.
- Tap a row to open the invoice or estimate, tap the client's name to open the client, or tap the job number to open the job.
There's no way to tick several invoices at once on a phone, so bulk send, reminder, mark sent and delete aren't there, and neither is Export. Open an invoice to use its Send invoice button or its menu's Delete invoice, one at a time. Use the web on a computer for the rest.