In this article, you'll learn how to create job tags, put them on jobs, and change or delete them later. Tags are short coloured labels that make a job easy to spot at a glance: waiting on parts, needs a second truck, call before arriving, or whatever matters to your business.
To open your tags:
- At the bottom of the menu, click the Settings gear. The settings list opens above it.
- Under Jobs & leads, click Tags.
If you don't see Tags there, your role can't change job settings. Ask the account owner.
On the phone app, open the side menu and tap the gear at the bottom (it only shows for admins), then tap Tags under Jobs & leads. The app's settings have a row of tabs along the top, and Tags is one of them. The page works the same as the web, with the differences noted below.
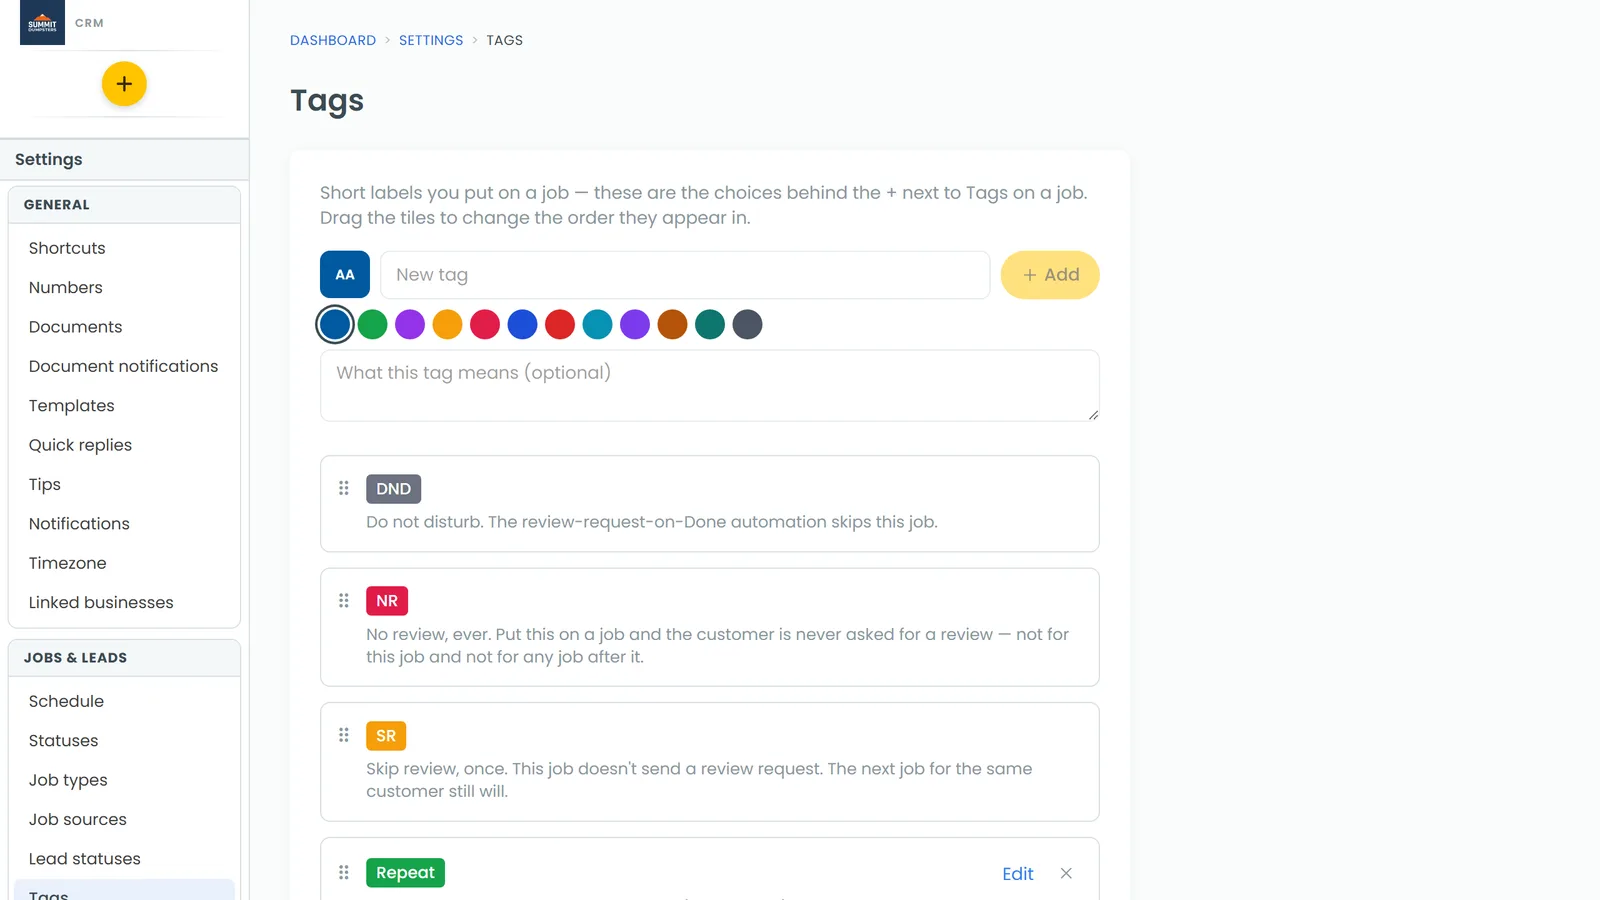
Creating a tag
- Type the tag's name in the New tag box.
- Pick a colour from the row of swatches underneath. The first swatch is picked for you. The small square beside the box previews the colour with the first three letters of the name.
- If you like, write a short note in What this tag means (optional). It shows under the tag on this page, so your team knows when to use it.
- Click Add, or press Enter.
The new tag goes to the bottom of your list and is ready to use on any job. If you type a name that already exists, the CRM keeps the existing tag instead of making a second one.
Adding a tag to a job
- Open the job.
- Next to Tags, click the +.
- Tick the tags you want. Each one shows in its colour. Tags already on the job show an x instead of a box.
- Click Save.
The tags show as coloured chips on the job. Nothing is saved until you click Save.
If you haven't made any tags yet, the menu says No tags yet with a link to Edit tags. Once you have some, the Edit tags and order link at the bottom of the menu takes you to Settings › Tags.
On the app, the + opens a Tags sheet with the same list, a Save button and an Edit tags and order link. That link opens Settings, so tap the Tags tab once you're there.
Removing a tag from a job
- Open the job.
- Click the x on the tag's chip (on the app, tap the chip).
That only takes the tag off this job. The tag stays in your list for other jobs.
Editing a tag
- Go to Settings › Tags.
- Click Edit next to the tag.
- Change the name, pick a new colour or update the note.
- Click Save, or Cancel to leave it as it was. On the web, Enter in the name box saves and Escape cancels.
The change shows on every job that already has the tag. If an automation rule checks for the tag by name, the new name carries over to the rule too.
Deleting a tag
- Go to Settings › Tags.
- Click the x at the right end of the tag's tile.
On the web the tag is deleted straight away, with no confirmation, so be sure first. On the app you're asked Delete "name"? with Cancel and Delete.
If any job still has the tag, it can't be deleted. You'll see a message saying how many jobs still use it. Take the tag off those jobs first, or rename it to something you'll use.
Filtering the schedule by tag
- In the menu, click Schedule.
- In the toolbar, click the filter button.
- In the Filter the calendar panel, under Tags, click the tags you want to see.
The calendar now shows only jobs with those tags. Clear all takes the filters off.
Using tags in automations
An automation rule can check a job's tags before it runs. When you edit a rule, click Add condition, pick job tag, and choose the tag from your list. For the full steps, see Adding conditions to your automation rules.
Tags on clients
Clients have their own tags. They're plain labels with no colour, and you type them on the client page. This is on the web.
- Open the client.
- On the card with their name and contact details, click Add tag.
- Type the tag and press Enter.
To take one off, click the × on it. These typed tags don't show up in the job tag menu. To tag several clients at once, use Apply tags on the Clients list. See Tagging multiple clients at once.
Related articles
- Choosing your shortcuts and features
- Adding conditions to your automation rules
- Tagging multiple clients at once
- How to create sub-statuses
- Managing jobs on the phone app