In this article, you'll learn how to use the Automation Center to send texts and emails on their own when something happens to a job, an invoice or an estimate. It's how you remind customers before a visit, chase an unpaid invoice or ask for a review without doing it by hand each time.
Automations is part of every account. There's nothing to switch on in Features. Anyone on the account can open the page, but you need to be an admin to add, change or delete rules.
To open the Automation Center:
- In the menu, click Automations.
- Pick a tab at the top: Discover for the ready-made rules, or My Automations for the ones on your account.
On the phone app, tap the bolt at the top of the Home screen, or open the menu and tap Automations.
What you can automate
Every rule reads as one sentence: when something happens, send someone a message at a set time. A few things you can set up:
- Text a customer a few hours before the job, so they know you're coming.
- Text a tech ahead of their next job.
- Email a customer a few days after an estimate goes out and nothing's happened.
- Text and email a customer the day after an invoice is sent, as long as there's still a balance.
- Ask for a review the day after a job is done.
- Email a customer six months after a job to bring them back.
Rules every account starts with
Open My Automations on a new account and you'll find a few rules already there:
- Review request on job Done is on. It asks the customer for a review when a job is marked Done, unless the job is tagged DND, NR or SR.
- On My Way text (job set to OMW) is on. It texts the customer when a job is moved to the OMW status. Its wording lives under Settings > Templates, in the On my way text message card.
- Invoice reminder | 1 day, 3 days and 5 days are off until you flip them on. Each texts and emails the customer that many days after an invoice's due date, only if there's still an amount due. A fourth, Invoice reminder | 6 days — tell the office, emails your team instead.
Starting from a ready-made rule
- Click the Discover tab.
- Find a rule under Reminders, Marketing, Follow-ups or Actions. The search box at the top filters them.
- Hover over the card and click Use. On the app, Use is a button on the card.
- The rule opens in the editor with everything filled in. Click any underlined word to change it.
- Click Preview/edit message to see and edit what the customer gets, then click Save and close.
- Click Add automation.
Building your own rule
- On either tab, click Add automation.
- Click the name at the top and type what you want to call the rule.
- Click this happens and pick the trigger. A job can be created, scheduled, done, or have a status you choose. An invoice can be created, sent, or due. An estimate can be created, sent, or approved.
- Click do this and pick the action: send the client a text message, an email, or both; send your team a text message or an email; or send the client a review request.
- Click within a defined time to set the timing: immediately, or a number of minutes, hours or days ahead of or after. Then click the date it counts from: the job's schedule date or end date, the invoice's date of sending or due date, or the estimate's date of sending.
- If you picked your team, click the names under to: who should get it. Nobody picked means the account owner.
- Click Add condition to narrow it down. Pick job type, job source, job tag, job status or amount due, an operator such as is or is not, and a value, then click Apply. Click the and between two conditions to turn it into or.
- Under Automation will be sent, set the earliest and latest time of day the message can go out. A new rule starts with 9:00 am to 9:00 pm. A send that lands outside the window waits for it to open.
- Click Preview/edit message, write the message, and use the short code buttons under it to drop in things like the customer's first name or the job date. Click Save and close.
- Click Add automation.
The review request rule
The Review request on job Done rule and the Enable review follow-ups switch in your Review Monster dashboard settings are the same switch. Turning one off turns the other off. A job tag condition on this rule keeps certain jobs from being asked. The Review when Done column under Settings > Job types also has a say: a job type with it off never asks, whatever the rule says.
Managing your rules
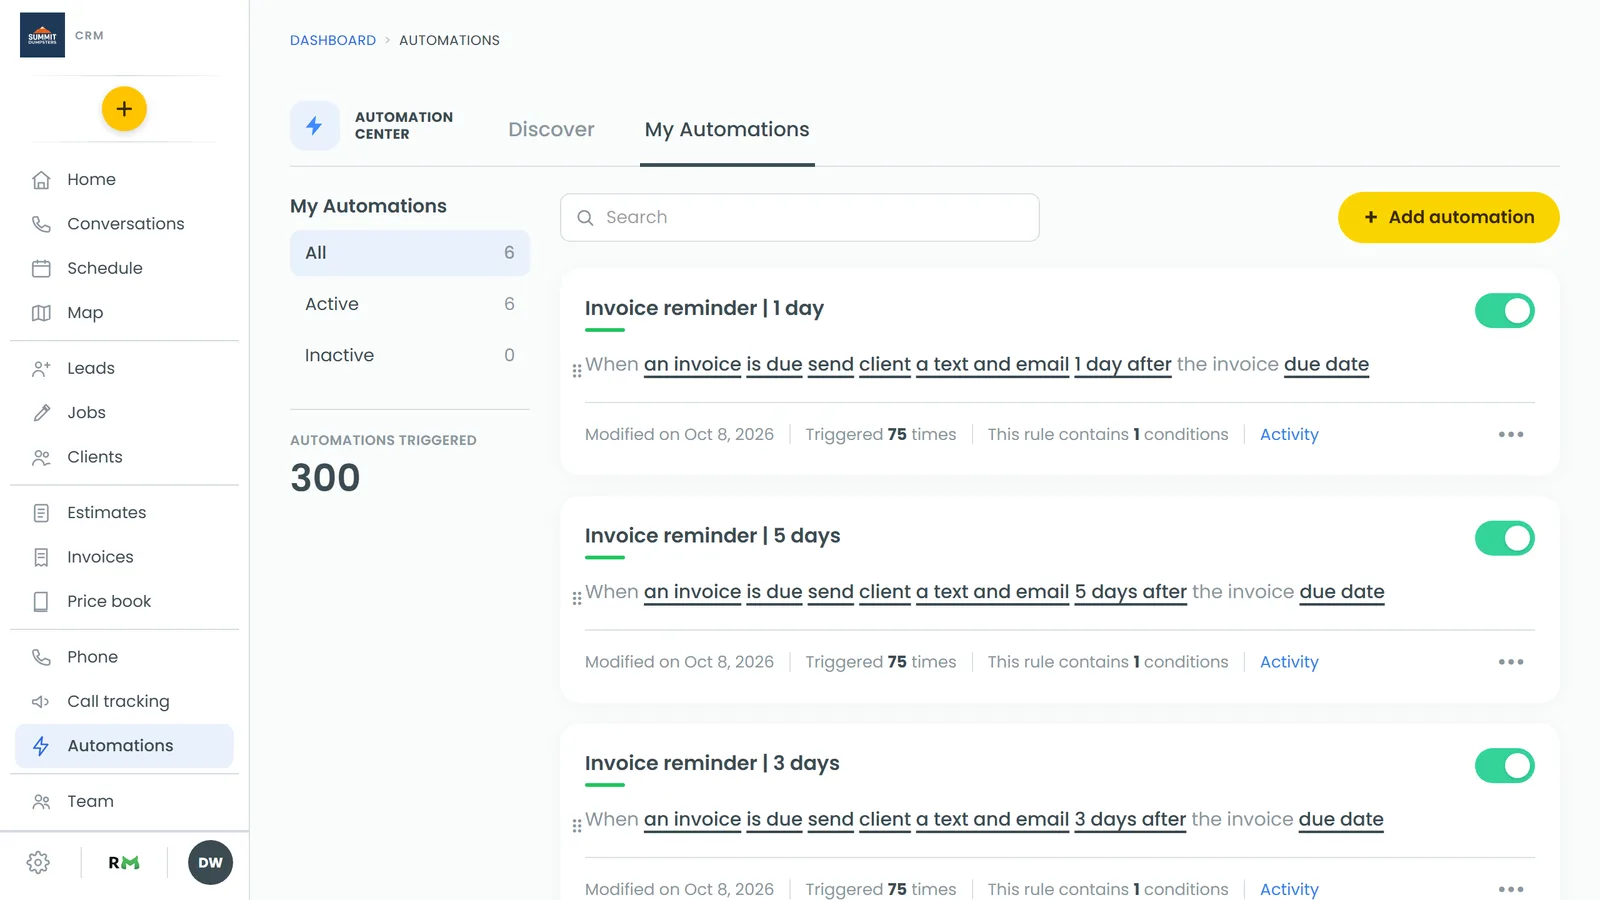
On My Automations, each rule is a card with its sentence, a toggle, how many times it's triggered and how many conditions it has.
- Flip the toggle to turn a rule on or off. Off means nothing is evaluated or sent.
- Click Activity to see what the rule did for each job, invoice or estimate: Sent, Scheduled, Skipped with the reason, or Failed.
- Click the three dots for Edit, Duplicate, Rename or Delete. A duplicate starts switched off.
- On the web, drag the handle at the left edge of a card to reorder your rules. On the app, use Move up and Move down in the same menu.
- The left rail filters by All, Active and Inactive, and shows the total Automations triggered.
Related articles
- Creating tags for jobs
- Creating custom automation rules
- Adding conditions to your automation rules
- Asking customers for reviews
- Turning off and deleting automation rules