In this article, you'll learn your way around the Receipts page: what the list shows, how to find a receipt, and how to fix anything the scan read wrong. It's where every receipt your team snaps ends up, so it helps to know it well before tax time.
Receipts is an extra you switch on in Features, under Money & books. There's nothing to set up after that. Once it's on, you can start snapping receipts right away.
To turn on Receipts:
- In the menu, click Features.
- Find Receipts in the Money & books group.
- Click the switch on its card so it turns green. The card shows Active, and Receipts appears in the menu.
To open your receipts:
- In the menu, click Receipts.
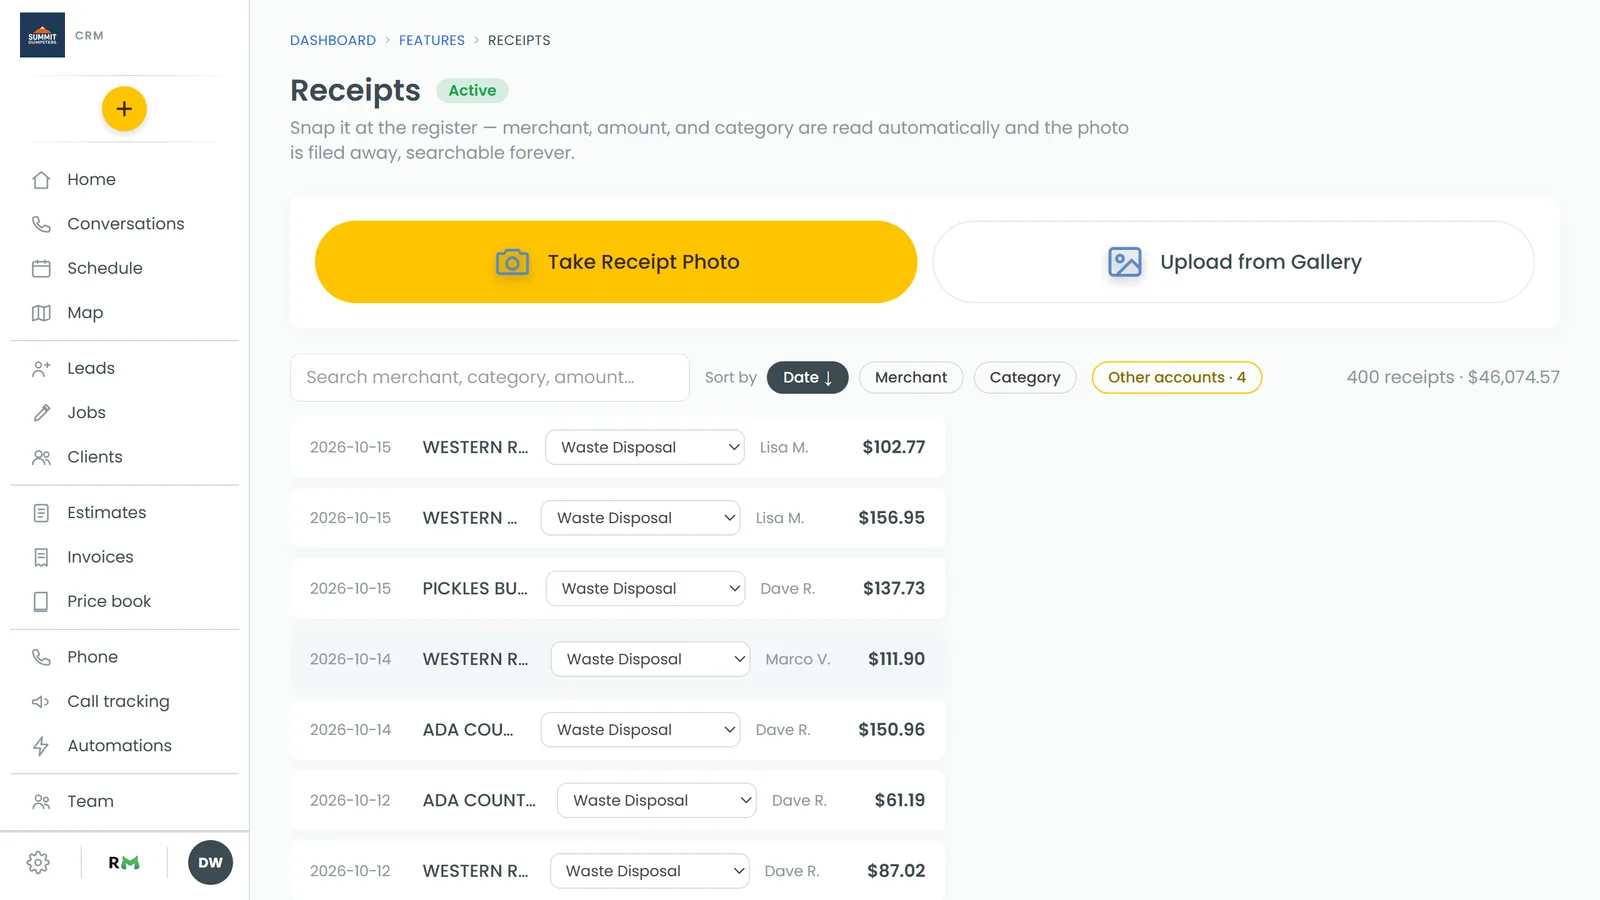
What the list shows
The top of the page is where you take or upload a receipt photo. Below that is the list, one receipt per row. Each row shows:
- The purchase date
- The merchant, followed by any expense details that were added
- The category
- The amount
Above the list, at the right, you'll see how many receipts are showing and their total, like "42 receipts · $3,180.55". Both follow your search, so they always add up what's on screen.
Receipts still being read
Right after a receipt is saved, the CRM reads the merchant, date, amount and category from the photo. While that's happening, the row says processing…. If the read fails, it says needs review with a retry link next to it. Click retry to have it read again. The photo is already saved, so nothing is lost while you wait.
Searching and sorting
Type in the Search merchant, category, amount… box to narrow the list. It matches the merchant, category, amount, date and expense details.
Next to the search box, Sort by has three buttons:
- Date shows the newest receipts first.
- Merchant groups receipts under each merchant's name, A to Z.
- Category groups receipts under each category, A to Z.
Click the button that's already selected to flip the direction. An arrow on the button shows which way it's sorted. Inside each group, the newest receipt always comes first.
Changing a receipt's category
On the web, each row has a category picker right in it. Choose a different category and it saves straight away. The picker isn't shown while you're sorted by Category, so switch to Date or Merchant first if you need it.
Opening a receipt
Click any row to open the viewer above the list. It shows the photo with the receipt's details along the top.
To fix what the scan read:
- Click the receipt in the list.
- Click into Merchant, the date, or Amount and type the right value.
- Click away from the field or press Enter. It saves on its own and shows saved ✓.
Paid from is in the viewer too. It's set to Business account unless the receipt was paid some other way.
To get around in the viewer:
- Enlarge opens the photo full screen. You can also click the photo itself.
- ‹ and › step to the previous or next receipt. The left and right arrow keys do the same.
- ✕ closes the viewer. So does Esc.
On the phone app
The phone app has the same list, search and Sort by buttons. Tapping a receipt opens it in a sheet that slides up, with the photo on top and Merchant, Purchase date and Amount below it. Changes there don't save on their own. Tap Save when you're done.
The category shows in the sheet, but you can't change it on the phone. Use the web for that.
Related articles
- Snapping and saving a receipt
- Matching receipts to bank charges
- Recording expenses paid from personal accounts
- Bookkeeping overview
- Managing expense categories