In this article, you'll learn how to use the Scheduler to turn a customer's calls and texts into a job on your schedule. It reads the conversation for you, call transcripts included, and fills in the customer's details, the address, the date and time, and what the work is. You check it, fix anything it got wrong, and book it. It reads a call after you hang up, not while you're still talking.
To switch on the Scheduler:
- In the menu, click Features.
- In the Customer messages card, find Scheduler and click its switch. An Active tag appears next to the name.
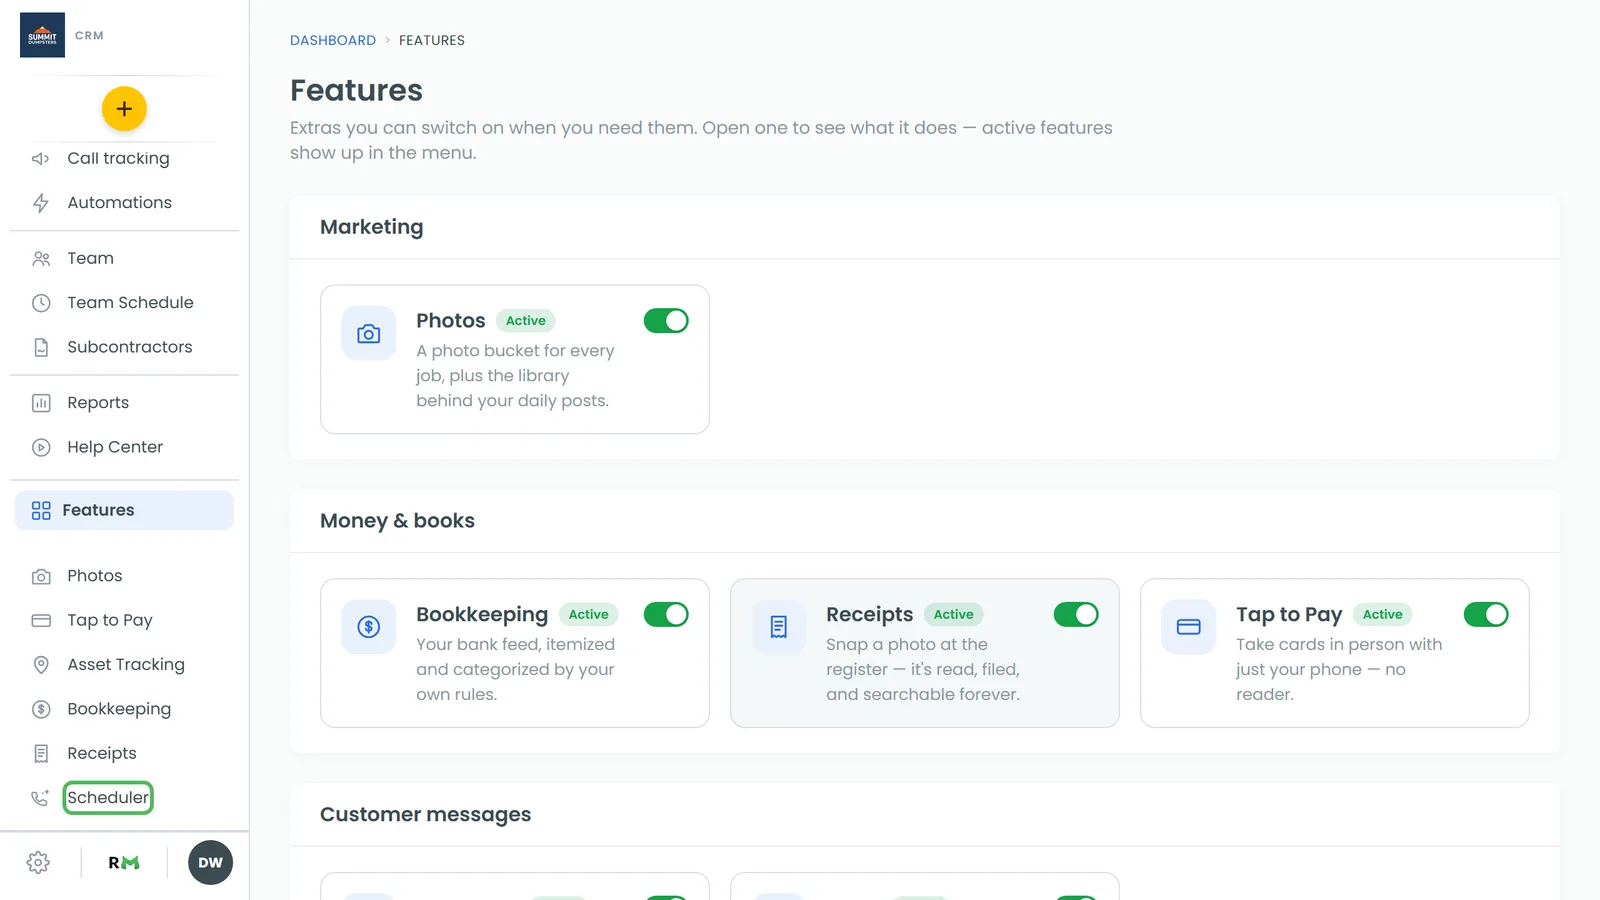
After that, Scheduler shows up in the menu under Features. You can also click the Scheduler tile in the store to read about it, then click Open Scheduler.
To open the Scheduler:
- In the menu, under Features, click Scheduler.
Finding the customer
There are two ways to pull up the customer you want.
Search by phone number
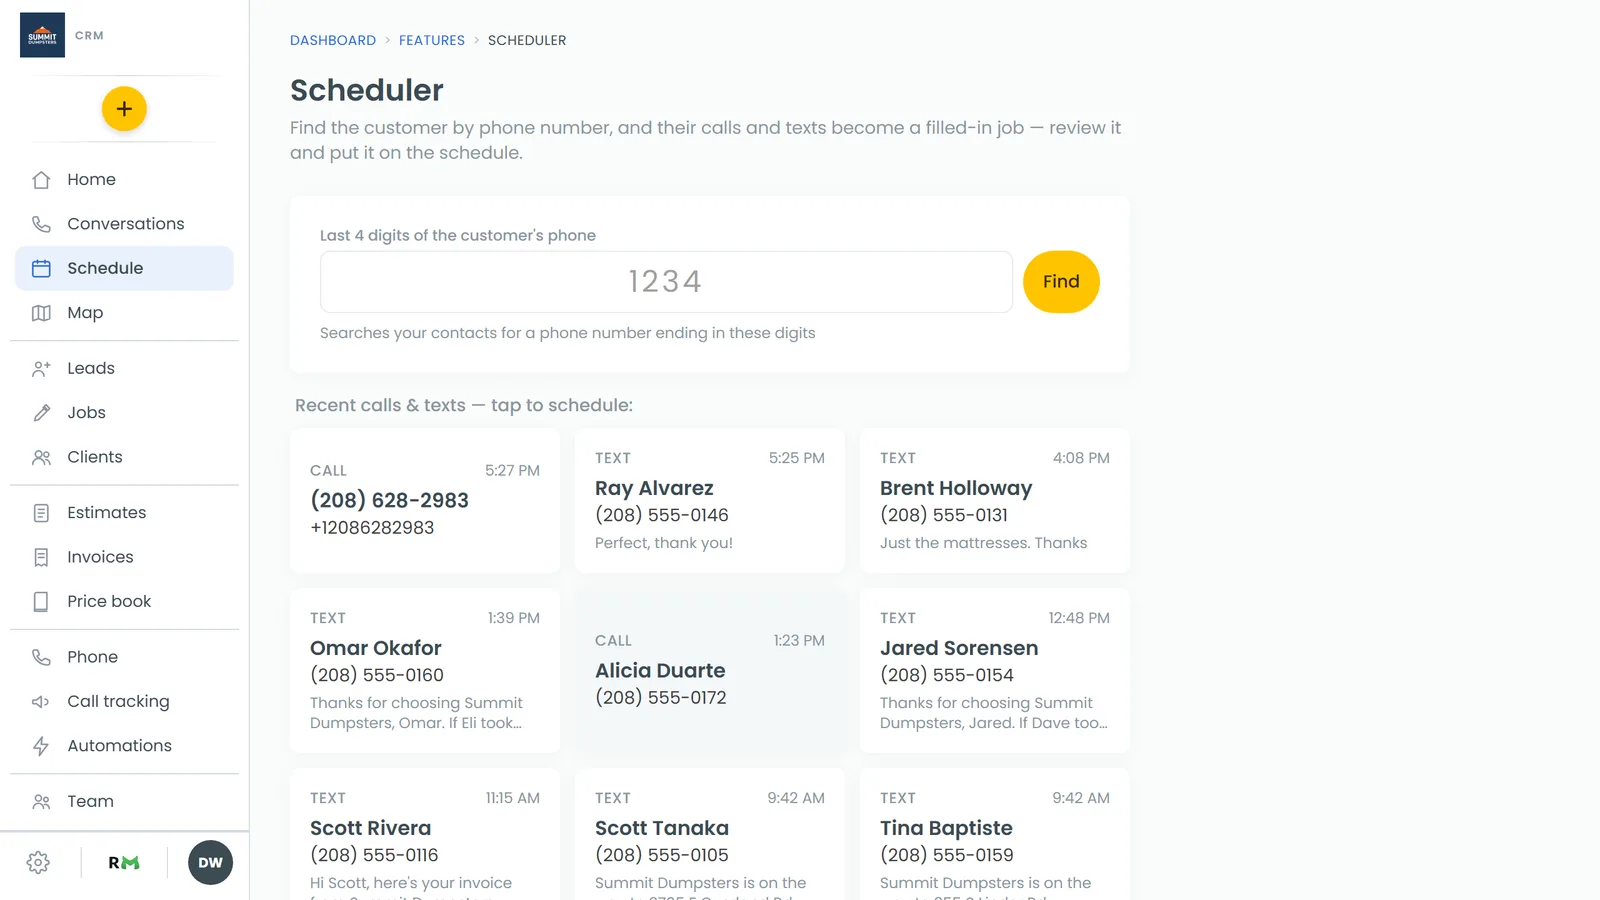
- In Last 4 digits of the customer's phone, type the last four digits. You can type more of the number if you like.
- Click Find.
- If more than one customer matches, pick the right one from the list under matches — pick the customer.
If nobody matches, you'll see "No contact found with a phone ending in those digits".
Pick from recent calls and texts
Under Recent calls & texts — tap to schedule:, each tile shows whether it was a call or a text, when it happened, the customer's name and number, and a bit of the message or call summary. It covers the last two weeks, one tile per customer.
- Click the tile for the customer you want.
Either way, the tile or row shows Reading conversation… while it goes through their texts and call transcripts. Then the job form opens, already filled in.
Starting from a call you just took
While you're on a call in the CRM, the in-call page has a Schedule job switch. Turn it on and the moment you hang up, the Scheduler opens for that caller and reads the call. The same switch is on the phone app's in-call screen. See Scheduling a job from a live call.
Checking the details
Look over the form and change whatever needs it.
Customer
First name, Last name, Phone, Email, Street address, City, State and Zip.
The address gets checked against map data as soon as the form opens. You'll see Checking the address…, then one of these:
- A green note, "Address confirmed — street, city, state and zip all match". If only the zip was wrong, it's fixed for you and the note reads "Street and city confirmed, zip corrected".
- A red note, "Not sure this address is right — look it up before scheduling", with the reasons under it. From there you can click Open in Google Maps, or a Use link to switch to the city and state the map found.
An address a long way from your business gets flagged too, since a mis-heard city looks exactly like that. If you change the address yourself, click Check this address to check it again.
Photos from the conversation
If the customer texted in photos that go with this job, they show under Photos from the conversation. Photos from an older job of theirs are left out. These get attached to the job, so take out any that don't belong:
- Click the × on a photo to remove it.
- Or tick the box on several photos and click Delete selected.
Schedule
- Job date and Start time. These are in your business timezone. Pick a date with no time and the start time is set to when you open that day, or 8:00 AM if you haven't set your hours.
- How long, from 1 hour to 4 hours in half-hour steps. It starts at 2 hours.
- Job type, from your own list. It picks the type that fits the work talked about, if one does.
- Job description, a write-up of the work for whoever's going out.
The conversation it read
To see exactly what the Scheduler read, click Show on Conversation (n items). Texts are marked Customer or You, and calls show as Call transcript.
If it found nothing to read, you'll see "No texts or call transcripts found for this contact — fill in the details by hand."
Putting it on the schedule
- Click Put it on the schedule. It stays greyed out until there's a job date, a start time and a phone number. It also needs a name, and tells you if one's missing.
- You'll see Job scheduled, with the job number, the customer and the time.
- Click Open the job to go to it, or Schedule another to start fresh.
To throw the form away and go back to the search, click Start over.
When you open it right after a call
If the customer's latest call hasn't been transcribed yet, the Scheduler waits for it instead of filling the form without it. You'll see "Getting (name)'s call ready", a progress bar with four steps (Call, Recording, Transcript and Job details) and a line saying where it's up to, such as "Transcribing the call".
- Click Fill in without this call to go ahead with what's already there.
- Click Cancel to stop waiting.
While the call's still going, it waits for you to hang up. After that it only waits a couple of minutes for the recording and a few minutes for the transcript. If one never arrives, it goes ahead without it.
On the phone app
The phone app's Scheduler works the same way, and the web version looks like it when you open it on a phone. In the app, open the menu and tap Scheduler under Features. A few things differ:
- Type exactly four digits and tap Search.
- Recent calls and texts are listed under Recent conversations.
- The form is split into Customer, Address and Job cards, and the description box is labelled What the job is.
- The address check reads "Address checks out" or "Double-check this address", with no Google Maps or Use link.
- Remove a photo with its ×.
- Tap Show the conversation to see what it read.
- The skip button while it waits reads Fill in without it.
- When it's booked you'll see "(job number) is on the schedule", with Open the job and Schedule another.