In this article, you'll learn what's under Settings in your dashboard and what each item is for. Come here when you want to change who gets alerts, or go back to something you set up during onboarding.
To open Settings:
- In the sidebar, find the Support group.
- Click Settings.
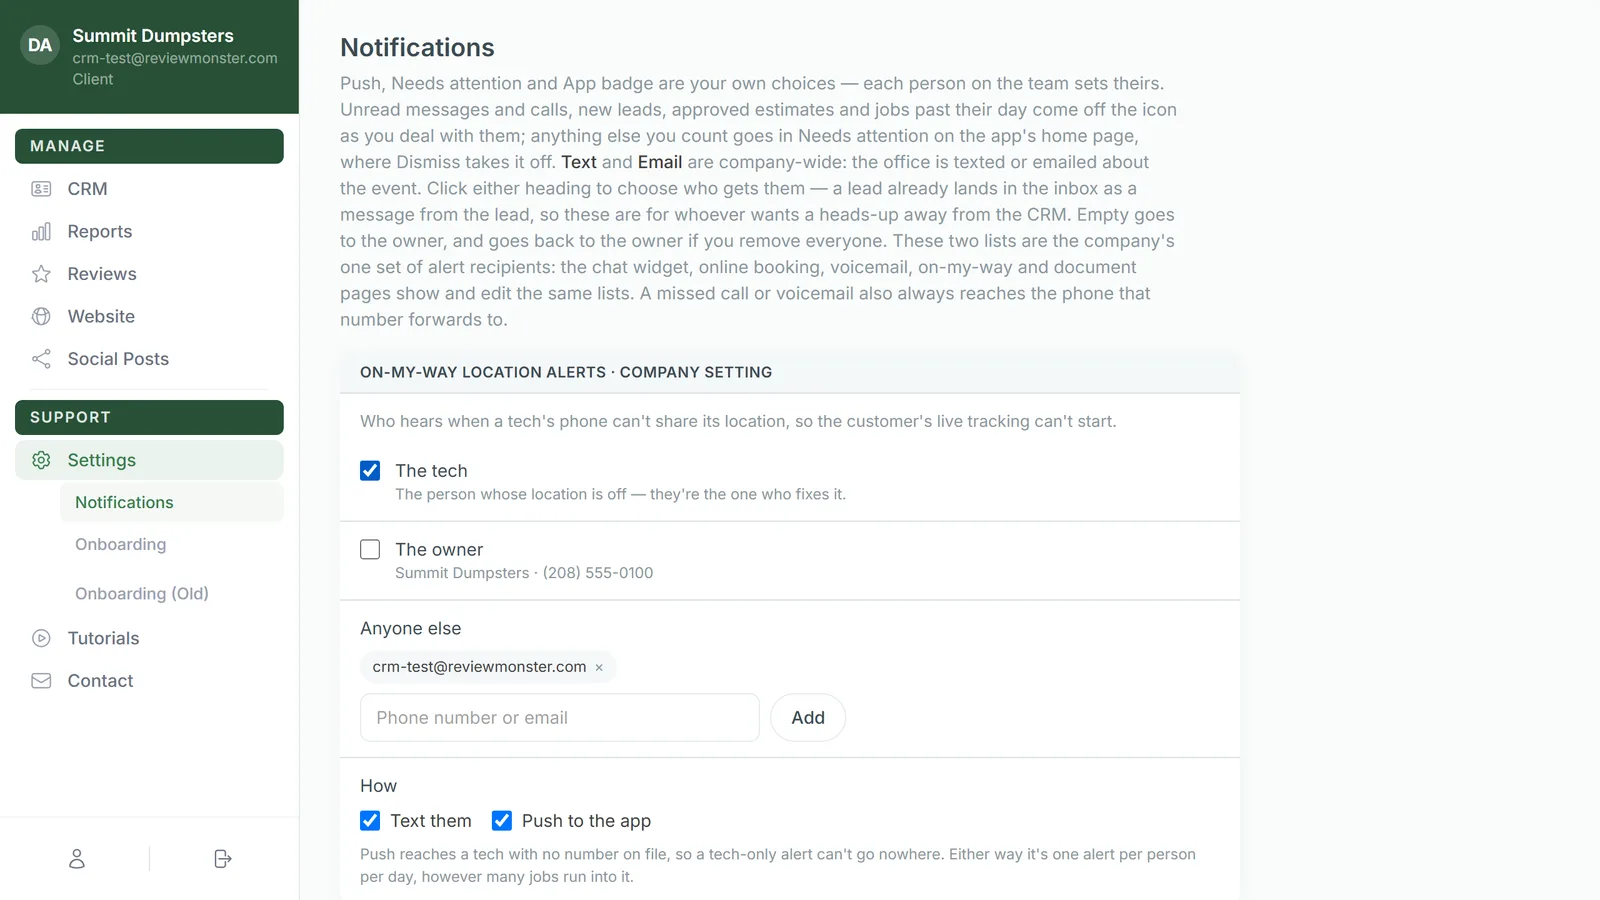
Settings opens on Notifications, and its submenu shows up underneath. The submenu can have up to three items: Notifications, Onboarding and Onboarding (Old).
Notifications
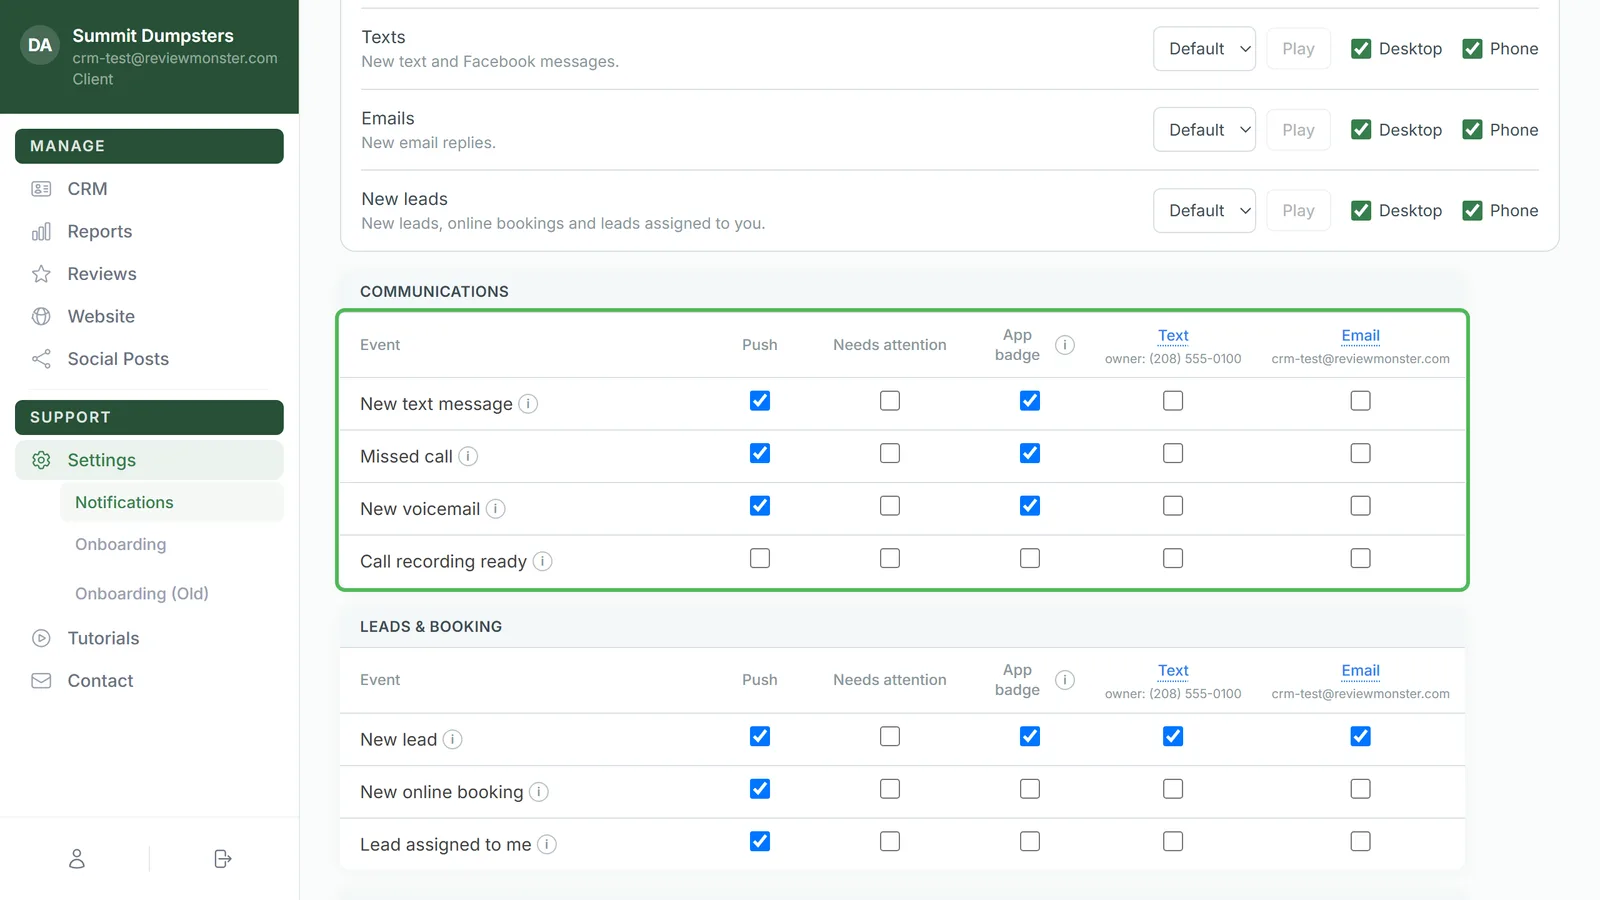
This is the same notifications grid you'll find in the CRM's settings. A switch you change here also changes in the CRM and the phone app. Events are grouped, and each row is one event. The columns are:
- Push, Needs attention and App badge are your own choices. Everyone on your team sets their own.
- Text and Email apply to the whole company. They decide whether the office gets a text or an email about that event.
A dash in a column means that option isn't available for that event.
Choosing who gets texts and emails
- Click the Text or Email heading at the top of a group. Under each heading you'll see who's on the list right now.
- Type a phone number or email address and click Add. To take someone off, click Remove next to them.
- Click Save.
If the list is empty, the alerts go to the owner.
Onboarding
Onboarding opens the setup steps from when you joined, one step per page. That way you can go back to a login or setting without starting over. While you're on one of these pages, the steps are listed under Onboarding in the sidebar.
Which steps you see depends on your plan:
- Everyone: Your business, CRM and Phone.
- Plans with reviews: Facebook & Instagram, Review Replies and Contacts.
- Plans with a website: Leads & bookings, Chat and Services & cities.
- SEO plans: Searches and Photos & videos.
- Everyone, at the end: Agreements and Onboarding call.
To reopen a step:
- Under Settings, click Onboarding. It opens on Your business.
- In the list under Onboarding, click the step you want.
Onboarding (Old)
This is the original onboarding checklist. It's switched off for most accounts, so you may not see it at all. If you do, it still opens the old checklist.
Turning onboarding off
Your account settings have an onboarding switch too.
To change it:
- At the bottom of the sidebar, click the Account icon next to Sign out.
- On the left, click Onboarding.
- Click the switch. While it's on, it reads Show onboarding in your sidebar. When it's off, it reads Hide onboarding in your sidebar. Your change saves right away, and Saved shows for a moment.
With the switch off, Onboarding (Old) won't open. It sends you to your dashboard instead. You also won't be sent back into onboarding when you sign in.
Related articles
- Reopening your onboarding steps from Settings
- Onboarding overview
- Rescheduling your onboarding call
- How to customize your account settings
- Getting voicemail alerts by text and email