In this article, you'll learn how to run your day from the Schedule: booking jobs right onto the calendar, putting a crew on them, moving them when plans change and changing their status. It's the screen most dispatchers keep open all day.
To open the schedule:
- In the menu, click Schedule.
The calendar opens on whichever view you used last.
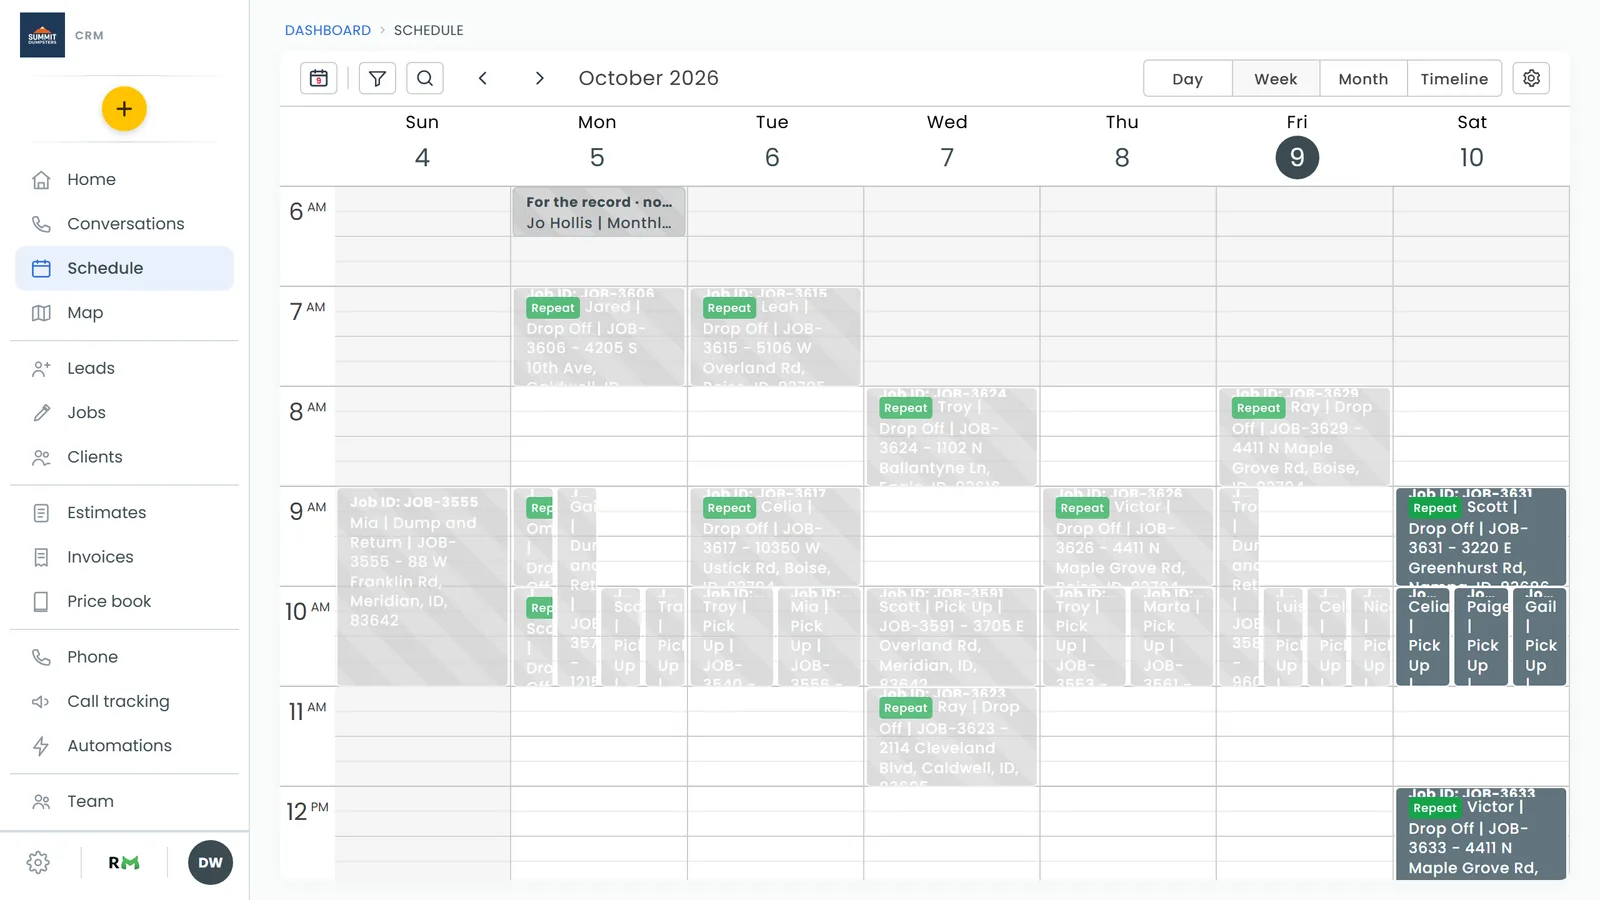
Pick a view
On the web, the buttons at the top right switch between four views:
- Day shows one day on an hourly grid.
- Week shows seven days side by side.
- Month shows the whole month, with each job as one line.
- Timeline shows one day with a row for each team member and an Unassigned row at the top. It's the quickest way to see who's free.
Use the arrows next to the search button to step back or forward, and click the calendar icon (Today) to jump back to today. The gear (Calendar settings) holds the calendar's display settings.
Book a job from the calendar
In Day or Week view you can start a job right where it belongs.
- Find an empty stretch of the day you want.
- Click once to book an hour starting there, or click and drag to cover the time you need. The times show on the block while you drag, and both ends snap to the nearest quarter hour.
- Let go. The new job form opens with the date, start time and end time already filled in.
- Fill in Client Details, Service Location and Job Details.
- In the Scheduled card, click Assign team members and pick who's going.
- Click Create.
Move or resize a job
You can drag jobs on every web view. The change saves the moment you let go.
- Day and Week: drag a job to another time or another day. Drag its bottom edge to change when it ends.
- Timeline: drag a job left or right to change its time. Drag its right edge to change when it ends.
- Month: drag a job to another day. It keeps the same time of day.
In Day, Week and Timeline, hold a job you're dragging against the left or right edge of the calendar to page to the previous or next day (or week, in Week view), then drop it there.
Open a job and change its status
Click any job on the calendar to see its summary: the job number, client, when it's scheduled, its status, address, tags and description.
From the summary you can:
- Change the status with the dropdown under Status. It's the same list as on the full job page, sub-statuses included, and it saves as soon as you pick one. The job's block on the calendar updates to match.
- Click the pencil (Edit) to open the full job page, or the Expand icon to open it in a new tab.
- Click the client's name to open their record, or use the text and call buttons beside their number.
- Click the address to open it in Google Maps.
On the full job page:
- Click the dropdown next to Status: and pick a status, or a sub-status listed under it. It saves right away.
- To reschedule, change the dates and times in the Schedule section, then click Save at the bottom.
- To change the crew, click Assign team members in the Team section. People you add, or take off with the ✕ beside their name, are saved as you go.
When your crew heads out, you can let the customer know with an On My Way text. See Send an On My Way text.
Filter and search the calendar
- Click the filter icon (Filter) next to Today.
- Under Filter the calendar, tick what you want to see in Team members, Job types, Statuses, Tags and Sources. Leave a group empty to show everything in it.
- Click Clear all to start over, or the ✕ to close the panel.
The filter icon shows a count while a filter is on. Click the magnifying glass to search the calendar by name, phone number, address or job number.
See jobs on a map
In the menu, click Map to see your jobs as pins on a map. On a phone, use the Map view at the top of the schedule.
Related articles
- Managing jobs on the phone app
- Assigning team members to jobs
- How to update a job's status
- Send an On My Way text
- How to create jobs